
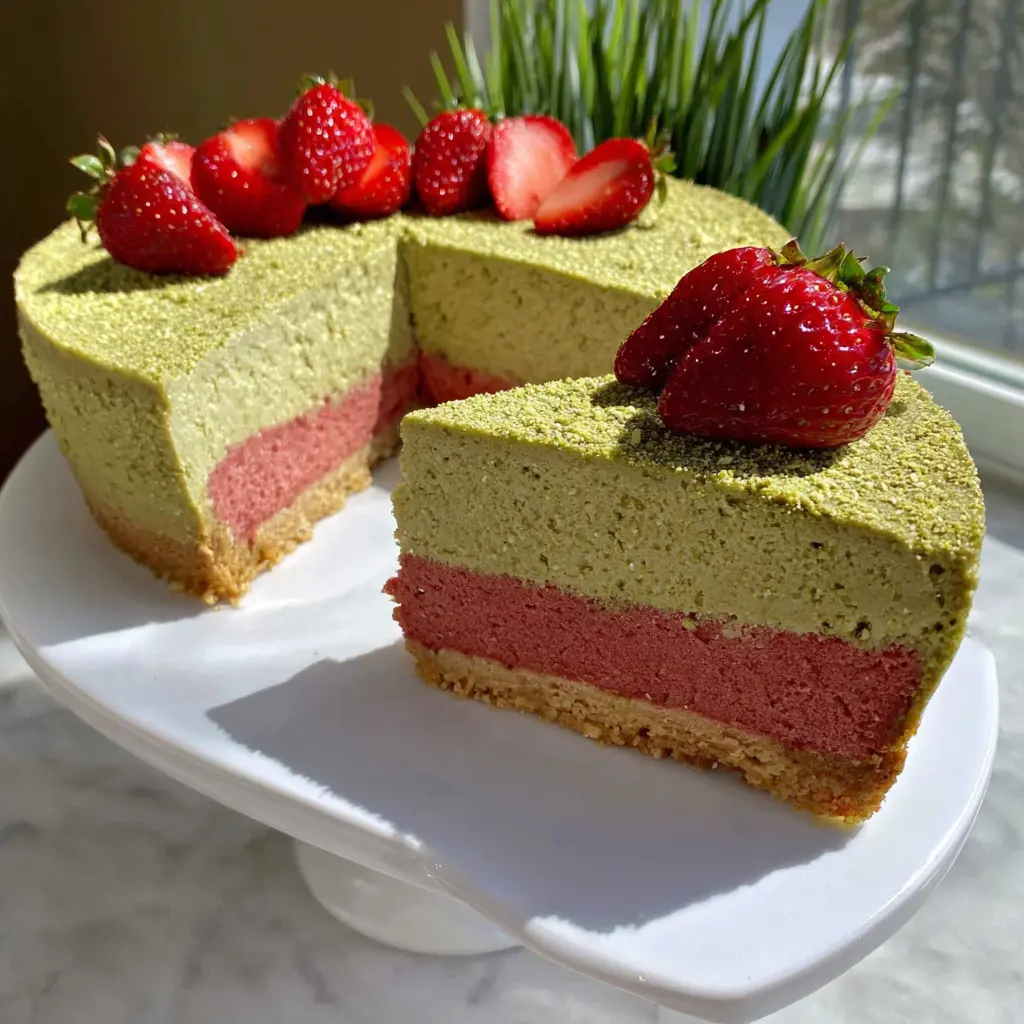

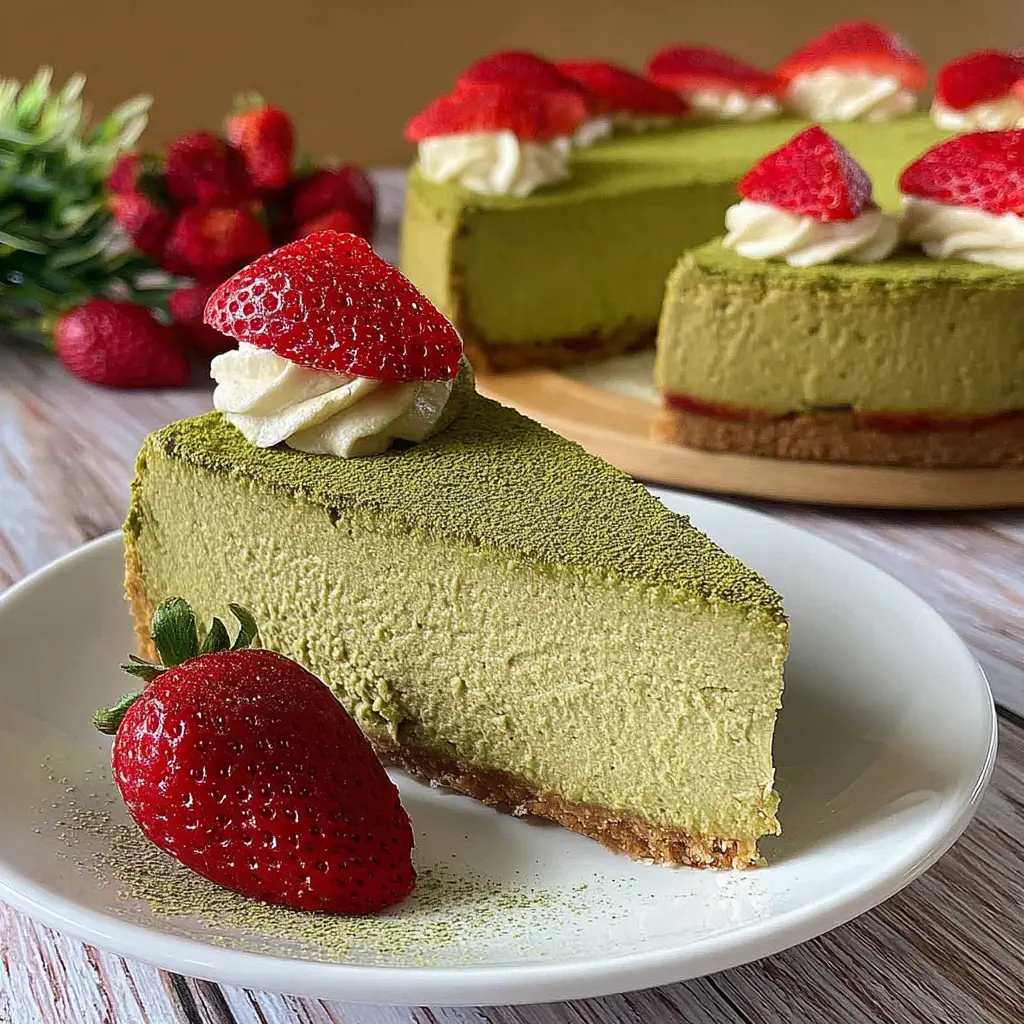
Strawberry Matcha Cheesecake
Ingredients
Method
- In a small saucepan, combine the frozen strawberries and granulated sugar. Cook over medium heat, stirring often, until the berries break down and the sugar dissolves, about 8 minutes.
- Season with a pinch of salt. Transfer the mixture to a blender and puree until smooth. Set aside to cool completely.
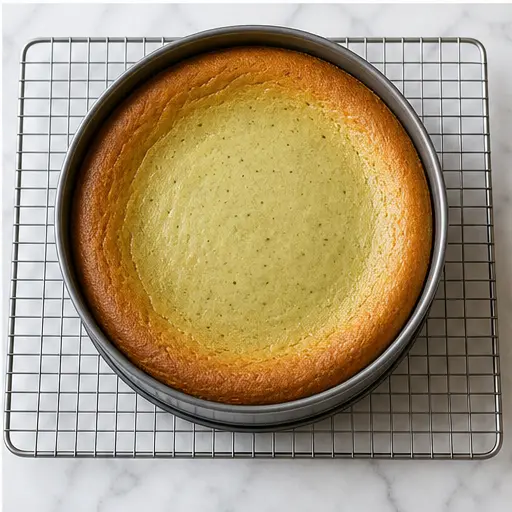
- Wrap the outside of a 9-inch springform pan with two layers of heavy-duty aluminum foil, ensuring no seams are exposed. This prevents water from seeping in during baking.
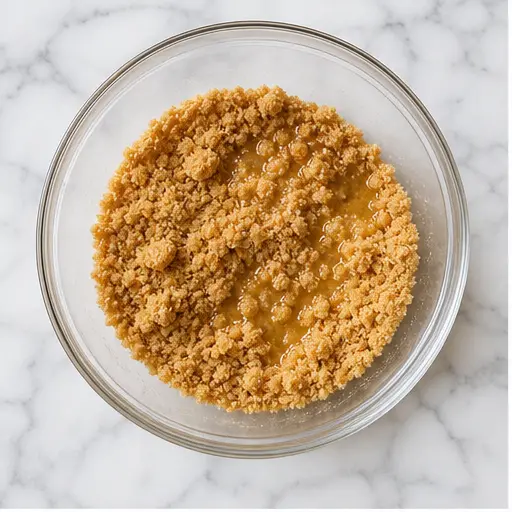
- If using whole graham crackers, pulse them in a food processor until finely ground. In a bowl, mix the crumbs with brown sugar, melted butter, and salt until evenly moistened.
- Press the mixture firmly into the bottom of the prepared pan. Refrigerate while you make the filling.
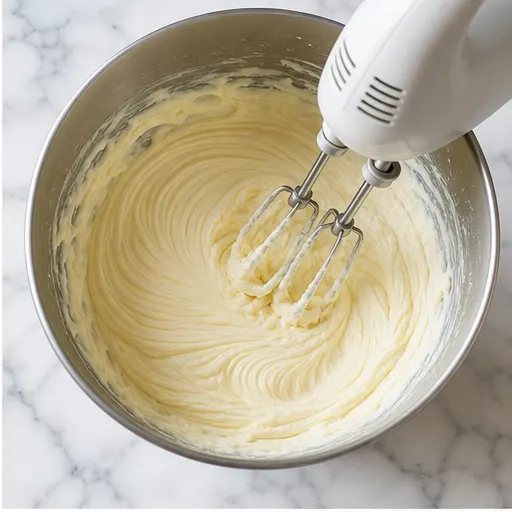
- Preheat the oven to 325°F. In a large bowl, beat the cream cheese with an electric mixer until smooth and fluffy. Add the granulated sugar and beat until creamy.
- Mix in the sour cream, vanilla extract, and salt until combined. Beat in the eggs one at a time, mixing just until incorporated after each addition.
- Sift the matcha powder over the batter and mix on low until smooth. If any lumps remain, strain the batter through a fine-mesh sieve into another bowl.
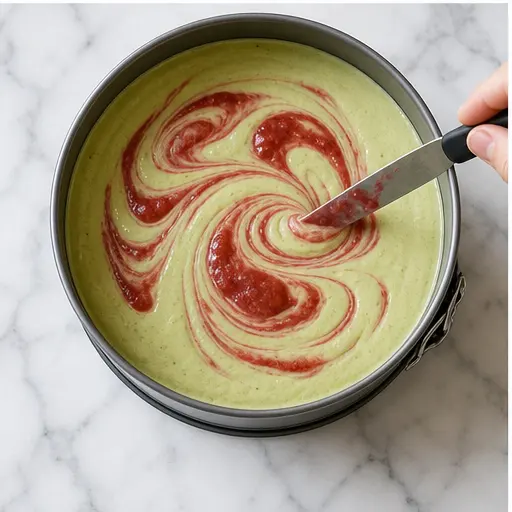
- Pour the cheesecake batter over the crust and spread it evenly. Drop spoonfuls of the cooled strawberry puree over the batter, then use a knife or skewer to gently swirl it into the surface.
- Place the foil-wrapped pan on a rimmed baking sheet. Carefully pour hot water into the baking sheet until it reaches about 1 inch up the sides of the pan.
- Bake for 1 hour 15 minutes to 1 hour 30 minutes, until the center is just set and registers 160°F on an instant-read thermometer. Turn off the oven and leave the cheesecake inside with the door cracked for 1 hour.
- Transfer the cheesecake to a wire rack to cool completely, then refrigerate for at least 6 hours or overnight.
- In a food processor, pulse the freeze-dried strawberries and powdered sugar until finely ground into a powder.
- In a large bowl, whip the heavy cream until stiff peaks form. Gently fold in the strawberry powder and red food coloring, if using, until evenly tinted.
- Remove the chilled cheesecake from the springform pan. Spread the strawberry whipped cream over the top. Dust lightly with matcha powder, if desired. Slice and serve cold.
- Store leftovers in the springform pan, covered, in the refrigerator for up to 4 days.
Nutrition
Notes
Tried this recipe?
Let us know how it was!Why You’ll Love This Strawberry Matcha Cheesecake
I remember the first time I saw a strawberry matcha cheesecake on Instagram. It was one of those pastel-perfect desserts that looked too beautiful to eat, let alone make. But here’s the thing it’s actually way more doable than you think. This Strawberry Matcha Cheesecake is that show-stopping dessert you bring to a spring brunch and everyone goes quiet for a second when they see it.
Matcha’s grassy, slightly savory notes and strawberry’s sweet-tartness are made for each other. It’s that classic flavor pairing that just works, like chocolate and peanut butter but way more elegant. The creamy cheesecake filling is smooth and velvety, with a subtle earthiness from the matcha that gets cut by the bright, fruity swirl. And that strawberry whipped cream on top? It’s the finishing touch that makes this feel bakery-quality.
This isn’t just another green tea cheesecake recipe. The layered effect pink and green, side by side is what makes it so visually stunning. And I promise, with a few key tips, you can get those clean layers without them turning into a muddy mess. Plus, it’s a great recipe for intermediate bakers who want to level up their dessert game without spending days in the kitchen.
So if you’re looking for a spring dessert recipe that’s equal parts beautiful and delicious, this is it. Let’s get into it.

Tips for Perfect Matcha Cheesecake
Before we dive into the how-to, let me share a few things I’ve learned the hard way. These tips will save you from the most common pitfalls and help you nail this cheesecake on your first try.
Use good quality matcha. This is non-negotiable. You want culinary-grade matcha not the cheap stuff that turns brown and tastes like grass clippings. Culinary grade is designed for baking and has a vibrant green color and a balanced flavor that won’t turn bitter. I usually grab mine from a reliable source or a specialty tea shop. Avoid drinking-grade matcha; it’s too delicate for baking and loses its color fast.
Room temperature ingredients are key. Take your cream cheese, eggs, and sour cream out of the fridge at least 2 hours before you start. Cold cream cheese creates lumps that are nearly impossible to beat out, and cold eggs can curdle the batter. Trust me, I’ve been there, and it’s not fun. Let them come to room temperature for a smooth, creamy filling.
Don’t over-beat the batter. This is a classic mistake. Over-beating incorporates too much air, which can cause cracks during baking. Beat the cream cheese until it’s smooth and fluffy, then add the sugar and beat until creamy. When you add the eggs, mix just until incorporated after each addition. You want a silky batter, not a frothy one.
Wrap your pan tightly with foil. For the water bath, you need to prevent any water from seeping into the cheesecake. Use two layers of heavy-duty aluminum foil and wrap it around the outside of the springform pan, making sure there are no seams or tears. I like to place the pan on a rimmed baking sheet and pour the hot water directly onto the sheet, not into the pan. It’s a game-changer.
Cool it slowly. After baking, turn off the oven and leave the cheesecake inside with the door cracked for a full hour. This gradual cooling prevents the dreaded crack. Then let it cool completely on a wire rack before refrigerating. Don’t rush this step it’s what gives you that perfect creamy texture.
Common Mistakes to Avoid
❌ Over-beating the batter: Leads to cracks and a dry texture. ✅ Solution: Mix just until ingredients are combined.
❌ Using cold ingredients: Creates a lumpy batter. ✅ Solution: Let cream cheese, eggs, and sour cream sit at room temperature for 2 hours.
❌ Skipping the water bath: Increases the risk of cracks. ✅ Solution: Use a water bath or place a pan of hot water on the rack below.
❌ Not cooling slowly: Causes the cheesecake to pull away from the crust. ✅ Solution: Leave in the oven with the door cracked for 1 hour after baking.
❌ Refrigerating while still warm: Leads to condensation and a soggy texture. ✅ Solution: Cool completely to room temperature before chilling.
Ingredient Breakdown
Let’s talk about what goes into this Strawberry Matcha Cheesecake and why each ingredient matters. This isn’t just a list it’s a little guide to help you understand what you’re working with.
Graham Cracker Crust: The classic base. Graham cracker crumbs, brown sugar, melted butter, and a pinch of salt. The brown sugar adds a deeper sweetness than white sugar, and the salt balances it out. Press it firmly into the pan you want a compact crust that holds together.
Strawberry Swirl: Frozen strawberries work great here because they’re already soft and break down easily. You cook them with sugar and a pinch of salt until they’re jammy, then puree them smooth. The salt enhances the strawberry flavor. Let it cool completely before swirling into the batter, or it’ll melt the cheesecake.
Cream Cheese Filling: This is the heart of the cheesecake. Full-fat cream cheese is best for that rich, creamy texture. Sour cream adds tanginess and helps keep the filling moist. Vanilla extract rounds out the flavors. The eggs are the structure they set the cheesecake as it bakes. And the matcha powder gives it that beautiful green color and earthy flavor.
Strawberry Whipped Cream Topping: Freeze-dried strawberries are the secret here. They’re intensely strawberry-flavored without adding extra moisture. You grind them with powdered sugar to make a pink powder, then fold it into whipped cream. A couple drops of red food coloring are optional, but they make the color pop. The powdered sugar also helps stabilize the cream, so it holds its shape longer.
Matcha for Dusting: A light sprinkle of matcha powder on top just before serving adds a final touch of color and flavor. It’s optional, but it looks gorgeous.
Step-by-Step Instructions
Alright, let’s walk through this together. I’ll break it down into four major stages so it feels manageable. Remember, the recipe card above has the exact measurements and times, so use that as your guide. This section is all about the why and the how.
Stage 1: Make the Strawberry Swirl
Start with the strawberry swirl because it needs time to cool. In a small saucepan, combine the frozen strawberries and granulated sugar. Cook over medium heat, stirring often, until the berries break down and the sugar dissolves. This takes about 8 minutes. You’ll see the mixture turn into a thick, jammy sauce. Season with a pinch of salt it really brings out the fruitiness. Transfer it to a blender and puree until smooth. Set it aside to cool completely while you work on the crust and filling.
Don’t be tempted to use it warm. If you swirl hot strawberry puree into the cheesecake batter, it’ll melt the cream cheese and create a muddy mess. Patience here pays off.
Stage 2: Prepare the Crust
Wrap the outside of a 9-inch springform pan with two layers of heavy-duty aluminum foil. Make sure there are no seams exposed this is your waterproof barrier for the water bath. If you’re using whole graham crackers, pulse them in a food processor until finely ground. In a bowl, mix the crumbs with brown sugar, melted butter, and salt until evenly moistened. It should feel like wet sand.
Press the mixture firmly into the bottom of the prepared pan. I like to use the bottom of a measuring cup to get it even and compact. Pop it in the fridge while you make the filling. A cold crust helps prevent it from shifting when you pour in the batter.
Stage 3: Make the Cheesecake Filling and Assemble
Preheat your oven to 325°F. In a large bowl, beat the softened cream cheese with an electric mixer until smooth and fluffy. Add the granulated sugar and beat until creamy. This is where you want to make sure there are no lumps. Mix in the sour cream, vanilla extract, and salt until combined. Then beat in the eggs one at a time, mixing just until incorporated after each addition. Remember, don’t over-beat.
Sift the matcha powder over the batter this prevents clumps and mix on low until smooth. If you see any lumps, strain the batter through a fine-mesh sieve into another bowl. The batter should be a pale, beautiful green. Pour it over the chilled crust and spread it evenly.
Now for the fun part. Drop spoonfuls of the cooled strawberry puree over the batter. Use a knife or skewer to gently swirl it into the surface. Don’t over-swirl you want distinct ribbons of pink and green, not a uniform color. A few figure-eight motions are all you need.
Stage 4: Bake, Cool, and Top
Place the foil-wrapped pan on a rimmed baking sheet. Carefully pour hot water into the baking sheet until it reaches about 1 inch up the sides of the pan. This water bath insulates the cheesecake and helps it bake evenly without cracking. Bake for 1 hour 15 minutes to 1 hour 30 minutes. The center should be just set and register 160°F on an instant-read thermometer. It will still jiggle slightly in the middle that’s normal.
Turn off the oven and leave the cheesecake inside with the door cracked for 1 hour. This slow cool-down is crucial. Then transfer it to a wire rack to cool completely. Once it’s at room temperature, refrigerate it for at least 6 hours or overnight. The longer it chills, the cleaner your slices will be.
For the topping, pulse freeze-dried strawberries and powdered sugar in a food processor until finely ground. Whip the heavy cream until stiff peaks form, then gently fold in the strawberry powder and a couple drops of red food coloring if you want a deeper pink. Spread it over the chilled cheesecake, dust with matcha powder, and slice.
Variations to Try
This recipe is pretty flexible, so feel free to experiment. Here are a few ideas to make it your own.
Gluten-Free Version: Swap the graham crackers for gluten-free graham crackers or use crushed gluten-free cookies. The rest of the recipe is naturally gluten-free, so it’s an easy swap.
Dairy-Free Version: Use dairy-free cream cheese and sour cream alternatives. I’ve had good luck with brands like Kite Hill or Tofutti. The texture might be slightly softer, but it still works beautifully.
Different Berries: Not a fan of strawberries? Try raspberries, blueberries, or even a mix. The process is the same cook the berries with sugar, puree, and swirl. Each one gives a different color and flavor.
No-Bake Version: If you want to skip the oven, you can make a no-bake strawberry matcha cheesecake. Use a no-bake cheesecake filling (cream cheese, sugar, and stabilized whipped cream) and fold the matcha powder in. Swirl the strawberry puree on top and chill for at least 6 hours. It won’t have the same dense, creamy texture as a baked cheesecake, but it’s perfect for hot days.
Extra Matcha Flavor: For a more intense matcha taste, increase the matcha powder to 3 tablespoons. Just be careful too much can make it bitter. Taste the batter before adding the eggs to adjust.
And if you’re looking for more inspiration, check out my Pinterest board for other fusion dessert ideas.
How to Store Leftovers
This cheesecake stores beautifully, which makes it perfect for make-ahead desserts. Here’s how to keep it fresh.
In the Fridge: Store leftovers in the springform pan, covered tightly with plastic wrap or foil, in the refrigerator for up to 4 days. The flavors actually meld and improve after a day or two. Just make sure it’s well-covered so it doesn’t absorb any fridge odors.
In the Freezer: For longer storage, slice the cheesecake into individual portions. Wrap each slice tightly in plastic wrap, then in aluminum foil. Place them in a freezer-safe bag or container. They’ll keep for up to 1 month. When you’re ready to enjoy one, thaw it in the refrigerator overnight. Don’t thaw at room temperature it can get watery.
Pro Tip: If you’re freezing, skip the strawberry whipped cream topping. Add it fresh after thawing for the best texture and appearance.
Frequently Asked Questions
When you slice into that perfect layer of this Strawberry Matcha Cheesecake, you’ll know it was all worth it. The vibrant pink swirl against the pale green filling, the creamy texture, the burst of strawberry flavor with every bite it’s a dessert that’s as rewarding to make as it is to eat. Don’t be tempted to rush the chilling steps. Trust the process, and you’ll have a show-stopping dessert that’ll earn you serious compliments.
Source: Nutritional Information


