
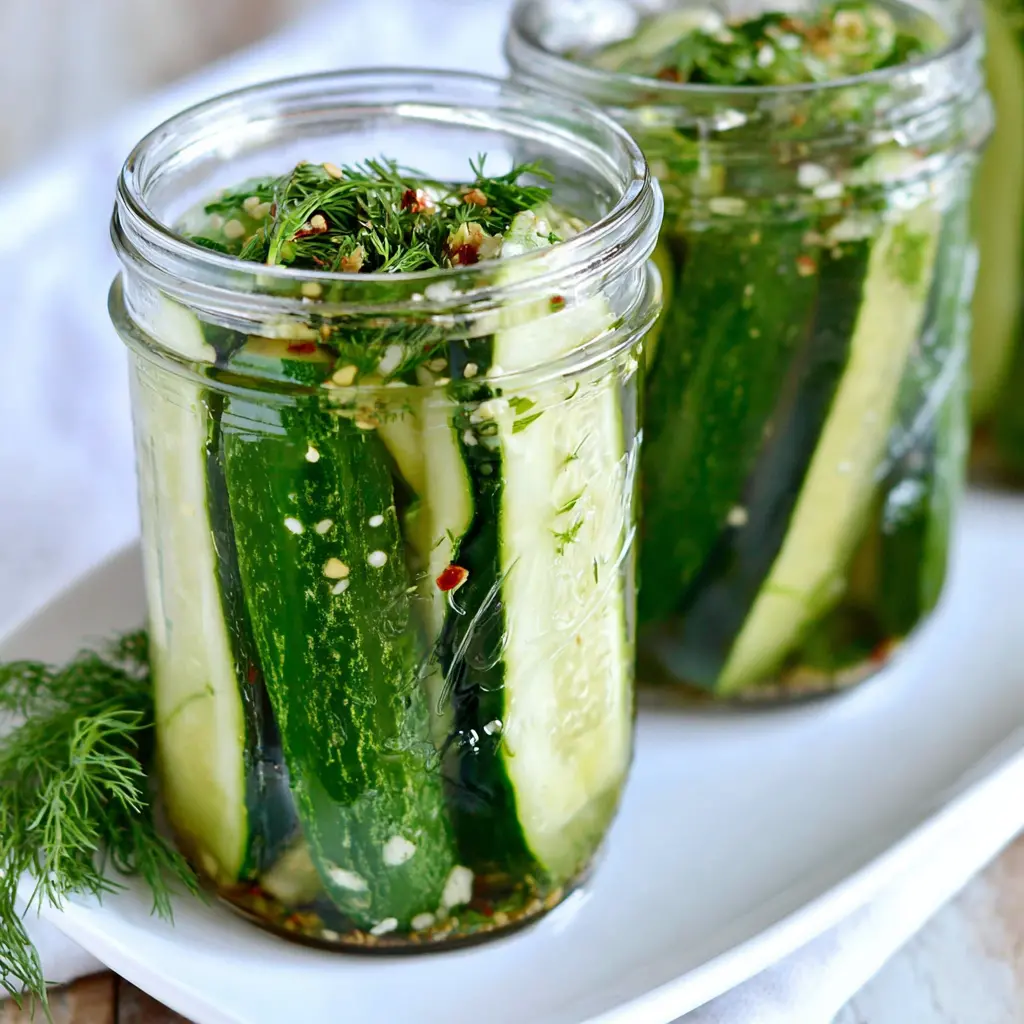
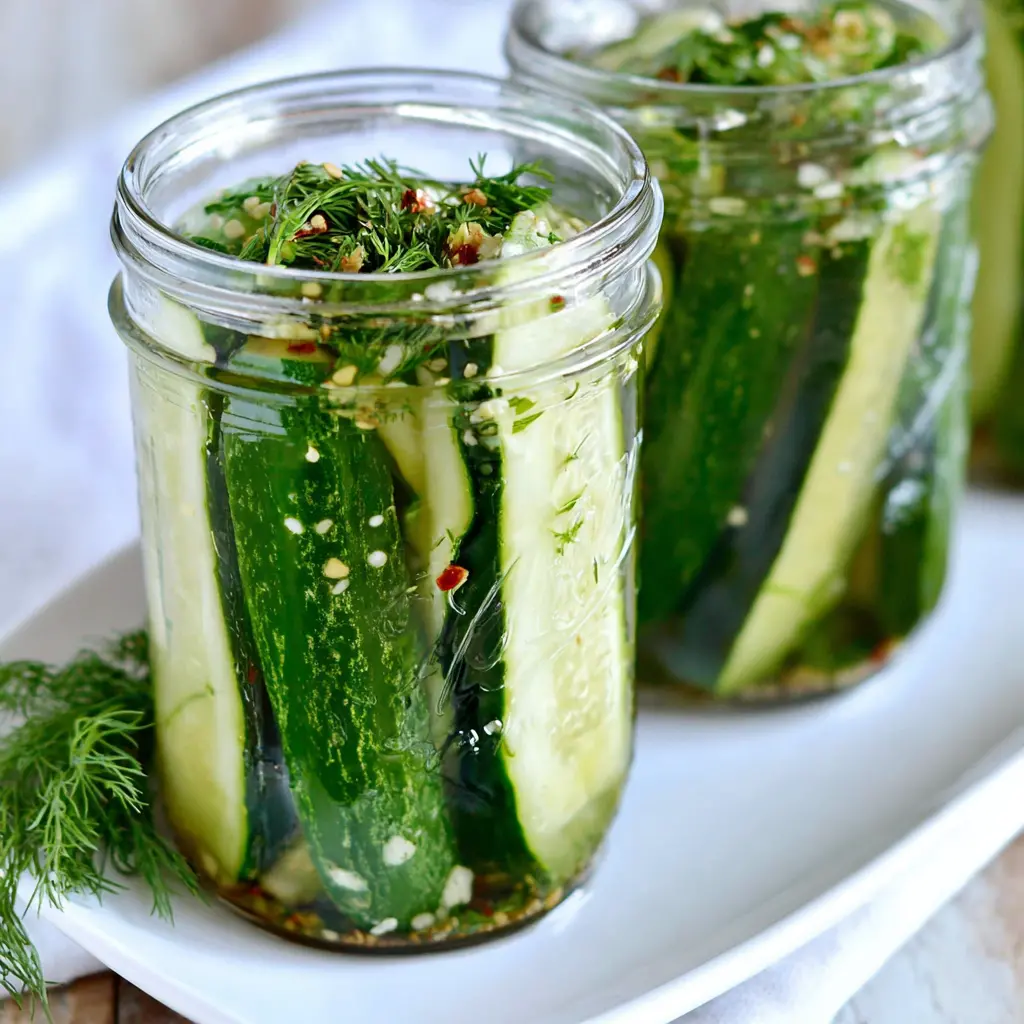
Refrigerator Dill Pickles
Ingredients
Method
- In a medium saucepan, combine water, white vinegar, sugar, and salt. Bring to a boil over medium-high heat, then reduce heat to low and simmer for 15 minutes. Remove from heat and let cool slightly.
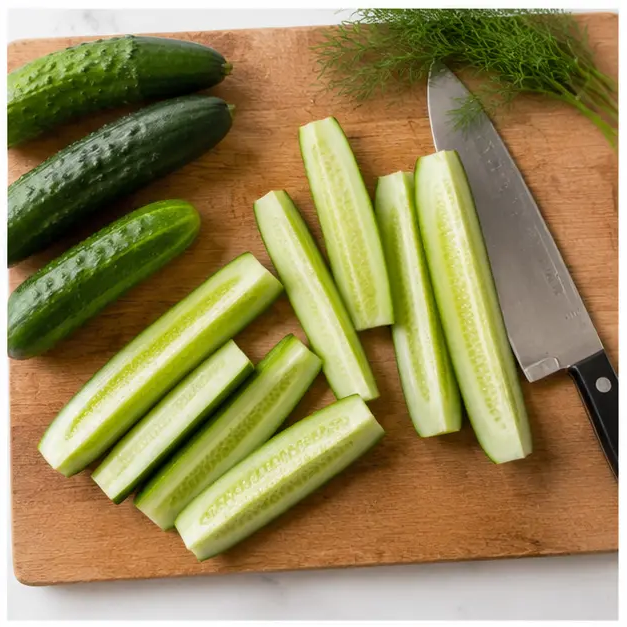
- Wash the cucumbers and cut each lengthwise into 4 spears, yielding about 24 spears total. If the spears are too tall for your jars, trim one end so they fit without sticking out above the rim. Pack the spears tightly into clean jars (you may have a few leftover—save for another use).
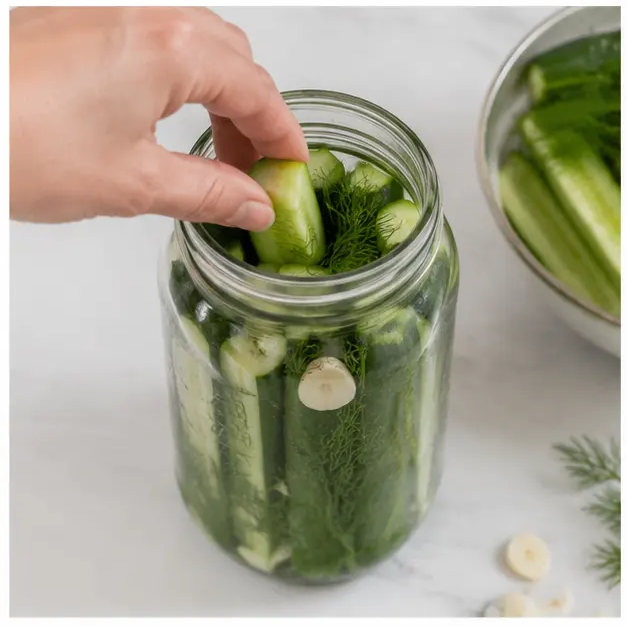
- Tuck the dill sprigs down between the cucumber spears. Add the sliced garlic and pickling spice, distributing evenly among the jars.
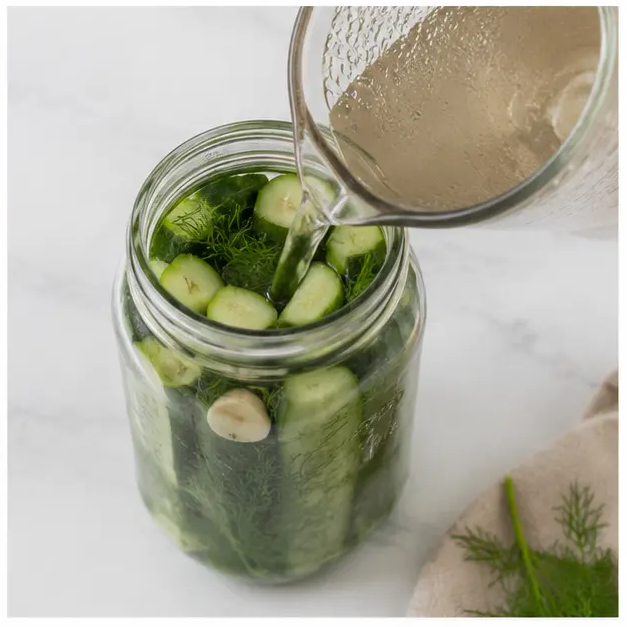
- Pour the warm brine over the cucumbers, dividing it evenly among the jars. Seal each jar with its lid.
- Refrigerate for at least 24 hours before serving to allow the flavors to meld. These pickles will keep in the refrigerator for up to one month—discard any leftovers after that.
Nutrition
Notes
Tried this recipe?
Let us know how it was!Why You’ll Love These Refrigerator Dill Pickles
You just came back from the farmers market with a bag of cucumbers, and now you’re wondering what to do with them all. Maybe your garden is going crazy and you’re running out of ideas. I’ve been there. That bag of Kirby cucumbers staring at me from the counter, threatening to go soft if I didn’t act fast.
These refrigerator dill pickles are my go-to solution. They’re so much better than anything you’ll find at the store. No weird preservatives, no artificial coloring, just real ingredients doing their thing. And the best part? No canning equipment needed. This is the no-fuss method – just a pot, some jars, and a fridge.
I’ll be honest with you: my first batch of homemade pickles was a disaster. Soggy, bland, totally disappointing. I’d followed some random online recipe and ended up with limp cucumber sticks that tasted like nothing. But that failure taught me what actually matters – the right cucumber variety, the perfect brine ratio, and a few tricks for keeping that crunch. Now I’m sharing everything I learned so you don’t have to make the same mistakes.
Ingredients for Refrigerator Dill Pickles
Let me walk you through what you’ll need. The ingredient list is short, which is exactly why each one matters.
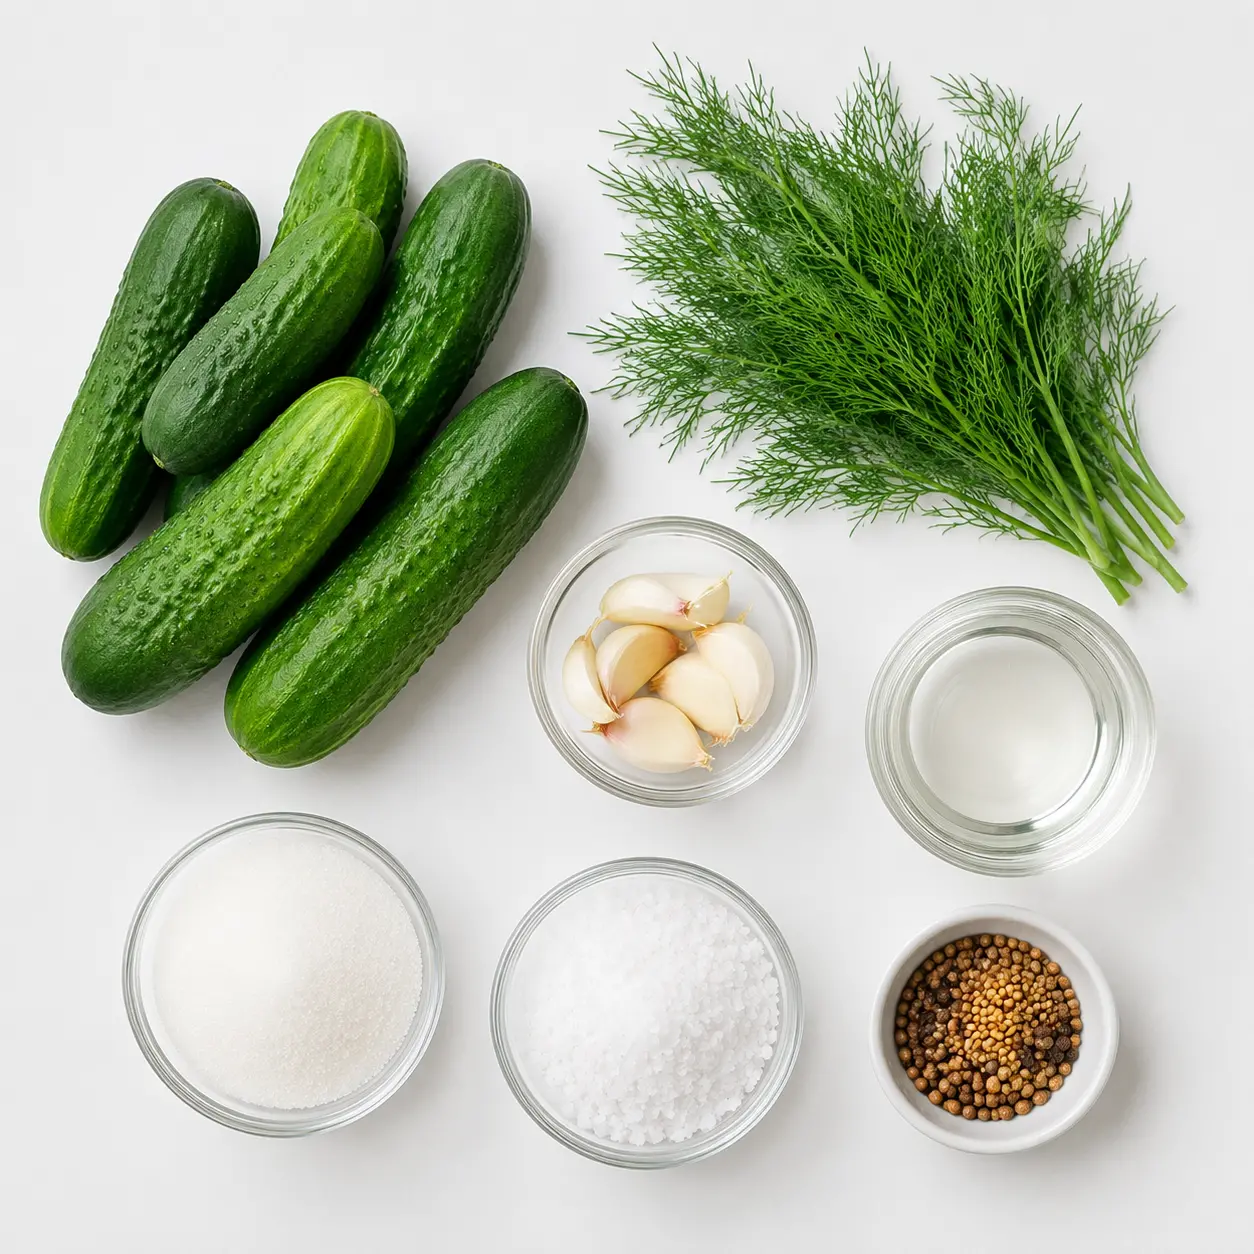
For the brine: You’ll need water, white vinegar, granulated sugar, and kosher salt. That’s it. The ratio is key here – 3 cups water to 3/4 cup vinegar to 3 tablespoons sugar to 2 tablespoons salt. This is what some folks call the pickle brine ratio 3-2-1 approach, though technically it’s 3-0.75-3-2. Close enough.
For the pickles: Small cucumbers (about 6 inches long), fresh dill sprigs, garlic cloves sliced thin, and pickling spice. The fresh dill is non-negotiable in my book. Dried dill just doesn’t give you that same bright, grassy flavor. And the garlic? It infuses everything with this subtle warmth that makes each bite addictive.
One thing I want to emphasize: use pickling salt vs table salt if you can. Table salt often has anti-caking agents that can make your brine cloudy. Kosher salt works fine too, and that’s what I use here. Just don’t use iodized salt – it can give your pickles a weird metallic taste.
Best Cucumbers for Pickling
This is where most people go wrong, and I don’t want you to repeat my soggy-pickle heartbreak. The cucumber variety you choose makes or breaks your batch.
Pickling cucumbers (Kirby cucumbers) are the gold standard. They’re shorter, bumpier, and have a thicker skin that stays crisp even after soaking in brine. They also have fewer seeds, which means less mushiness. You can find them at farmers markets during summer, and some grocery stores carry them year-round. I usually grab mine from the Santa Monica Farmers Market when they’re in season – the difference is night and day.
But what if you can’t find Kirby cucumbers? Don’t worry. Persian cucumbers are a solid alternative. They’re small, thin-skinned, and stay relatively crisp. English cucumbers (the long ones wrapped in plastic) work in a pinch, but they have thinner skins and more water content, so they’re more likely to get soft. If you use English cucumbers, I’d recommend eating them within a week or two rather than trying to keep them for a month.
And whatever you do, don’t use those big waxed cucumbers you find at the supermarket. They’re bred for salads, not pickling, and they’ll turn into sad, limp spears every time.
How to Make Refrigerator Dill Pickles
Alright, let’s get into the process. I’ll walk you through the four main stages. Think of these as the big picture steps – the detailed instructions are in the recipe card above.
Stage 1: Make the Brine
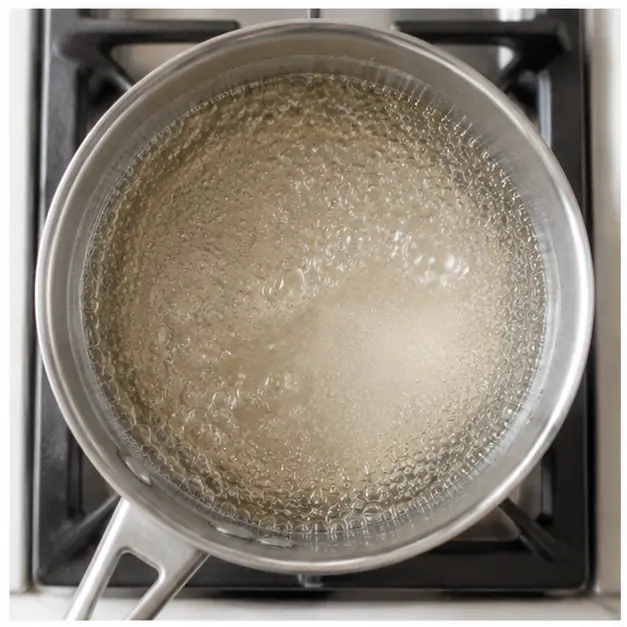
Start by combining water, white vinegar, sugar, and salt in a medium saucepan. Bring it to a boil over medium-high heat, then reduce the heat and let it simmer for about 15 minutes. This simmering step isn’t just for show – it helps the sugar and salt fully dissolve and allows the flavors to meld. After 15 minutes, remove it from the heat and let it cool slightly. You want the brine warm, not boiling, when you pour it over the cucumbers. Pouring boiling hot brine directly onto cucumbers is a common mistake that softens them.
Stage 2: Prepare the Cucumbers
Wash your cucumbers thoroughly, then cut each one lengthwise into four spears. You’ll end up with about 24 spears total. If the spears are too tall for your jars, trim one end so they fit without sticking out above the rim. This is important – if any part of the cucumber is above the brine line, it can get moldy. Pack the spears tightly into clean jars. You might have a few leftover, which you can save for another use or just snack on while you work.
Stage 3: Add Aromatics
Now the fun part. Tuck the fresh dill sprigs down between the cucumber spears. Add the sliced garlic and pickling spice, distributing them evenly among the jars. I like to push the dill and garlic down into the middle of the jar, not just on top, so the flavor infuses throughout. The smell at this point is incredible – that fresh dill and garlic hitting the warm brine, it’s like summer in a jar.
Stage 4: Fill, Seal, and Chill
Pour the warm brine over the cucumbers, dividing it evenly among the jars. Make sure all the cucumbers are completely submerged. Seal each jar with its lid, then pop them in the refrigerator. Now comes the hardest part: waiting. You need to let them sit for at least 24 hours before eating. I know, it’s torture. But trust me, the flavors need time to meld and develop. The first time you crack open a jar the next day and take that first bite, you’ll understand why it was worth the wait.
Tips for the Best Pickles
After making countless batches (and a few duds), I’ve gathered some tips that make a real difference.
- Ice bath trick: Before packing your cucumbers, soak them in ice water for 30 minutes. This firms them up and helps them stay crisp longer. It’s a simple step that pays off big.
- Don’t overcrowd the jars: You want the brine to be able to circulate around each spear. Pack them tightly but not so tight that they’re squished.
- Use fresh dill generously: Don’t be shy with it. Those sprigs are where so much of the flavor comes from.
- Smash your garlic: Slicing is good, but smashing the cloves releases even more flavor. I usually do a combination of both.
- Keep them submerged: If any cucumbers are floating above the brine, use a clean weight or just push them down every day. Exposure to air can lead to spoilage.
One more thing about the crisp refrigerator pickles secret: some people swear by adding a grape leaf or a teaspoon of calcium chloride (Pickle Crisp) to each jar. I’ve tried both, and they do help, but honestly, if you start with the right cucumbers and don’t pour boiling brine over them, you’ll get plenty of crunch without any extras.
Ways to Use Refrigerator Dill Pickles
Once you have a jar of these beauties, you’ll find yourself reaching for them constantly. They’re not just for burgers and hot dogs, though they’re amazing there too.
I love throwing a few spears on a charcuterie board for a tangy contrast to all the rich cheeses and meats. They’re perfect on delicious sandwiches – think turkey and Swiss with a generous layer of pickles, or a classic Reuben (without the corned beef, if you’re keeping it simple). My husband even chops them up and adds them to tuna salad for extra crunch and brightness.
For summer gatherings, I bring a jar to every barbecue. They disappear fast. People always ask, “Did you make these?” and there’s this moment of pride when I say yes. It’s such a simple thing, but homemade pickles just hit different.
And honestly? Sometimes I just eat them straight out of the jar as a snack. That cold, crisp snap, the tang of vinegar, the garlicky kick – it’s the perfect afternoon pick-me-up.
Storage and Shelf Life
Proper storage is key to keeping your pickles safe and delicious. These are refrigerator pickles, which means they’re not shelf-stable. You need to keep them in the fridge at all times.
How long do fridge pickles last? They’ll stay good for up to one month in the refrigerator. After that, they start to lose their crunch and the flavor can become off. I always label my jars with the date I made them so I don’t forget.
How to tell if fridge pickles have gone bad: Look for any signs of spoilage. If you see mold floating on the surface, if the brine turns cloudy (it should be clear), or if there’s an off smell – toss them. Trust your nose on this one. If something seems wrong, it probably is.
One question I get a lot: Can I reuse the brine? Technically yes, but I wouldn’t recommend it for more than one reuse. The brine loses its acidity and flavor strength after the first batch. If you do reuse it, add a little fresh vinegar and salt to boost it back up.
Variations to Try
Once you’ve mastered the basic recipe, feel free to experiment. Here are some of my favorite twists:
- Spicy refrigerator pickles: Add a sliced jalapeno or a teaspoon of red pepper flakes to each jar. The heat builds over time, so start small and adjust to your taste.
- Extra garlic dill pickles: Double the garlic. I’ve done this and it’s incredible – just be prepared for powerful garlic breath.
- Apple cider vinegar pickles: Swap the white vinegar for apple cider vinegar. The flavor is milder and slightly fruity, which some people prefer.
- Add extra spices: Toss in some yellow mustard seeds, coriander seeds, a bay leaf, or black peppercorns. These add layers of flavor that make each jar unique.
Remember, these are all optional additions – the base recipe is perfect as is. But it’s fun to play around and find your signature blend.
Common Mistakes to Avoid
Let me save you from the pitfalls I’ve stumbled into.
- ❌ Using non-pickling cucumbers: This is the number one cause of soggy pickles. Stick with Kirby or Persian cucumbers.
- ❌ Pouring boiling brine over cucumbers: Let the brine cool slightly first. Too much heat softens the cucumbers.
- ❌ Not waiting 24 hours: I know it’s hard, but eating them too early means you miss the full flavor. The pickles need time to develop.
- ❌ Using reactive cookware: Don’t use aluminum, copper, or cast iron pots for the brine. They can react with the acid and give your pickles a metallic taste. Stick with stainless steel or enameled pots.
- ❌ Storing at warm temperatures: These are refrigerator pickles. Keep them cold at all times.
Frequently Asked Questions
So there you have it – everything I know about making refrigerator dill pickles that are crisp, tangy, and absolutely delicious. I hope this recipe becomes a staple in your kitchen like it has in mine. There’s something so satisfying about pulling a jar of homemade pickles out of the fridge, knowing you made them yourself.
If you make these, I’d love to hear how they turn out. Drop a comment below or tag me on social media. And if you’re looking for more inspiration, check out my Pinterest board where I share all my favorite summer recipes and pickling ideas. Happy pickling!
Source: Health & Nutrition Research
3 Responses
I made these last weekend and they turned out amazing! The crunch is perfect. I used Kirby cucumbers and followed the brine ratio exactly. My only question is: can I reuse the brine for a second batch, or should I make fresh brine each time?
Great question, Emily! I always recommend making fresh brine for each batch. The brine absorbs flavors from the first batch and may not have enough vinegar or salt left to properly pickle a second batch. Plus, fresh brine ensures that crunch! So glad you loved them.
Good recipe, but I found the pickles a bit too sweet for my taste. Next time I’ll cut the sugar in half. The dill and garlic flavors were spot on though!