
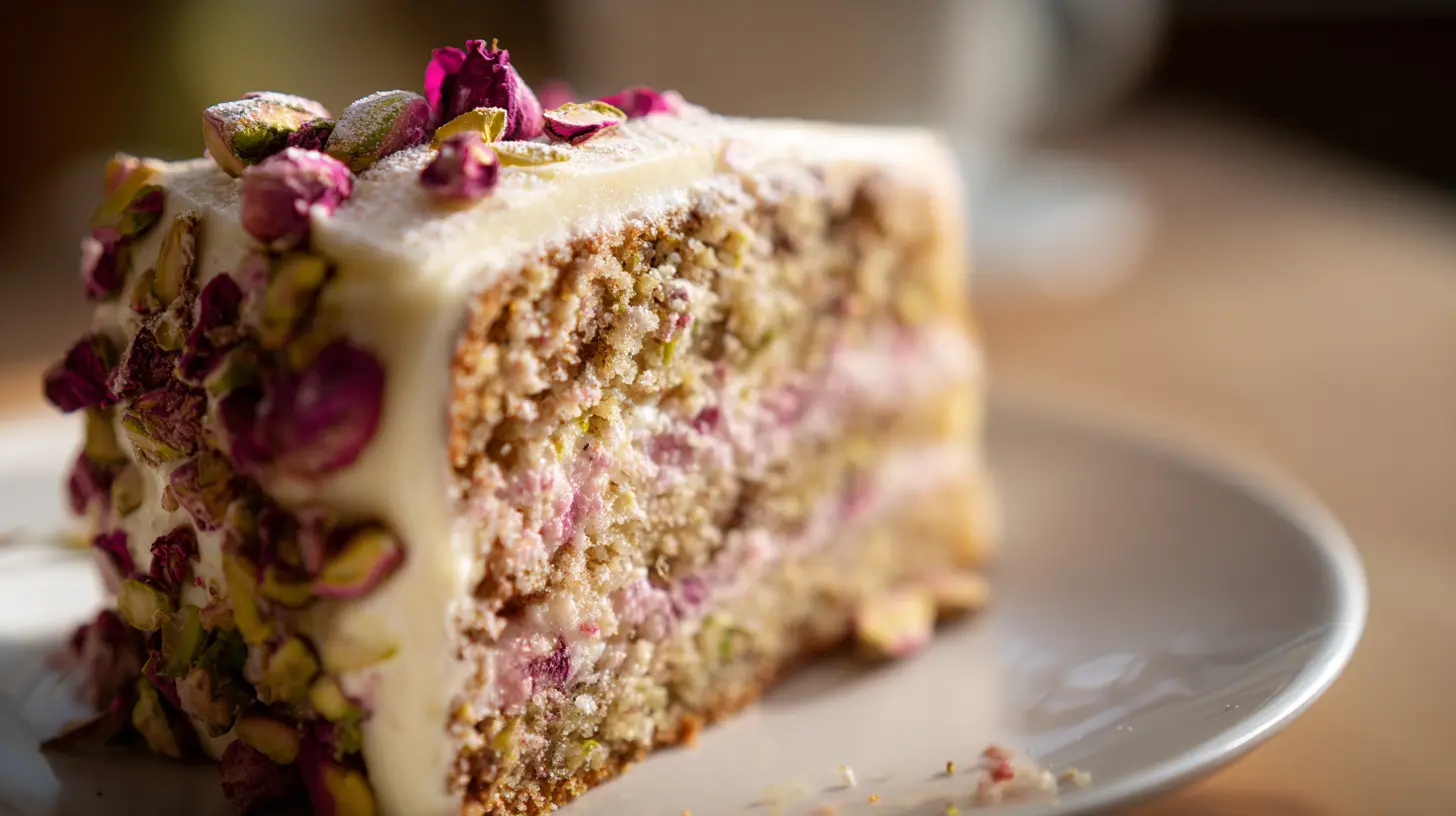

Pistachio Rose Cake: Floral, Nutty Layers
Ingredients
Method
- Preheat oven to 350°F (175°C). Grease two 8-inch cake pans and line their bottoms with parchment paper.
- Grind shelled pistachios in a food processor until finely ground but slightly coarse, about 20 seconds. Set them aside.
- Sift together all-purpose flour, ground pistachios, baking powder, baking soda, and salt in a medium bowl.
- In a large bowl, beat softened butter and granulated sugar with an electric mixer on medium speed until pale and fluffy, about 3-4 minutes.
- Beat in eggs one at a time, fully incorporating each before adding the next. Stir in vanilla extract.
- Alternately add dry ingredients and milk to the butter mixture, starting and ending with dry ingredients. Mix gently on low speed until just combined.
- Divide batter evenly between the prepared pans and smooth the tops.
- Bake for 25-30 minutes, or until a toothpick inserted in the center comes out clean and the cakes spring back when lightly pressed.
- Cool cakes in their pans for 10 minutes, then turn them out onto wire racks to cool completely.
- Chill a mixing bowl and beaters for 10 minutes. Whip heavy cream, powdered sugar, rose water, and vanilla on medium-high speed until soft peaks form. Adjust rose water to taste.
- Place one cake layer on a cake stand or plate. Spread a generous layer of rose whipped cream on top.
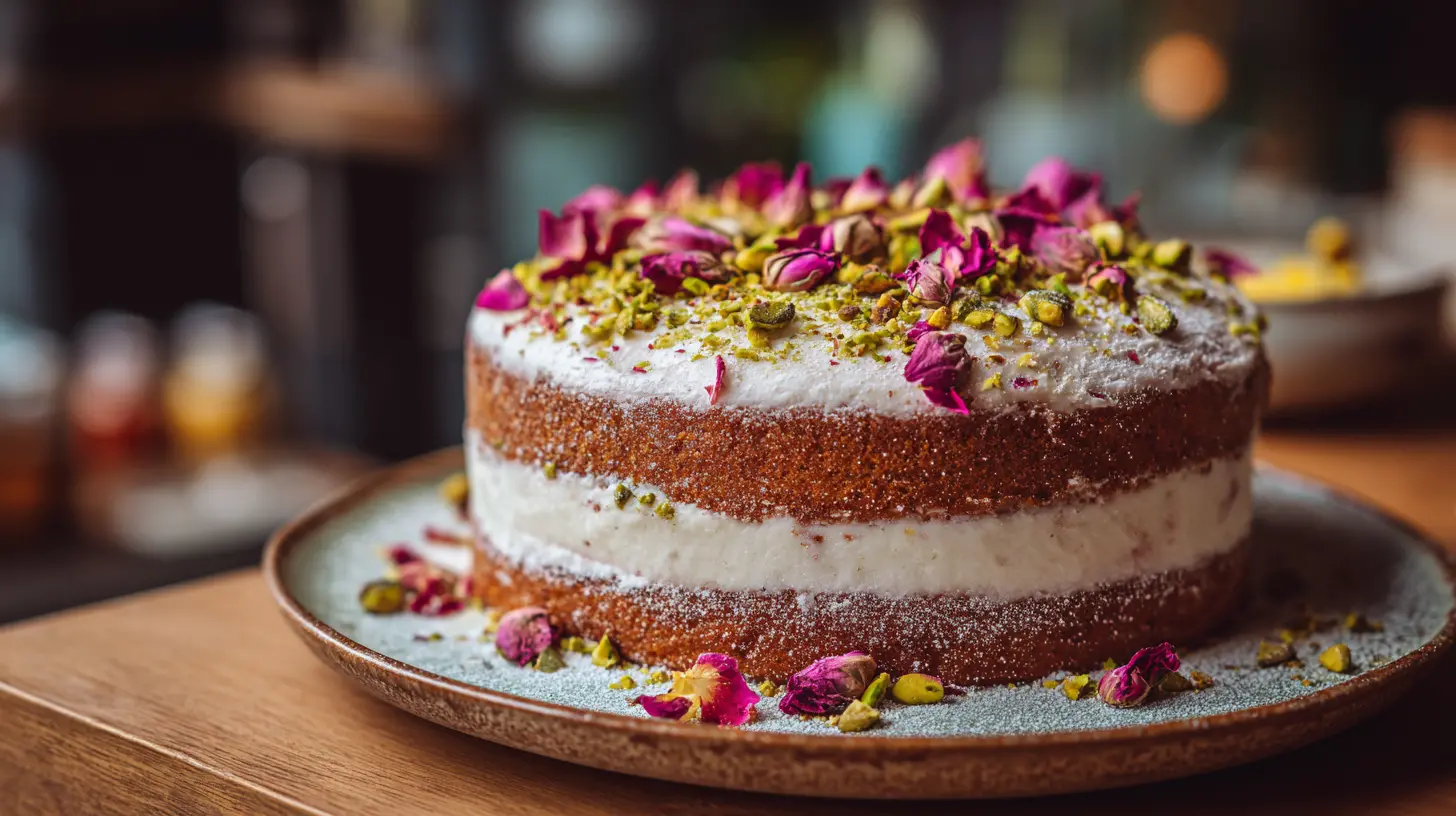
- Add the second cake layer and cover its top with more rose whipped cream. Smooth the cream lightly on top and sides, leaving the sides exposed for a naked cake look.
- Sprinkle chopped pistachios over the top and sides. Scatter fresh edible rose petals if using. Dust lightly with powdered sugar.
- Refrigerate the assembled cake for at least 30 minutes to set the cream before serving.
Nutrition
Notes
Tried this recipe?
Let us know how it was!Why This Pistachio Rose Cake Will Be Your New Spring Favorite
Honestly, sometimes you just want to bake something that feels a little bit special, you know? Something that isn’t your everyday chocolate chip cookie, but also isn’t going to have you pulling your hair out in the kitchen. Especially when spring starts to bloom here in Los Angeles, I find myself craving lighter, more aromatic flavors. I mean, who doesn’t want a dessert that looks like it took hours, but is actually quite achievable?
That’s where this Pistachio Rose Cake comes in. It’s a floral pistachio dessert cake that just screams elegance without a ton of fuss. It’s perfectly moist, delicately fragrant, and it has this amazing visual appeal that just garners compliments. You’ll love this recipe because it gives you that gourmet-quality dessert experience right at home, building your confidence in baking unique flavors. Trust me, it’s going to be a showstopper for your next brunch or gathering.
Essential Ingredients & Smart Prep Tips
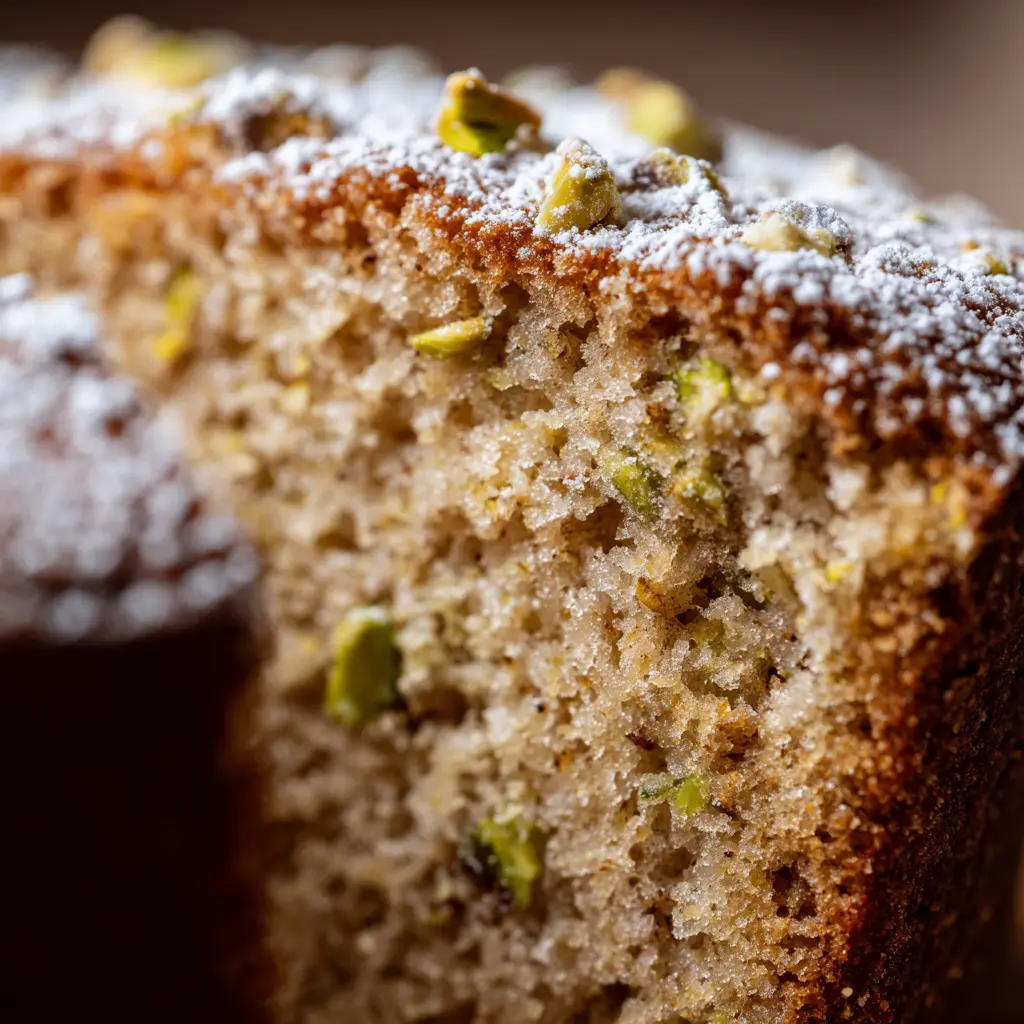
Baking, like anything, starts with a good foundation, and that means your ingredients. For a cake that’s truly amazing, you’ve got to pay attention to the details. I know this sounds a little fussy, but it makes all the difference, honestly. We’re aiming for a soft pistachio rose sponge here, and that begins before you even turn on the mixer.
Key Ingredients Explained
You’ll notice we’re using all-purpose flour here, which is pretty standard, but it’s crucial for that tender crumb we’re after. And the pistachios, well, they’re the star of the show. We’ll be using both ground pistachios in the batter and chopped pistachios for garnish. For the rose element, we’re relying on pure rose water for that delicate aroma, not an essence, which can be overpowering. The cream cheese frosting really complements the nutty floral cake layers, you know?
Homemade Pistachio Milk: The Secret to Flavor
Here’s what I wish someone had told me earlier in my baking journey: making your own pistachio milk is a game-changer for this Pistachio Rose Cake. It’s not just about the flavor, though that’s certainly enhanced. Blending shelled pistachios with whole milk until completely smooth gives you this rich, vibrant green base that infuses every bite. It ensures the color changes and it’s not gritty, which can happen if you don’t blend it enough. This step, honestly, makes the cake so much more moist and flavorful.
Prepping Pistachios: Skin or No Skin?
When it comes to prepping your pistachios, you’ve got a couple of approaches, and it really depends on what you’re going for. I think, for the absolute best flavor and color, roasting fresh pistachios to intensify their flavor is a must. It also helps reduce moisture, making them easier to grind. Now, about the skins: you can peel pistachio skins, and it does give a brighter green color to your cake. To do this, soak them in cold water for 1-2 hours, then pinch off the skins, pat them dry, and toast them for about 10 minutes on low heat. It’s an extra step, I mean, but it’s worth it for that vibrant look, especially if you want a really striking pistachio rose cake.
How to Make This Aromatic Rose Cake Slice
Making this Pistachio Rose Cake is simpler than you might think, especially once you get the hang of a few key techniques. The thing is, we’re building layers of flavor and texture here, and each step contributes to that perfectly tender result. I always say, baking is a bit like science, but with a lot more deliciousness involved, you know?
First off, bring all your ingredients to room temperature. This isn’t being fussy, it’s the difference between a smooth, emulsified batter and one that’s a bit clumpy. Your butter, eggs, and milk should all be at room temperature for proper emulsification and a great texture. For accuracy, especially with flour, I always recommend weighing your ingredients. It just gives you a more consistent result every time.
When you’re mixing the batter, don’t overmix. This is a classic mistake, and honestly, I learned this the hard way more times than I care to admit. Overmixing develops the gluten too much, and you end up with a tough cake, not that soft pistachio rose sponge we’re aiming for. Mix until just combined, that’s the secret. You’ll know it when you see it, the batter will be just right.
For baking, grease and flour your bundt tin really well for easy cake removal. Nothing’s worse than a beautiful cake stuck in the pan, right? And if you’re worried about uneven baking, I’ve got a trick for you: use cake strips. These are towel strips soaked in water and wrapped around your pans. They help prevent the edges from baking too quickly, ensuring the whole surface rises evenly and remains level. It’s a small step, but it makes a huge difference, especially with a cake this special.
As soon as the cake comes out of the oven, while it’s still warm, add your sugar syrup. This is another one of those ‘chef’s secrets’ for a truly moist sponge cake. The warm cake absorbs the syrup beautifully, keeping it from drying out. For the rose water, how much is ideal for an aromatic rose cake slice? I think it’s about balance. Start with the amount specified in the recipe, and if you’re adding it to a glaze, gradually add a teaspoon until you’re happy with the flavor. You don’t want it to be overpowering, just a delicate aroma.
Pistachio Rose Cake Variations & Adaptations
One of the things I love most about baking is how adaptable recipes can be. This Pistachio Rose Cake is no exception. Whether you’re looking to change up the flavor profile a little, or you need to cater to different dietary needs, there are plenty of options. You’ve got this, honestly.
Flavor & Form Variations
If you’re not a huge fan of rose water, or maybe you just want to try something different, you can absolutely substitute it. Vanilla extract is a classic choice, or for another floral note, orange blossom water works beautifully. For an extra nutty boost to enhance that pistachio flavor, a few drops of almond extract are amazing. And if you want a really vibrant green cake, a tiny bit of green food coloring does the trick.
This recipe isn’t just for a bundt cake, either. You can totally make this into cupcakes or individual rectangular cakes. Just remember to adjust the baking time accordingly; cupcakes will bake much faster, probably around 20-25 minutes. It can also be made into 3×7-inch round cake layers, 2×8-inch round layers, or even a single 10-inch round cake. The batter is pretty versatile, you know?
Eggless & Vegan Adaptation Guide
I know a lot of you are looking for egg replacements or vegan versions, and honestly, it’s totally doable with this Pistachio Rose Cake, though the texture might be a little different. For an eggless version, you can substitute eggs with flax eggs. For each egg, mix one tablespoon of ground flaxseeds (or linseeds) with three tablespoons of water and let it sit for about five minutes until it thickens. This adds moisture and acts as a binder, but it might result in a slightly denser cake. It’s still good, just a different kind of good!
For a full vegan Pistachio Rose Cake, you’ll want to substitute the milk for a plant-based milk. I’ve found soya milk works really well here, but almond milk could also probably work. Just make sure your butter substitute is also plant-based, of course. For gluten-free folks, you can use a gluten-free flour blend. I’ve had good luck with a mix of King Arthur’s Gluten Free Flour and almond meal, usually at a 2:1 ratio. The texture might be a bit less airy than with traditional flour, but it’s still a delicious floral dessert.
Serving, Storage & Troubleshooting Your Pistachio Rose Cake
You’ve put in the effort, and now it’s time to enjoy your amazing Pistachio Rose Cake. But first, let’s talk about how to serve it, keep it fresh, and what to do if things don’t go perfectly. Because, honestly, even us recipe developers have our moments in the kitchen, right?
Best Ways to Serve Your Cake
Serving this cake is all about presentation. It’s already so beautiful, but a few simple garnishes can really make it pop. A sprinkle of chopped pistachios on top of the cream cheese frosting adds a lovely crunch and highlights the nutty flavor. Edible rose petals are just, well, amazing. They elevate the whole look and emphasize that delicate aroma. I mean, it’s perfect for a spring dessert ideas spread. And a big mug of tea or coffee? Absolutely a must!
Storing Pistachio Rose Cake
How long can you store a homemade Pistachio Rose Cake? Good question! If you’re planning to serve it a day later, definitely add the syrup and glaze once it’s done baking and cooled. It’ll stay fresh for 2-3 days at room temperature in an airtight container, but honestly, I think it’s even better stored in the fridge for up to 5 days. Just remember to take it out about 2 hours before serving to let it come to room temperature for the best flavor and texture.
Can you freeze this Pistachio Rose Cake? Absolutely! Wrap the cake tightly in plastic wrap or a plastic bag and freeze it for up to a month. When you’re ready to enjoy it, simply thaw it by placing it on the counter to get to room temperature. It’s a great make-ahead option for when you know you’ll have a busy week.
Troubleshooting Common Cake Issues
Common Mistakes & Fixes for Your Pistachio Rose Cake
Mistake: Dry cake.
Solution: This often happens from overbaking or not adding the syrup to the warm cake. Always use a timer and test for doneness with a skewer. Make sure that sugar syrup goes on as soon as it bakes.
Mistake: Cake sticks to the bundt tin.
Solution: You probably didn’t grease and flour your bundt tin thoroughly enough. Take your time with this step, making sure every crevice is coated. I learned this the hard way, trust me!
Mistake: Gritty pistachio milk.
Solution: You need to blend it longer! Blend the pistachio milk until completely smooth. The texture should be creamy, not sandy.
Mistake: Overpowering rose flavor.
Solution: This usually means you used too much rose water or accidentally used rose essence instead. Rose essence is much more concentrated. For the glaze, gradually add rose water, tasting as you go.
Mistake: Cake has a salty taste.
Solution: Did you use salted pistachios? Always use unsalted pistachios in baking to control the salt content. You don’t want any unexpected flavors in your sweet pistachio treat.
Pistachio Rose Cake FAQ
Storage & Serving Your Beautiful Pistachio Rose Cake
Once your Pistachio Rose Cake is baked, cooled, and beautifully frosted, you’ll want to make sure it stays just right. I mean, you’ve put in the effort, and it deserves to be enjoyed at its peak! For that perfect soft pistachio rose sponge, a little care in storage goes a long way.
If you’ve got leftovers, or you’re making it a day ahead for a gathering, storing it in the fridge is your best bet. Just pop it into an airtight container, and it’ll happily keep for up to five days. When you’re ready to serve, take it out of the fridge about two hours beforehand. This lets it come to room temperature, and honestly, the flavors and textures really shine when it’s not super cold. It just tastes so good that way.
For longer storage, this Pistachio Rose Cake freezes beautifully. Wrap the cooled cake tightly in plastic wrap, then slip it into a plastic bag or another airtight freezer-safe container. It’ll stay amazing for up to a month. When you’re ready for that aromatic rose cake slice, just transfer it to your counter and let it thaw at room temperature. It’s a lifesaver for those busy weeks, or when you suddenly decide to “do brunch” with friends.
When it’s time to serve, consider a few fresh garnishes. A sprinkle of chopped pistachios and some delicate edible rose petals really make this floral pistachio dessert cake pop. It’s a wonderful finale to any meal, especially during these mild LA spring days. Enjoy that moment, you know, the one where everyone oohs and aahs over your amazing creation. That’s the best part!
More Delicious Recipes to Explore
I hope you absolutely love making and sharing this Pistachio Rose Cake. There’s such a joy in creating something so beautiful and unique with your own hands. When you share this stunning cake with loved ones, you’re not just serving dessert, you’re sharing a little piece of your culinary creativity. It’s amazing how a simple cake can bring so much happiness.
I mean, this is just the beginning of your journey into unique and show-stopping desserts, I think. If you enjoyed exploring these nutty floral cake layers, you’ll probably love some of my other seasonal bakes. Keep experimenting with those delicate aromas and flavors!
Don’t forget to tag me in your beautiful bakes! I love seeing what you create. For more inspiration, check out my Pinterest boards.
Source: Nutritional Information


