


Lemon Berry Cheesecake Cake
Ingredients
Method
- Preheat your oven to 350°F. Lightly grease an 8-inch springform pan and line the bottom with a parchment paper round. Wrap the outside of the pan with a double layer of heavy-duty aluminum foil to keep water out during the water bath.
- In a food processor, pulse the 3/4 cup fresh blueberries and 16 oz cream cheese until smooth. Transfer the mixture to a large mixing bowl.
- Add the 1/2 cup sugar and 2 tablespoons flour, then beat on medium speed until creamy and smooth. Mix in the 1 1/2 teaspoons vanilla.
- Add the 2 eggs and 1 egg yolk one at a time, mixing on low just until combined after each addition. Do not overmix.
- Gently fold in the 1/4 cup sour cream and 1/4 cup heavy cream until just incorporated. Pour the batter into the prepared springform pan and smooth the top. Place the springform pan into a larger roasting pan, then carefully pour boiling water into the roasting pan until it reaches halfway up the sides of the springform pan. Bake for 40-45 minutes, or until the center is set and barely jiggles.
- Remove the springform pan from the water bath and run a thin knife around the edge of the cheesecake. Let it cool completely on a wire rack, then refrigerate for at least 4 hours or overnight until fully chilled and firm.
- Preheat the oven to 350°F. Butter and lightly flour two 8-inch round cake pans, then line the bottoms with parchment paper rounds.
- In a medium bowl, whisk together the 2 cups flour, 2 tablespoons cornstarch, 2 teaspoons baking powder, and 1/4 teaspoon salt. Set aside.
- In a small bowl, stir together the 1/2 cup milk and 3 tablespoons lemon juice. Let it sit for 5 minutes to curdle and form a buttermilk substitute.
- In a large bowl, beat the 2/3 cup butter and 1 1/3 cups sugar on medium-high speed until pale and fluffy, about 4 minutes. Reduce speed to low and add the 2 eggs and 1 egg white one at a time, mixing well after each addition. Add the 1 1/2 teaspoons vanilla and 2 teaspoons lemon zest, mixing until combined.
- With the mixer on low, add the flour mixture in three additions, alternating with the milk mixture in two additions, beginning and ending with the flour mixture. Mix just until combined after each addition; do not overmix.
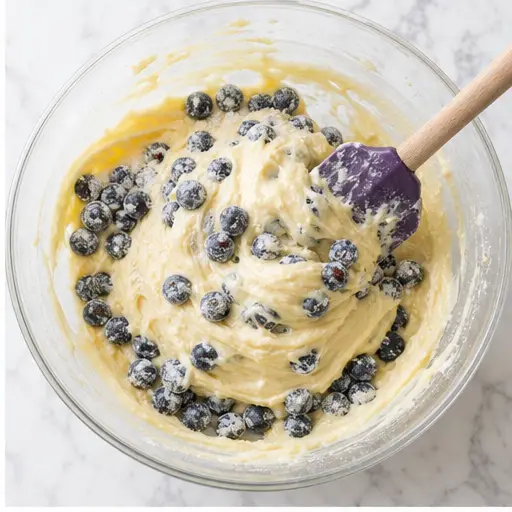
- In a small bowl, toss the 1 1/2 cups blueberries with 3-4 teaspoons flour to coat them. Gently fold the coated blueberries into the batter using a spatula, being careful not to crush the berries.
- Divide the batter evenly between the two prepared pans. Smooth the tops and bake for 30-35 minutes, or until a toothpick inserted into the center comes out clean. Let the cakes cool in the pans for 10-15 minutes, then turn them out onto a wire rack to cool completely.
- In a large bowl, beat the 12 oz cream cheese and 1 cup butter together on medium speed until smooth and no lumps remain. Do not overbeat before adding the sugar, or the frosting may become runny.
- Add the 1/4 teaspoon salt, 2 teaspoons vanilla, and 1 tablespoon lemon zest, mixing until well combined.
- Gradually add the powdered sugar, starting with 3 1/2 cups and adding more up to 4 1/2 cups until the frosting reaches your desired sweetness and thickness. Scrape down the sides of the bowl and beat on medium speed until smooth and fluffy.
- Place one lemon blueberry cake layer on a serving plate. Spread a thin layer of lemon cream cheese frosting over the top. Carefully place the chilled blueberry cheesecake layer (still in its springform pan ring, but remove the sides) on top of the frosting. Spread another thin layer of frosting over the cheesecake.
- Top with the second lemon blueberry cake layer. Frost the entire cake with the remaining lemon cream cheese frosting, smoothing the sides and top with an offset spatula. Decorate with lemon wedges and fresh blueberries if desired.
- Refrigerate the assembled cake for at least 45 minutes before slicing to allow the layers to set. This helps the cake hold together when cut. Store any leftovers in the refrigerator.
Nutrition
Notes
Tried this recipe?
Let us know how it was!Why This Lemon Berry Cheesecake Cake Works
I still remember the moment. My friend took a bite, looked at me, and whispered, “Did you buy this?” That’s the exact reaction this Lemon Berry Cheesecake Cake gets every time. It looks like it came from a fancy bakery, but here’s the thing it’s totally doable at home.
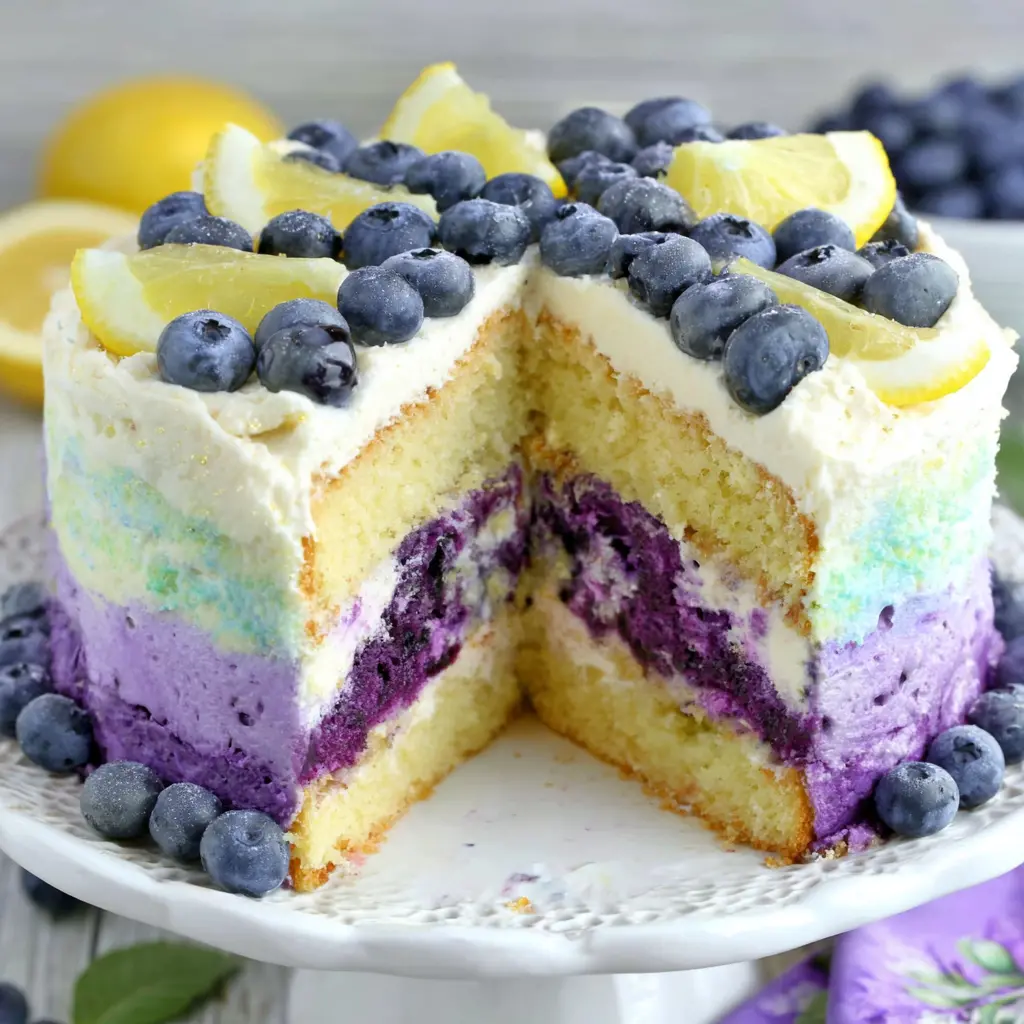
This isn’t just another layered cake. We’re talking about three distinct components that come together in one stunning dessert. A moist lemon blueberry cake that’s tender and bursting with fruit. A creamy blueberry cheesecake layer that’s dense and silky, no cracks allowed. And a tangy lemon cream cheese frosting that ties it all together. It’s the kind of cake that makes you the hero of any spring gathering.
The secret? Each component is designed to work together. The tart lemon cuts through the rich cream cheese. The sweet blueberries add pops of flavor in every bite. And the textures soft cake, creamy cheesecake, smooth frosting they create something truly special. If you’ve ever been intimidated by layered cakes, this one will change your mind.
Ingredients You’ll Need
Let’s talk about what goes into this beauty. The ingredient list looks long, but most of it is pantry staples. Here’s what you need for each part of the Lemon Berry Cheesecake Cake.
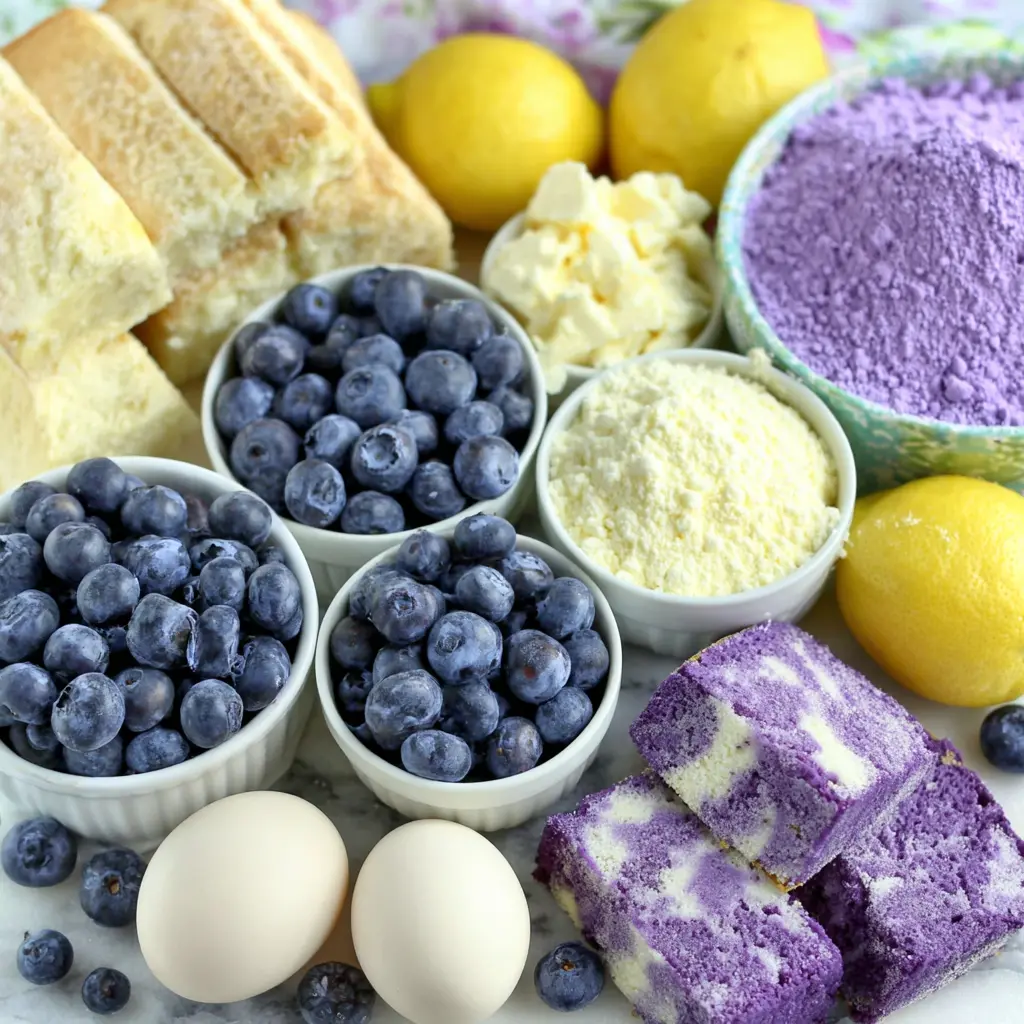
For the Blueberry Cheesecake Layer:
- Fresh blueberries you’ll blend them right into the cream cheese for that gorgeous color
- Full-fat cream cheese this is non-negotiable for a dense, creamy texture
- Granulated sugar and a little flour for structure
- Eggs plus an extra yolk the yolk adds richness and helps prevent cracking
- Sour cream and heavy cream these make the cheesecake extra silky
For the Lemon Blueberry Cake Layers:
- All-purpose flour with cornstarch the cornstarch gives a softer, more tender crumb
- Fresh lemon zest and juice Meyer lemons are amazing here if you can find them
- Whole milk mixed with lemon juice this creates a quick buttermilk that makes the cake super moist
- Fresh blueberries tossed in a bit of flour this keeps them from sinking to the bottom
For the Lemon Cream Cheese Frosting:
- Cream cheese and butter both need to be properly softened
- Powdered sugar start with 3 1/2 cups and add more if you want it sweeter or stiffer
- Lemon zest this gives the frosting that bright, fresh flavor
Recipe Expert Tip
Room temperature ingredients: This is the single most important tip for this entire recipe. Cold cream cheese creates lumps in your cheesecake and frosting. Cold butter won’t cream properly with sugar. Take everything out of the fridge at least an hour before you start. Your future self will thank you.
Step-by-Step Instructions
I’m going to walk you through each component of this Lemon Berry Cheesecake Cake. The key is to plan ahead the cheesecake layer needs at least 4 hours to chill, but overnight is better. Trust me on this.
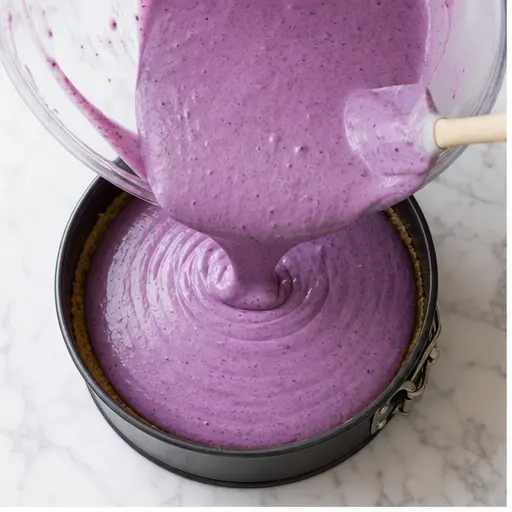
Making the Blueberry Cheesecake Layer
This is where the magic starts. You’ll pulse fresh blueberries right into the cream cheese using a food processor. It creates this gorgeous lavender-purple batter that’s so pretty you’ll want to eat it with a spoon. But don’t.
The water bath is crucial here. You wrap your springform pan in foil, place it in a larger roasting pan, and pour boiling water halfway up the sides. This gentle, even heat is what prevents cracking. The cheesecake is done when the center jiggles like firm Jell-O not liquid, but not completely set either. It will continue to set as it cools.
Let it cool completely on the counter, then refrigerate for at least 4 hours. Overnight is better. The cheesecake needs to be fully firm before you try to stack it.
Baking the Lemon Blueberry Cake Layers
These cake layers are where the lemon really shines. You’ll cream the butter and sugar until pale and fluffy about 4 minutes. Don’t rush this step. It’s what gives the cake its light, tender texture.
Here’s a trick I learned the hard way: when you add the flour mixture and the buttermilk mixture, do it in three additions, starting and ending with the flour. And mix just until combined. Overmixing develops gluten, and gluten makes tough cake. We don’t want tough cake.
The blueberries get tossed in a little flour before folding them into the batter. This is the secret to keeping them suspended throughout the cake instead of sinking into a sad pile at the bottom. Be gentle when you fold you want the berries distributed evenly, not crushed into purple streaks.
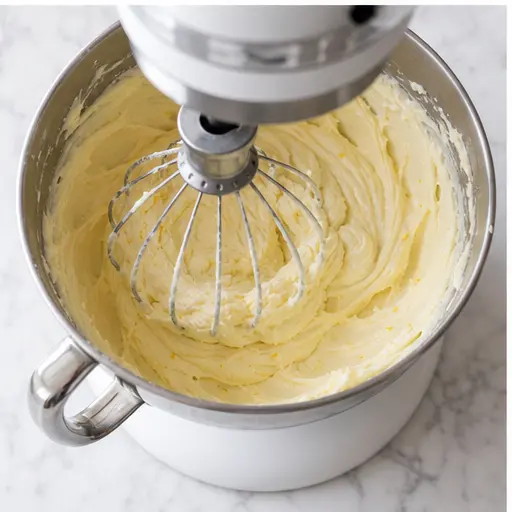
Whipping Up the Lemon Cream Cheese Frosting
This frosting is my favorite part. It’s tangy, creamy, and perfectly sweet. The key is to beat the cream cheese and butter together until completely smooth no lumps allowed. Then add your powdered sugar gradually.
I start with 3 1/2 cups of powdered sugar and taste it. If you want it sweeter or stiffer, add more. The lemon zest goes in at the end, and it gives the frosting this incredible fresh flavor that cuts through all the richness.
One thing I learned: if your frosting seems too soft, pop it in the fridge for 15 minutes before you try to spread it. Cream cheese frosting gets softer as you work with it, so a little chill helps it hold its shape.
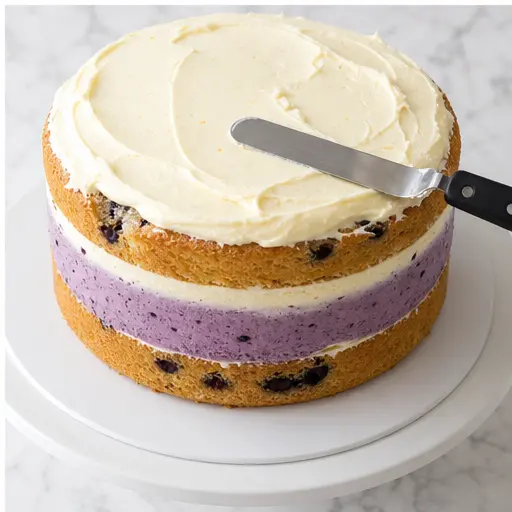
Assembling the Cake
This is where it all comes together. Start with one lemon blueberry cake layer on your serving plate. Spread a thin layer of frosting on top this acts as glue for the cheesecake layer. Carefully place the chilled cheesecake on top. Then spread another thin layer of frosting over the cheesecake.
Top with the second cake layer. Now you’re ready to frost the whole thing. Don’t worry if it’s not perfect a rustic, swoopy frosting job looks intentional and beautiful. Decorate with fresh blueberries and lemon wedges if you want that extra wow factor.
Here’s the most important step: refrigerate the assembled cake for at least 45 minutes before slicing. This lets everything set up so your slices come out clean and beautiful.
Tips for Success
I’ve made this Lemon Berry Cheesecake Cake more times than I can count. Here are the things I’ve learned that make the difference between good and spectacular.
- Don’t overmix the cheesecake batter. Mix on low speed and stop as soon as everything is combined. Overmixing incorporates too much air, which causes cracks as the cheesecake bakes and cools.
- Use a water bath for the cheesecake. I know it’s a pain, but it’s the best way to get a crack-free surface. The steam keeps the cheesecake moist and prevents it from drying out.
- Cool the cheesecake slowly. After baking, turn off the oven and crack the door open. Let the cheesecake sit in there for an hour before you take it out. This gradual cooling prevents sudden temperature changes that cause cracking.
- Toss berries in flour. This simple step prevents them from sinking to the bottom of your cake layers. It also absorbs some of the berry juice so it doesn’t make your batter too wet.
- Chill between layers. When you’re assembling, a quick chill after adding each layer helps everything stay in place. Even 10 minutes in the fridge makes a difference.
- Use a hot knife for clean slices. Dip your knife in hot water, wipe it dry, then cut. The heat helps the knife glide through the frosting and cheesecake without dragging.
Common Mistakes to Avoid
❌ Cheesecake cracks on top. This usually means the oven was too hot, the batter was overmixed, or the cheesecake cooled too quickly. Use a water bath, mix gently, and let it cool slowly in the oven.
❌ Cake layers are tough or dry. Overmixing the batter develops gluten. Mix just until the flour disappears. Also check your oven temperature an oven that runs hot will dry out your cake.
❌ Frosting is too runny. Your cream cheese or butter was too soft, or you overbeat it. Chill the frosting for 15-20 minutes before using. If it’s still runny, add more powdered sugar.
❌ Berries sank to the bottom. You forgot to toss them in flour. Next time, coat your berries in a tablespoon of flour before folding them into the batter.
Storage and Leftovers
This cake actually gets better after a day in the fridge. The flavors meld together, and the texture becomes even more luscious. Here’s how to store it properly.
Refrigerator: Store the assembled cake in an airtight container in the fridge for up to 5 days. If you don’t have a container tall enough, use a cake carrier or cover it loosely with plastic wrap. Let it sit at room temperature for about 15 minutes before serving this takes the chill off and lets the flavors shine.
Freezer: You can freeze the individual components. The cake layers can be wrapped tightly in plastic wrap and frozen for up to 3 months. The cheesecake layer freezes beautifully too. Just thaw everything in the fridge overnight before assembling.
Make-Ahead Strategy: This is my favorite way to approach this cake. Make the cheesecake layer two days before. Make the cake layers the next day. Make the frosting and assemble everything the day you plan to serve. It breaks the work into manageable chunks and makes the whole process feel easy.
Serving Suggestions
This Lemon Berry Cheesecake Cake is a showstopper all on its own, but here are a few ways to make it even more special.
- Fresh berries on top a pile of fresh blueberries, raspberries, and sliced strawberries makes it look like a garden party in cake form
- Lemon wedges or curls a few thin lemon slices or curls of lemon zest add a bright pop of color
- Whipped cream on the side a dollop of lightly sweetened whipped cream is never a bad idea
- For a red, white, and blue theme this cake is perfect for Memorial Day or Fourth of July with its natural color scheme
What to drink with it: A tall glass of cold milk is classic. For something fancier, a sparkling lemonade or iced tea pairs beautifully with the citrus notes.
Frequently Asked Questions
You’ve got this. I know this Lemon Berry Cheesecake Cake looks complicated, but it’s really just three simple components that come together beautifully. Start the cheesecake a day ahead, take your time with each step, and don’t stress about perfection. The flavors are so good that even a slightly messy cake will taste amazing.
Your cake will be the star of the table. I promise.
If you make this recipe, I’d love to hear about it! Share your creation on Pinterest and tag me so I can see your beautiful work.
Source: Nutritional Information


