
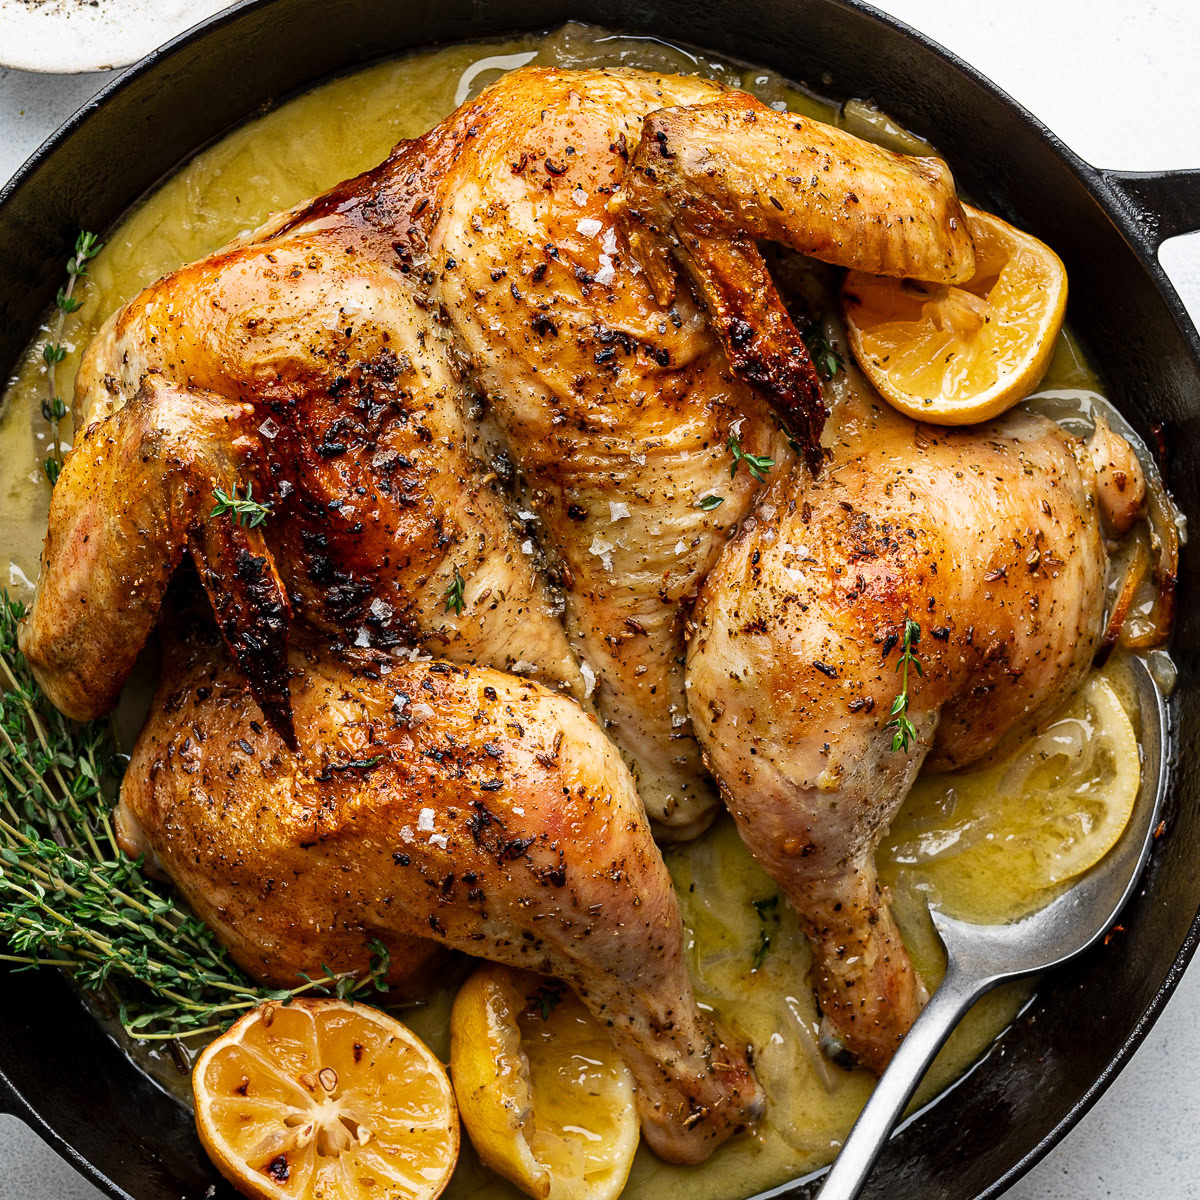
Ina Garten Lemony Chicken Dinner: Skillet-Roasted Bird with Wine
Ingredients
Method
- Preheat the oven to 450°F.
- In a large cast-iron skillet, spread the sliced onion, garlic, and lemon slices in an even layer.
- In a mini food processor, combine the thyme, fennel seeds, kosher salt, and black pepper. Pulse until ground. Transfer to a small bowl and whisk in the olive oil.
- Pat the chicken dry all over with paper towels—it must be very dry for crispy skin.
- Brush about one-third of the herb-oil mixture on the underside of the chicken. Place the chicken breast-side up in the skillet on top of the onion mixture. Pat the top dry again, then brush the remaining herb-oil mixture all over the top and sides.
- Nestle the two lemon halves (cut-side up) around the chicken. Roast for 35 minutes.
- Remove the skillet from the oven and pour the white wine around the chicken (avoid pouring directly on the skin). Return to the oven and roast for another 15–20 minutes, until a meat thermometer inserted into the thickest part of the breast registers 160°F–165°F.
- Squeeze the juice from the roasted lemon halves over the chicken and pan sauce. Cover tightly with foil and let rest 10–15 minutes (skip foil if you prefer extra-crispy skin).
- Carve the chicken into pieces—the missing backbone makes this easy. Sprinkle with flaky salt, if desired, and serve hot with all the pan juices.
Nutrition
Notes
Tried this recipe?
Let us know how it was!Why This Ina Garten Lemony Chicken Dinner Works
Let me tell you about the first time I made this ina garten lemony chicken dinner. It was a hot June evening, and I had friends coming over. I wanted something that felt special but wouldn’t have me sweating over a hot stove for hours. This recipe from the How Easy Is That? cookbook was my saving grace.
The chicken came out of the oven with skin so crispy it crackled when I carved it. The meat was impossibly juicy, and the pan sauce was this incredible mix of lemon, garlic, and thyme. My friend Sarah, who is not easily impressed, actually asked for the recipe. That’s when I knew this was a keeper.
What makes this lemony chicken recipe so foolproof? It’s the combination of techniques that Ina perfected. Spatchcocking the chicken ensures it cooks evenly, so you don’t end up with dry white meat and undercooked dark meat. The high heat of 450°F gives you that gorgeous golden skin. And the bed of onions, garlic, and lemon slices underneath creates a built-in sauce that’s pure magic.
I’ve made this ina garten lemony chicken dinner at least a dozen times since that first night, and it never fails. Trust me, you’ve got this. Even if you’ve never spatchcocked a chicken before, I promise it’s easier than it sounds.
Key Ingredients & Notes
The beauty of this ina garten lemony chicken dinner is that the ingredient list is short, but each one plays a crucial role. Let me walk you through what you’ll need and why it matters.
- Meyer lemons: These are Ina’s go-to, and for good reason. They’re sweeter and less acidic than regular lemons, with a floral aroma that’s just incredible. If you can’t find them at your local Ralphs or Whole Foods, regular lemons work fine. Just use half a lemon for the slices to avoid bitterness, since regular lemons have more pith.
- Whole fennel seeds: This is the secret ingredient that makes everyone ask what you did. They add this subtle, almost licorice-like warmth that pairs beautifully with the lemon. Don’t skip them.
- Fresh thyme: You want the leaves, not the stems. The earthy, slightly minty flavor is essential. If you only have dried, use 1 teaspoon instead of 2 teaspoons fresh.
- Good olive oil: Ina always says this, and she’s right. A California extra-virgin olive oil makes a real difference. It’s what carries all those herb flavors into the chicken.
- The chicken: A 4-pound whole chicken, spatchcocked. This is key for even cooking. Your butcher can do this for you, or you can do it yourself with sharp kitchen shears. I’ll show you how.
- Dry white wine: Something you’d actually drink, like a Sauvignon Blanc from Napa Valley. The wine deglazes the pan and creates the most incredible sauce. If you don’t cook with wine, you can substitute chicken broth with a splash of vinegar.
One thing I learned the hard way: don’t skimp on the salt. Ina uses Diamond Crystal kosher salt, which is less dense than table salt. If you’re using table salt, use half the amount. Season generously, and your lemony chicken with white wine will taste like it came from a restaurant.
How to Spatchcock a Chicken
Okay, let’s talk about spatchcocking. The word sounds intimidating, but it’s really just a fancy term for removing the backbone so the chicken lies flat. This is the single most important technique for this ina garten lemony chicken dinner, and I promise you can do it.
Here’s what you need: a pair of sharp kitchen shears. That’s it. Place the chicken breast-side down on a cutting board. You’ll see the backbone running down the center. Using your shears, cut along one side of the backbone, from the tail to the neck. Then cut along the other side. Remove the backbone and save it for stock if you want. Flip the chicken over and press down firmly on the breastbone until you hear a crack. The chicken should now lie flat.
If this feels too daunting, ask your butcher to do it. Most grocery store butchers will spatchcock a chicken for free. I’ve done it both ways, and honestly, having the butcher do it saves me about 5 minutes. But doing it yourself is oddly satisfying. You feel like a real chef.
Why spatchcock? Because it creates a flat, even surface. The chicken cooks about 30% faster, and every part reaches the right temperature at the same time. No more overcooked white meat. No more undercooked thighs. Just perfect, juicy chicken with crispy skin all over. This is the foundation of a great lemony chicken recipe.
Step-by-Step Instructions
Now let’s get cooking. I’m going to walk you through the four main stages of making this ina garten lemony chicken dinner. Think of these as the big picture steps that build on each other.
Stage 1: Prep the Aromatics and Herb Oil
Preheat your oven to 450°F. In a large cast-iron skillet, spread the sliced onion, garlic, and lemon slices in an even layer. This creates a flavorful bed that will infuse the chicken as it roasts. In a mini food processor, combine the thyme, fennel seeds, kosher salt, and black pepper. Pulse until ground. Transfer to a small bowl and whisk in the olive oil. The smell at this point is incredible. Fennel and thyme together are just meant for chicken.
Now, the most important step: pat the chicken dry all over with paper towels. I mean really dry. Get every nook and cranny. This is non-negotiable for crispy skin. If you have time, let it sit uncovered in the fridge for an hour. That extra drying time makes a huge difference.
Stage 2: Season and Arrange the Chicken
Brush about one-third of the herb-oil mixture on the underside of the chicken. Place the chicken breast-side up in the skillet on top of the onion mixture. Pat the top dry again with a paper towel. Then brush the remaining herb-oil mixture all over the top and sides. Don’t be shy. Every bit of that flavor needs to get on the chicken.
Nestle the two lemon halves, cut-side up, around the chicken. These will roast alongside the chicken and later get squeezed over the finished dish for a burst of fresh lemon flavor. The lemon halves are not just for show. They’re the secret to that bright, zesty finish.
Stage 3: Roast and Add Wine
Roast the chicken for 35 minutes. The kitchen will start to smell like a Barefoot Contessa dream. After 35 minutes, remove the skillet from the oven and pour the white wine around the chicken. Be careful not to pour it directly on the skin, or you’ll wash away all that beautiful herb oil. Return to the oven and roast for another 15 to 20 minutes.
Here’s the part where a meat thermometer is your best friend. Insert it into the thickest part of the breast, not touching bone. You’re looking for 160°F to 165°F. The chicken will continue to cook as it rests, so pulling it at 160°F is perfect. This is the secret to never having dry chicken again.
Stage 4: Rest, Carve, and Serve
Once the chicken is done, squeeze the juice from the roasted lemon halves over the chicken and pan sauce. This is where the magic happens. The roasted lemons have mellowed and sweetened, and their juice adds a final layer of brightness. Cover the skillet tightly with foil and let it rest for 10 to 15 minutes. If you’re a crispy skin fanatic, skip the foil. The skin will stay shatteringly crisp.
Carving is a breeze with a spatchcocked chicken. The missing backbone means you can easily cut through the joints. I usually separate the legs and thighs, then cut each breast half in half. Sprinkle with flaky sea salt, like Maldon, if you want that extra crunch. Serve hot with all those incredible pan juices.
Tips for the Best Lemon Chicken
Over the years, I’ve learned a few things that take this ina garten lemony chicken dinner from great to unforgettable. Here are my top tips.
- Pat the chicken dry. I said it before, but it’s worth repeating. Wet skin steams instead of crisps. Use paper towels and get every surface. If you have time, refrigerate uncovered for an hour.
- Use a meat thermometer. This is the single best investment you can make for cooking chicken. No more guessing. No more cutting into the chicken to check. Just insert and read.
- Don’t use too many lemon slices. The recipe calls for half a Meyer lemon, sliced. That’s plenty. Too many slices can make the sauce bitter because the pith releases bitterness as it cooks.
- Let the chicken come to room temperature. Take it out of the fridge 30 minutes before cooking. This ensures even cooking and prevents the outside from burning before the inside is done.
- Season generously. Ina’s recipes are never shy with salt and pepper. It’s what makes restaurant food taste so good. Don’t hold back.
- Rest the chicken. Those 10 to 15 minutes of resting allow the juices to redistribute throughout the meat. Cut into it too soon, and all those juices will run out onto the cutting board.
One common mistake I see is people covering the chicken with foil while it rests and then wondering why the skin is soggy. If you want that perfect crispy skin, leave the foil off. The chicken will stay plenty hot.
What to Serve with Lemony Chicken
This ina garten lemony chicken dinner is a complete meal in a skillet, but it loves company. The pan juices are begging to be soaked up by something. Here are my favorite pairings.
- Crusty sourdough bread: This is non-negotiable. Get a good loaf from a local bakery or even the bakery section at Trader Joe’s. Tear off a piece and mop up every drop of that lemony pan sauce.
- Roasted vegetables: Broccolini, asparagus, or green beans tossed in olive oil and salt, roasted at the same temperature as the chicken. They’ll be done in about 15 minutes. The slight char pairs beautifully with the bright chicken.
- A simple green salad: Arugula with a lemon vinaigrette is perfect. The peppery greens contrast with the rich chicken. It’s a summer chicken dinner idea that feels light and fresh.
- Orzo or rice: The lemony chicken with orzo is a classic combination. The small pasta catches all the sauce. Or try it with fluffy white rice or even cauliflower rice for a lighter option.
- Roasted baby potatoes: Toss them in the pan with the chicken during the last 20 minutes of cooking. They’ll absorb all those wonderful flavors.
For a truly California summer dinner, serve this with a glass of the same Sauvignon Blanc you used in the recipe. The bright citrus notes in the wine mirror the lemon in the chicken. It’s a perfect match.
Storage & Reheating
Leftovers from this ina garten lemony chicken dinner are a gift. The flavors actually get better after a day in the fridge. Here’s how to handle them.
Store leftover chicken and sauce in an airtight container in the refrigerator for up to 3 days. The key to reheating is to maintain that crispy skin. For small amounts, use a toaster oven or a skillet on the stovetop. The direct heat will re-crisp the skin. For larger amounts, preheat your oven to 300°F. Place the chicken in a baking dish with a little chicken broth, cover with foil, and bake for 15 minutes. Remove the foil and bake for another 5 to 10 minutes until the skin is crispy and the chicken is heated through.
Can you freeze it? Yes. Place the cooled chicken and sauce in a freezer-safe container. It will keep for up to 3 months. Thaw in the refrigerator overnight before reheating. The texture of the skin won’t be quite as crispy after freezing, but the flavor will still be fantastic. Use it in salads, sandwiches, or over pasta for a quick weeknight meal.
Make It Your Own
One of the things I love about this lemony chicken recipe is how adaptable it is. Here are a few ways to put your own spin on it.
- Swap the herbs: Don’t have thyme? Use fresh rosemary or oregano instead. The fennel seeds are still the star, but different herbs change the character completely.
- Add capers: Toss a tablespoon of capers into the skillet along with the wine. They add a briny pop that’s amazing with the lemon.
- Use chicken leg cuts: If you’re cooking for two, use bone-in, skin-on leg cuts instead of a whole chicken. Reduce the cooking time to about 30 to 35 minutes total. Same technique, smaller portions.
- Go dairy-free: This recipe is naturally dairy-free. Just make sure your bread or side dishes are also dairy-free if needed.
- Make it a sheet pan dinner: Ina Garten sheet pan chicken is a thing for a reason. Spread the aromatics on a sheet pan, add the chicken, and roast. The only difference is the pan juices will spread out more, so you might want to add a little extra wine.
The beauty of this recipe is that it’s forgiving. Once you understand the basic technique, you can play with flavors. But honestly, the original version is so good that I rarely change a thing.
Frequently Asked Questions
When you make this ina garten lemony chicken dinner, and you will, come back and tell me how it went. I want to hear about the crispy skin, the bright lemon flavor, and the compliments from your family. This is one of those recipes that becomes a staple, the one you turn to when you want to feel like a hero in the kitchen without breaking a sweat.
Happy cooking!
Source: Nutritional Information


