Why You’ll Love This Crispy Rice Beef Bowl
Okay, I’ll admit it. I used to spend way too much money on those overpriced takeout bowls. You know the ones. The crispy rice ones that cost like fifteen bucks and leave you wanting more. I always thought getting that golden, crunchy rice at home was some kind of culinary magic trick. Something you needed a deep fryer for, or maybe a special pan from a fancy kitchen store.
Spoiler alert: it’s not. Not even close.
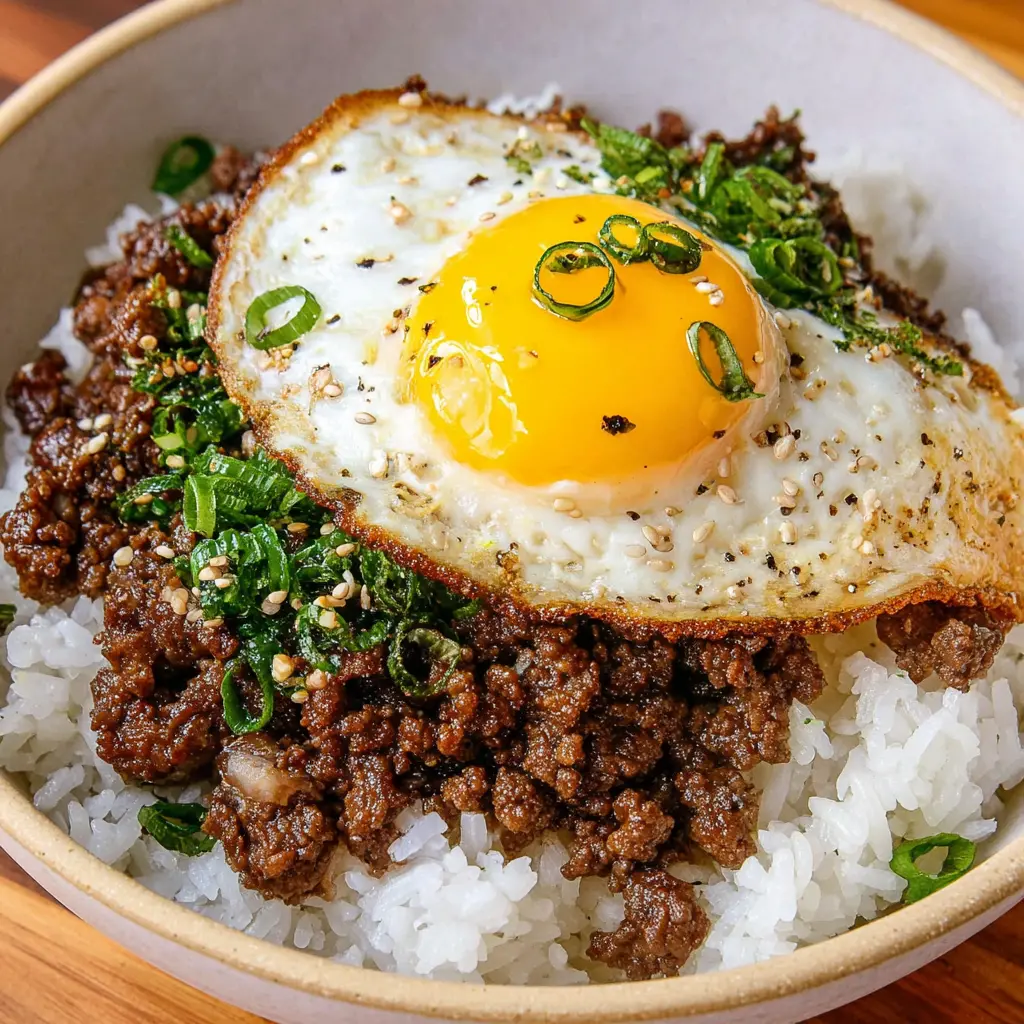
This Crispy Rice Beef Bowl is the real deal. It’s quick, it’s satisfying, and it tastes like it came from your favorite spot. But here’s the thing you can make it in your own kitchen in under 30 minutes. And I mean 20 minutes if you move fast. The secret isn’t complicated techniques or hard-to-find ingredients. It’s about letting the beef get nice and crispy, then coating it in this sweet and savory sauce that just… works.
I first made this on a Tuesday night after a long day. I was tired, hungry, and honestly just wanted something that felt special without the effort. I had some ground beef in the fridge and rice in the pantry. I figured, why not try? The first time, I burned the rice a little. But you know what? Those charred bits were actually delicious. It added this smoky flavor I didn’t expect. Now I look forward to those slightly crispy edges.
This bowl has become my go-to weeknight dinner. It’s the kind of meal that makes you feel like you’ve got your life together, even if you’re eating it in your sweatpants on the couch. Trust me, your dinner routine is begging for a shake-up. Let’s do this.
Ingredients for Crispy Rice Beef Bowl
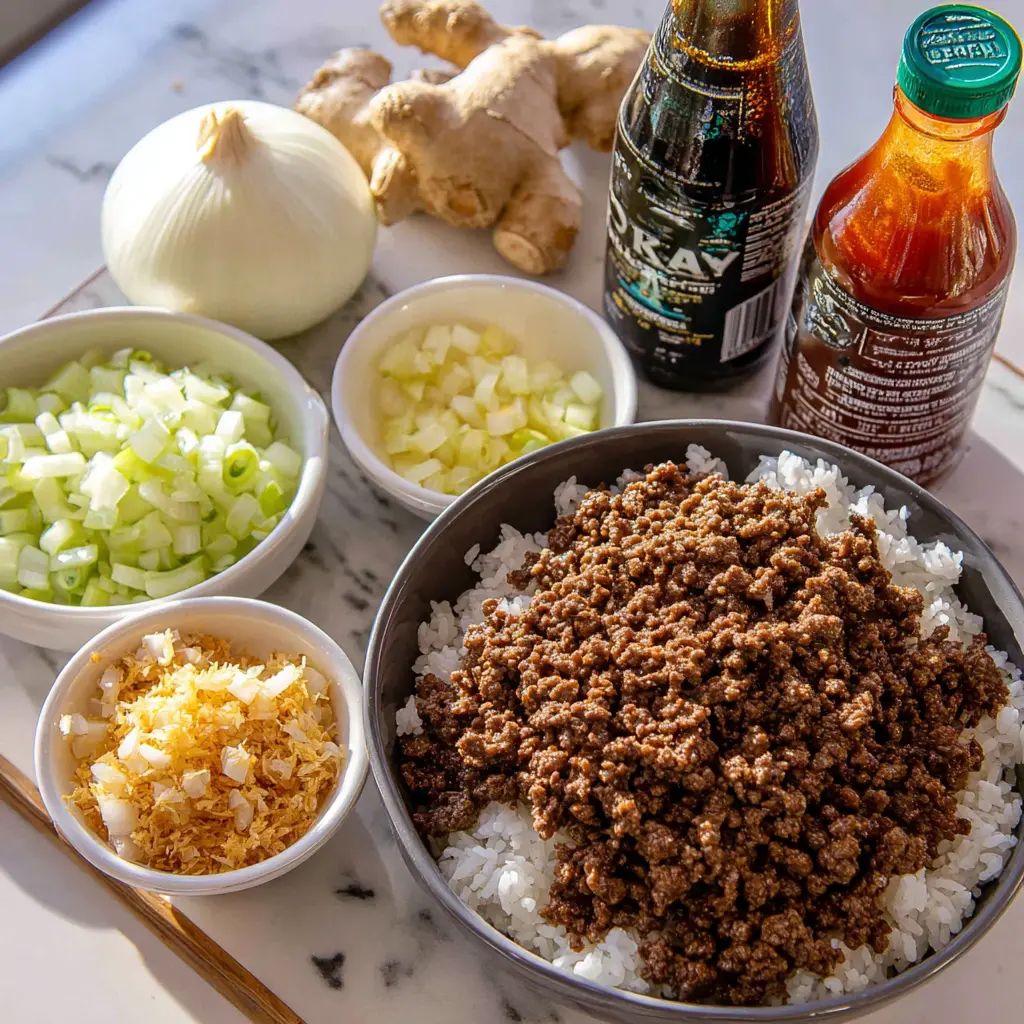
Here’s what you need. Nothing fancy, I promise. You probably have most of this stuff already.
For the Beef:
- 1 lb ground beef (I like using ground chuck with a bit more fat for extra flavor)
- 1 medium yellow onion, diced
- 4 cloves garlic, minced
- 1 tablespoon neutral oil (avocado or grapeseed works great)
For the Sauce:
- 4 tablespoons sweet Thai chili sauce
- 2 tablespoons vegetarian oyster sauce (regular works too, but this is what I had)
- 2 tablespoons light soy sauce
- 2 tablespoons rice vinegar
- 1 tablespoon sesame oil
- 1 inch fresh ginger, grated
- 2 tablespoons water
For the Bowls:
- Cooked jasmine rice (day-old is best, but fresh works too)
- Fried eggs (one per bowl, totally optional but highly recommended)
- Sesame seeds for garnish
- Green onions, thinly sliced
That’s it. No weird ingredients you’ll never use again. The sweet Thai chili sauce and vegetarian oyster sauce might be new to you, but you can find them at any grocery store. Trader Joe’s has both. Whole Foods too. And once you have them, you’ll want to put them on everything.
Oh, and about the crispy rice technique I’ll get to that in a minute. But the key is using leftover rice if you can. It’s drier and gets crunchier faster. If you’re making fresh rice, just spread it out on a baking sheet to cool and dry out a bit before using.
Step-by-Step Instructions
Let’s walk through this together. I’ll show you how to get that perfect crunchy rice bowl without any stress.
Stage 1: Get That Beef Crispy
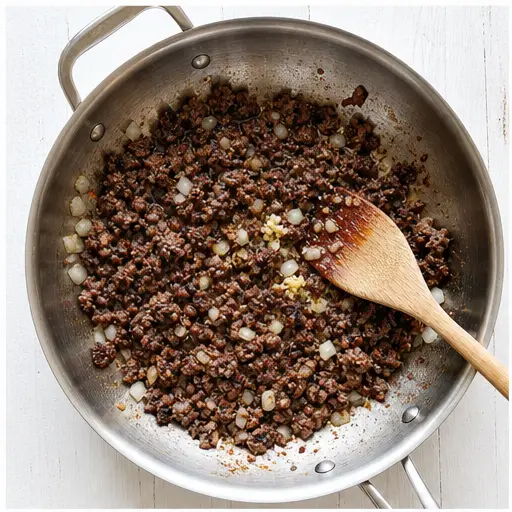
Heat your largest skillet or wok over medium-high heat. Add the oil and let it get shimmering you want it hot. Then add the ground beef, diced onion, and minced garlic. Here’s the most important tip: don’t stir it too often. I know it’s tempting to keep moving things around, but you need to let the beef sit and develop a crust. Let it brown undisturbed for a few minutes, then break it apart with your spatula. Let it sit again. Do this for about 10 minutes total. You’ll see the beef transform from gray to deep golden brown. Those crispy edges are what we’re after.
Stage 2: Whisk Up the Magic Sauce
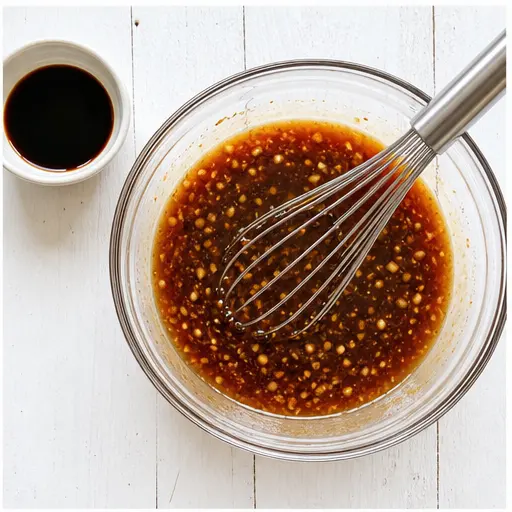
While the beef is doing its thing, make the sauce. Grab a small bowl and whisk together the sweet Thai chili sauce, vegetarian oyster sauce, soy sauce, rice vinegar, sesame oil, water, and grated ginger. That’s it. No cooking required. The smell alone will make you hungry. The sesame oil gives it that nutty aroma, and the ginger adds a little warmth. This sauce is what makes the whole dish sing.
Stage 3: Combine and Caramelize
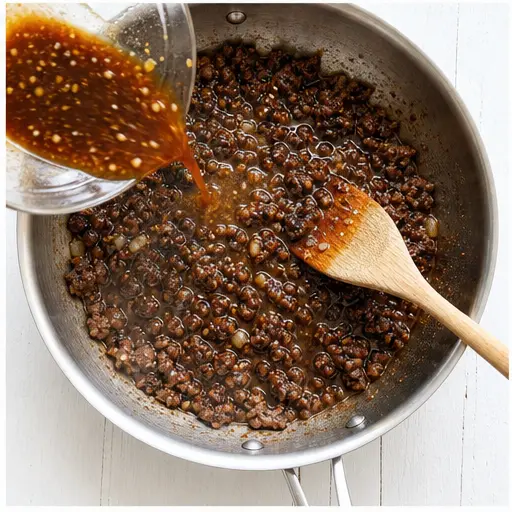
Once your beef is perfectly crispy, pour the sauce right over it. Stir it around to coat everything. Let it cook for another 1-2 minutes, stirring occasionally. You’ll see the sauce start to thicken and get all glossy. It’ll caramelize on the beef, creating this sticky, savory coating that’s just incredible. The kitchen will smell amazing at this point. Your roommates or family will start wandering in asking what’s for dinner.
Stage 4: Assemble Your Bowls
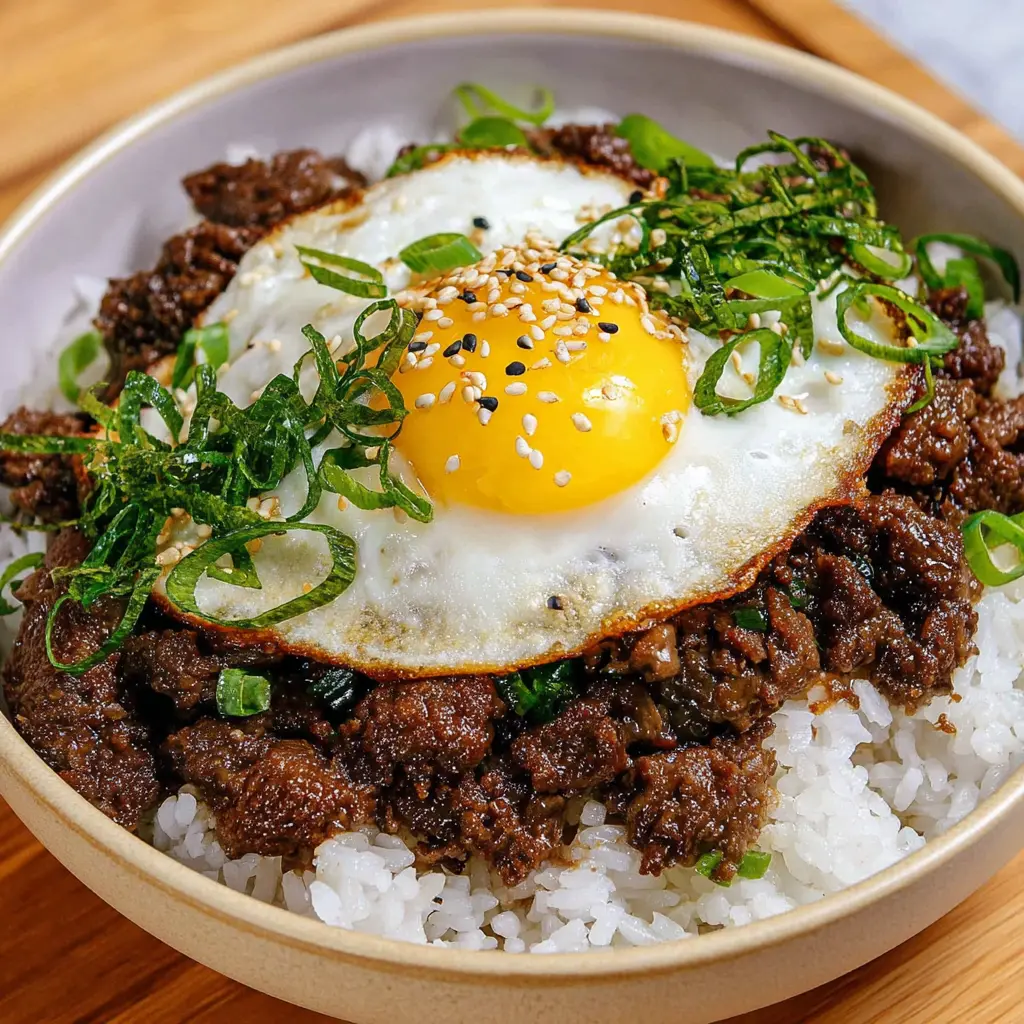
Divide your cooked jasmine rice among four bowls. Top each with a generous portion of the crispy beef. If you’re doing the fried egg (and you really should), fry it up in a separate pan with a little oil. Sunny-side up is perfect so the yolk runs into the rice. Sprinkle sesame seeds and sliced green onions over everything. That’s it. You’re done.

Tips for the Best Crispy Beef
I’ve made this crispy rice beef bowl more times than I can count. Here are the things I’ve learned along the way.
- Let the beef brown undisturbed. This is the number one tip. If you stir constantly, you’ll end up with steamed beef instead of crispy beef. Give it space to develop that crust.
- Use ground chuck with higher fat content. The fat renders out and helps create those crispy edges. Lean ground beef won’t get as crunchy.
- Don’t crowd the pan. If you’re doubling the recipe, use two skillets or cook in batches. Overcrowding creates steam, and steam is the enemy of crispiness.
- Day-old rice is your friend. Fresh rice has more moisture. Leftover rice from the fridge is drier and will crisp up faster in the pan. If you’re using fresh rice, spread it out on a baking sheet to cool and dry for 10 minutes.
- Listen for the sizzle. When you add the sauce, it should sizzle loudly. That’s the sound of flavor happening. If it doesn’t sizzle, your pan isn’t hot enough.
Common Mistakes to Avoid
❌ Stirring the beef too often: This prevents the crust from forming. ✅ Solution: Let it sit for 2-3 minutes before breaking it apart.
❌ Adding sauce too early: The beef won’t be crispy enough. ✅ Solution: Wait until the beef is deeply browned, about 10 minutes.
❌ Using wet rice: Freshly cooked rice won’t crisp well. ✅ Solution: Use day-old rice or spread fresh rice out to dry.
Variations and Substitutions
One of the best things about this Asian beef bowl is how flexible it is. Here are some ways to make it your own.
Different Proteins: Not a beef person? No problem. Swap the ground beef for ground turkey, ground chicken, or even crumbled tofu. The cooking time might vary a bit turkey and chicken cook faster, so keep an eye on them. Tofu needs a little more time to get crispy, so press it well first.
Vegetable Add-Ins: This is a great way to use up whatever veggies are lurking in your fridge. Toss in some shredded carrots, thinly sliced snow peas, or bell peppers. Add them when you add the onion so they soften up. I’ve also added steamed broccoli on the side for extra greens.
Sauce Swaps: If you don’t have sweet Thai chili sauce, mix 3 tablespoons honey with 1 tablespoon sriracha. It’s not exactly the same, but it’s close. And if you can’t find vegetarian oyster sauce, regular oyster sauce works perfectly fine.
Rice Options: Jasmine rice is classic, but brown rice works too. It just needs a little more time to crisp up. Cauliflower rice is a great low-carb option, though it won’t get as crunchy.
Make It Gluten-Free: Use tamari or coconut aminos instead of soy sauce. Check that your oyster sauce is gluten-free too. Most sweet Thai chili sauces are naturally gluten-free.
How to Store and Reheat Leftovers
Let’s be real leftovers from this crispy rice beef bowl are a gift. But you need to know how to handle them so the rice stays crunchy and the beef stays delicious.
Storing: Keep the rice and beef in separate containers. If you store them together, the rice will absorb moisture from the beef and get soggy. The beef will keep in the fridge for up to 3 days. The rice, about 3-4 days.
Reheating the Beef: The best way is in a skillet over medium heat. Add a splash of water or a little more sauce to bring back the moisture. Let it sizzle for a few minutes until heated through. The microwave works in a pinch, but the texture won’t be as good.
Reheating the Rice: To get that crunch back, reheat the rice in a separate skillet with a little oil. Spread it out and let it sit without stirring for a few minutes. You’ll hear it sizzle and see the bottom turn golden. That’s what you want.
Make-Ahead Tip: You can prep the sauce and chop the onion and garlic up to a day in advance. Store them in the fridge in separate containers. When you’re ready to cook, everything comes together in minutes.
Frequently Asked Questions
Go make this tonight. Seriously. Your dinner routine is begging for a shake-up. This crispy rice beef bowl is the kind of meal that makes you feel like a rockstar in the kitchen, even on a random Tuesday. And when you take that first bite that perfect crunch of the rice, the savory beef, the runny yolk you’ll wonder why you ever spent money on takeout.
If you make this, tag me or share it. I’d love to see how it turns out. And if you have any questions, just ask. I’m always here to help.
Pin this recipe for later on Pinterest you’ll want to come back to it.
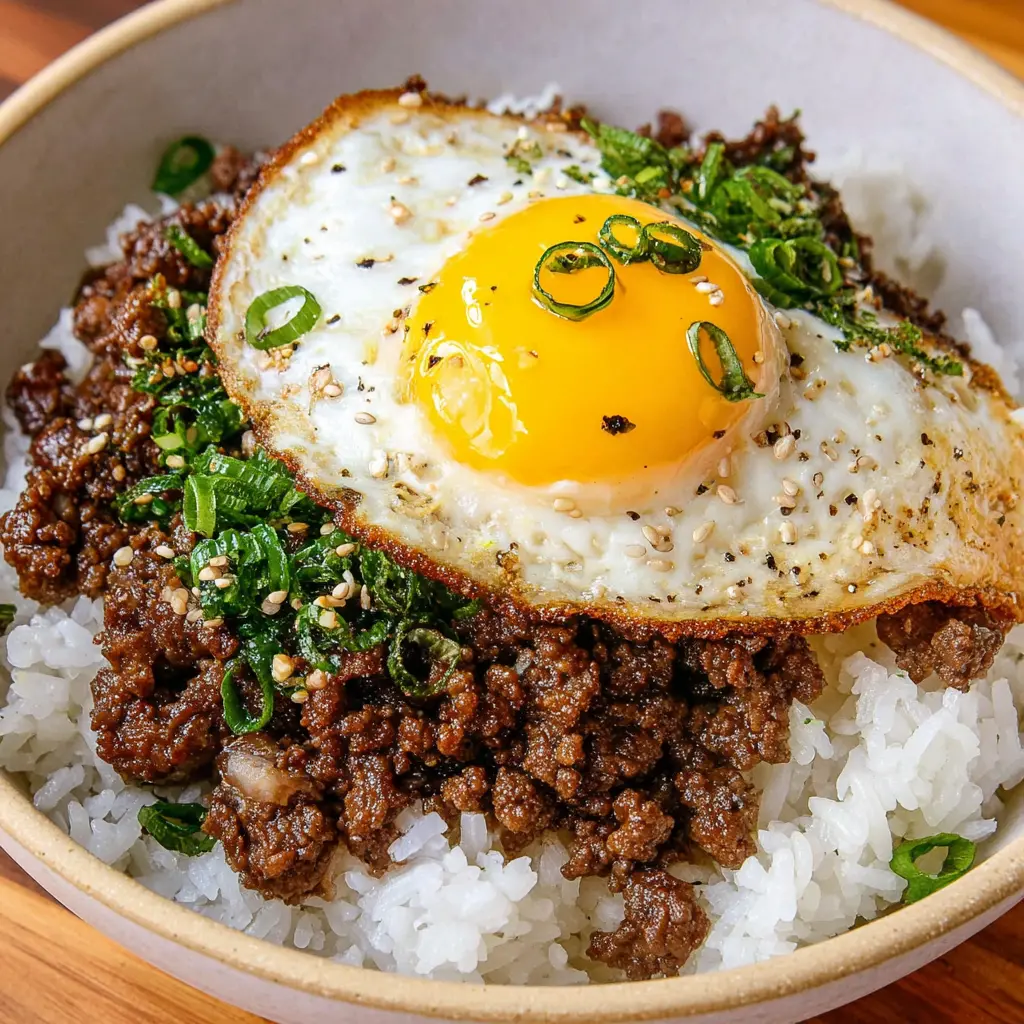
California Crispy Rice Beef Bowl
Ingredients
Method
- In a large skillet or wok, heat the oil over medium-high heat until shimmering.
- Add the ground beef, onion, and garlic. Cook, breaking the beef apart with a spatula, until browned and crispy, about 10 minutes. Do not stir too often; let the beef develop a crust.
- While the beef cooks, prepare the sauce.
- In a small bowl, whisk together the sweet Thai chili sauce, vegetarian oyster sauce, soy sauce, rice vinegar, sesame oil, water, and grated ginger until smooth.
- Once the beef is crispy, pour the sauce over it. Cook for 1-2 minutes, stirring occasionally, until the sauce thickens and coats the beef. Let it get nice and caramelized.
- Divide the cooked rice among four bowls.
- Top each bowl with a generous portion of the crispy beef.
- Add a fried egg on top, if desired.
- Garnish with sesame seeds and sliced green onions. Serve with your favorite veggies or a simple salad.
Nutrition
Notes
Tried this recipe?
Let us know how it was!Source: Nutritional Information