
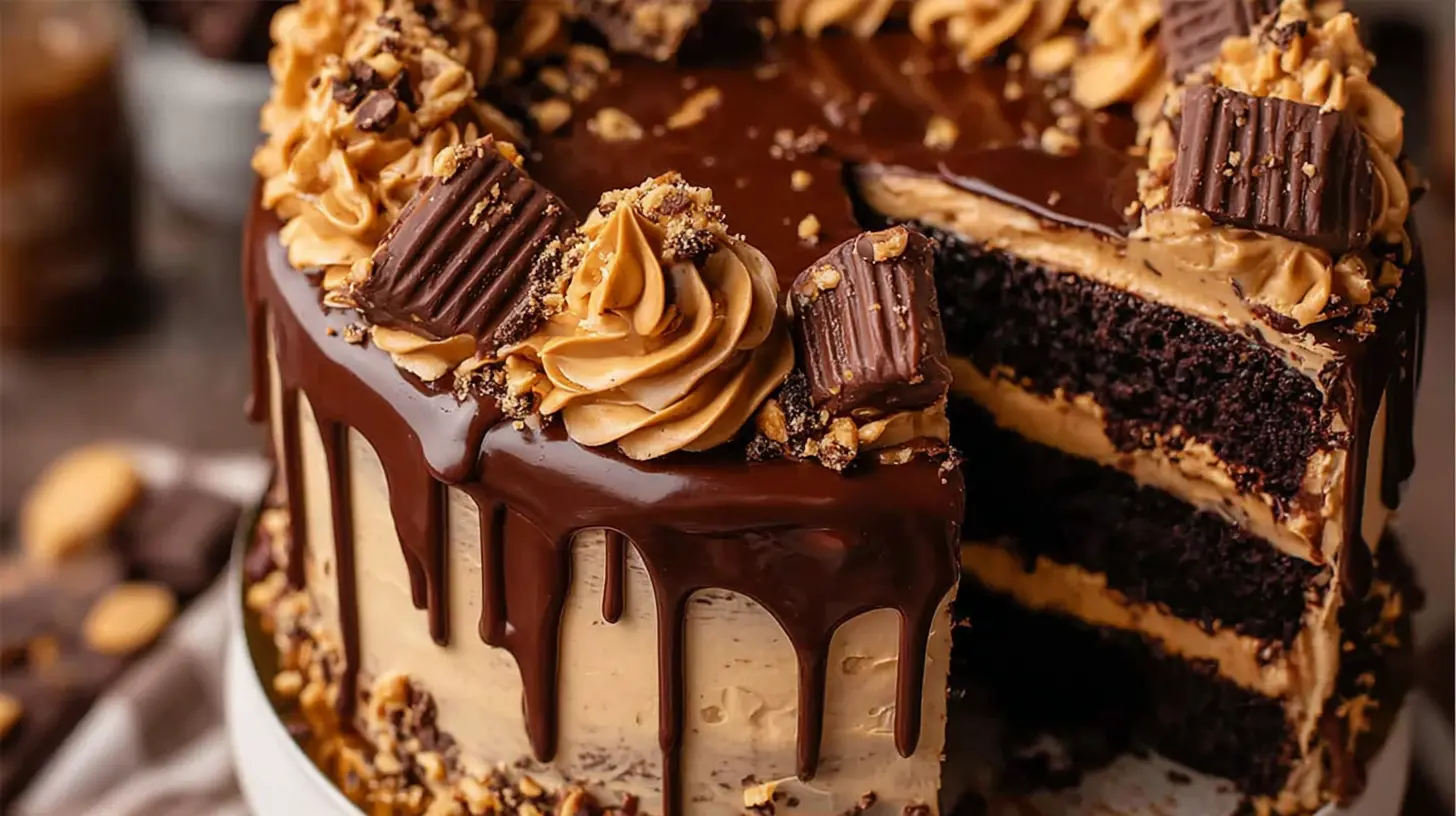
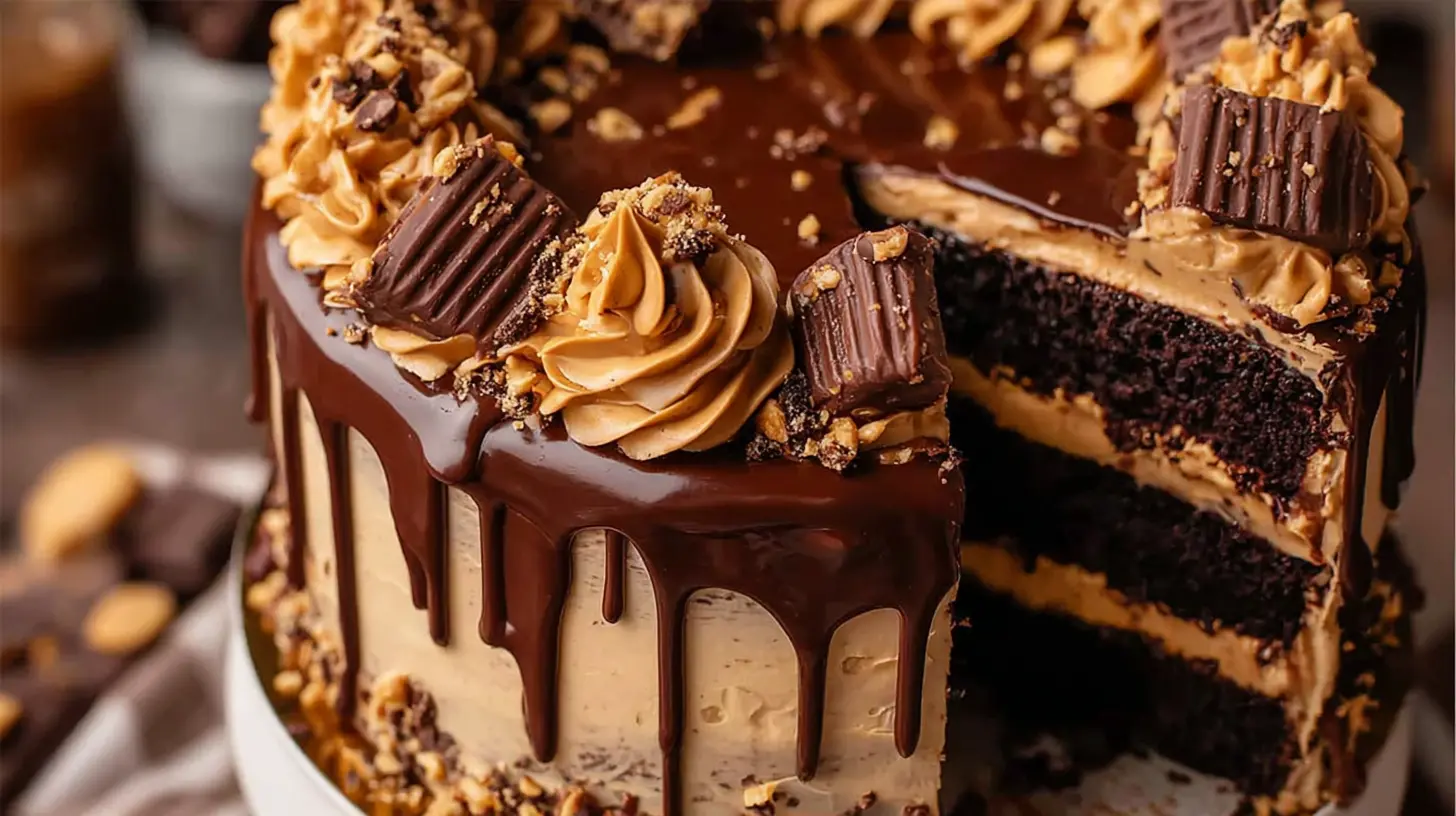
Showstopping Chocolate Peanut Butter Drip Cake
Ingredients
Method
- Preheat oven to 350°F. Butter three 8-inch round cake pans and set them aside.
- Whisk together flour, cocoa powder, baking powder, baking soda, and salt in a medium bowl.
- Combine water and sugar in a medium saucepan over medium-high heat. Bring to a boil and stir for about 1 minute until the sugar dissolves. Remove from heat, then add chocolate and butter, stirring occasionally until melted. Chill the butter mixture in the fridge for 10 minutes.
- Whisk in vegetable oil and vanilla extract. Quickly beat eggs into the melted chocolate mixture until well combined. Whisk in the dry ingredients until smooth, mixing just until the batter comes together; do not over-stir.
- Divide the cake batter evenly among the prepared pans. Bake for 20 to 23 minutes, or until a toothpick inserted into the center comes out clean.
- Cool cakes in their pans until cool to the touch, then frost them.
- Cream butter and peanut butter in a stand mixer or with a hand mixer in a bowl. Add vanilla and salt. Gradually add powdered sugar, half a cup at a time, beating well on medium speed. Scrape the sides and bottom of the bowl as needed.
- Once all sugar is mixed in and the icing appears dry, add milk one teaspoon at a time. Beat at medium speed until the icing is perfectly light and fluffy.
- Assemble the three cake layers, applying a thick layer of frosting between each. Apply a thin crumb coat to the top and sides. Place the cake in the freezer for about 10 minutes to harden the crumb coat.
- Apply one final thick and even layer of frosting around the outside of the cake. Top with chocolate sauce and decorate, if desired.
Nutrition
Notes
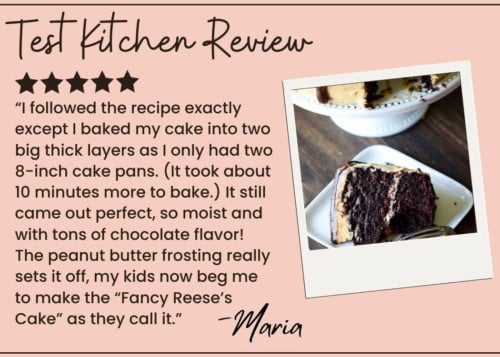 Learn more about our Test Kitchen promise!
Tried this recipe?
Let us know how it was!Why This Chocolate Peanut Butter Drip Cake Actually Works
I’ll be honest with you. Drip cakes used to intimidate me. I’d scroll through Instagram and see these perfect glossy drips and think, “There’s no way I’m pulling that off.” But this chocolate peanut butter drip cake? It’s the one that changed my mind. The trick is that it’s actually built on a super forgiving chocolate cake base that stays moist for days. And the ganache drip itself? Way simpler than it looks.
Here’s the thing. Most people think the hard part is the drip. But honestly, the real magic is in the peanut butter frosting. It’s soft and creamy, not overly sweet, and it pairs so perfectly with that rich chocolate cake. I mean, you could skip the drip entirely and just have a really good layer cake. But the drip is what makes it a showstopper, right?
This is one of those recipes that looks like you spent all day in the kitchen. But really, it’s just a few straightforward steps. And the payoff is huge. People lose their minds over this cake. I’ve brought it to birthday parties, holiday dinners, and even just a random Tuesday because why not? Every time, someone asks for the recipe.
What You Need to Get Started
Before we jump in, let’s talk ingredients. I’m not going to list everything here because the recipe card handles that. But there are a few things worth mentioning. For the chocolate cake layers, you’ll want good quality cocoa powder. I prefer dark cocoa powder for that deep, almost fudgy flavor. Dutch-process works great too. If you only have natural cocoa powder, I’d recommend using my standard chocolate cake recipe instead and baking in three pans.
For the peanut butter frosting, use creamy peanut butter. I know, it’s tempting to use natural peanut butter because it’s healthier. But here’s the problem: natural peanut butter separates and has a different consistency. It won’t whip up into that light, fluffy frosting you’re after. Jif or Skippy are my go-to brands. They work perfectly every time.
And for the ganache drip? Heavy cream and dark chocolate. That’s it. The quality of the chocolate matters here. Use something you’d actually enjoy eating. Ghirardelli or Guittard are great options you can find at Ralphs or Vons. I wouldn’t use chocolate chips for this because they have stabilizers that can affect the texture.
One more thing. Hot water in the cake batter. Or even better, hot brewed coffee. If you’ve used coffee in chocolate cake before, you know it doesn’t taste like coffee. It just makes the chocolate flavor deeper and more complex. Trust me on this.
Step-by-Step Instructions for the Perfect Cake
Let’s walk through this together. The process is straightforward, but a few little things make a big difference.
Making the Chocolate Cake Layers
Start by preheating your oven to 350°F. Grease three 8-inch round cake pans and line the bottoms with parchment paper. I like to use baking strips on the pans too. They help the layers bake flat so you don’t have to level them later. If you don’t have baking strips, you can wrap the pans with damp paper towels and aluminum foil. It works surprisingly well.
Whisk your dry ingredients together in a large bowl. The flour, cocoa powder, baking powder, baking soda, and salt. In another bowl, mix the hot water (or coffee), buttermilk, vegetable oil, vanilla, and eggs. Then combine the wet and dry ingredients. Mix until just combined. Overmixing will make the cake tough, so stop as soon as you don’t see any flour streaks.
Divide the batter evenly between the three pans. Bake for about 22 to 25 minutes. You’ll know they’re done when a toothpick inserted in the center comes out with just a few moist crumbs. The edges should be pulling away from the pan slightly. Let them cool in the pans for about 10 minutes, then turn them out onto a wire rack to cool completely. And I mean completely. Frosting a warm cake is a recipe for disaster.
Making the Peanut Butter Frosting
This frosting is one of my favorites. It’s soft and creamy with a strong peanut butter flavor. Not too sweet, which I love. Start by beating the butter until it’s smooth and creamy. Then add the peanut butter and beat until combined. Add the vanilla and salt. Then gradually add the powdered sugar, alternating with the evaporated milk. Beat until it’s light and fluffy.
If you want a sweeter or stiffer frosting, just add more powdered sugar. A cup at a time until you get the consistency you want. I like it soft because it pairs so well with the rich chocolate cake and the ganache. But you do you.
How to Assemble and Decorate This Showstopper
This is where the magic happens. But first, a few things to keep in mind.
Leveling and Layering
Once your cake layers are completely cool, it’s time to level them. Use a serrated knife or a cake leveler to trim off the domed tops. This gives you a flat, stable base for stacking. The chocolate cake layers can be a bit fragile, so be gentle. If they crumble a bit, don’t worry. That’s what the crumb coat is for.
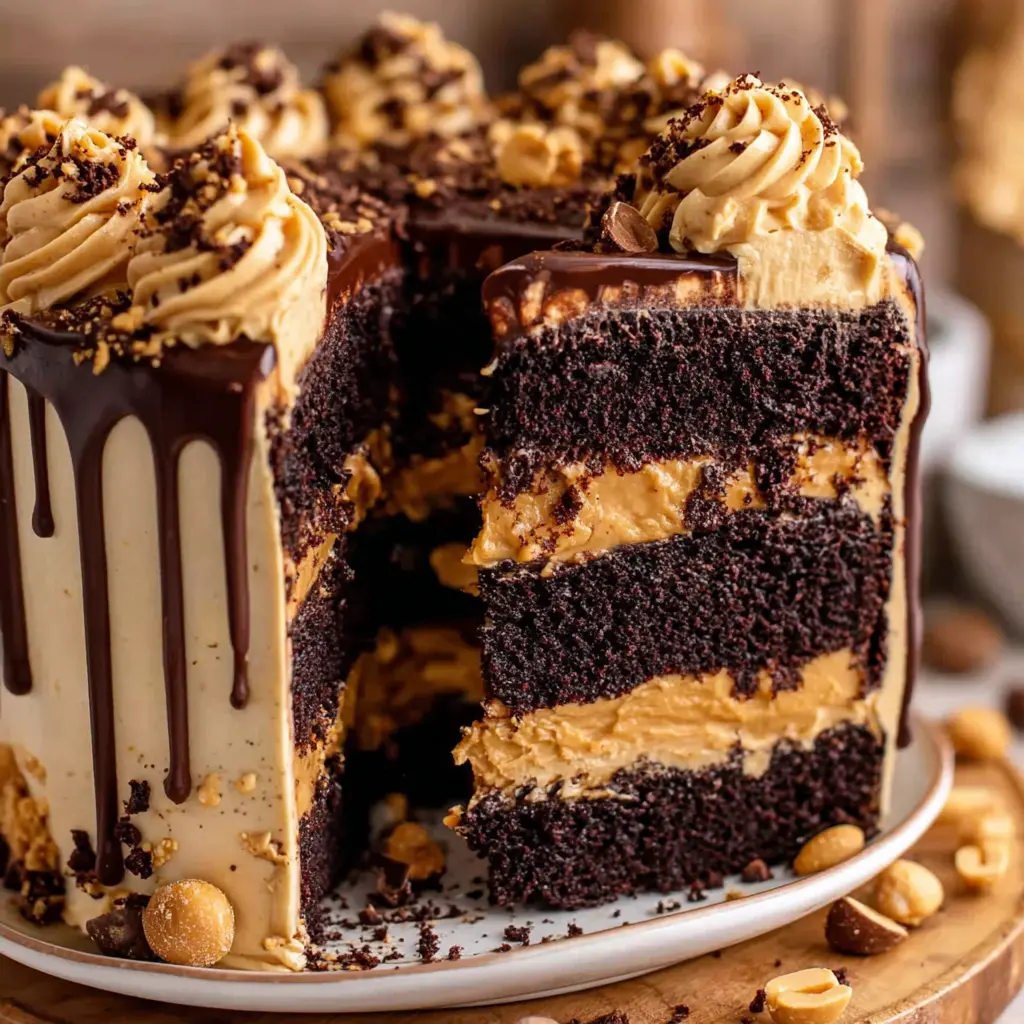
Place one layer on your cake stand or board. Add a generous amount of peanut butter frosting and spread it evenly. Repeat with the second and third layers. Then apply a thin crumb coat all over the cake. Pop it in the fridge for about an hour. This sets the frosting and makes the final coat so much easier.
After the crumb coat is set, apply the final layer of frosting. Smooth it out as best you can. It doesn’t have to be perfect because the ganache drip will cover the top and some of the sides. But a smooth base makes the drip look cleaner.
The Ganache Drip: The Star of the Show
This is the part everyone asks about. How do you get those perfect glossy drips? It’s all about temperature and timing. Here’s what works for me.
First, make the ganache. Heat the heavy cream until it’s just simmering. Pour it over the chopped dark chocolate and let it sit for a minute. Then stir until smooth. Let it cool slightly. You want it to be warm but not hot. If it’s too hot, it will run right off the cake and melt the frosting. If it’s too cool, it will just sit there and not drip at all.
Here’s my favorite test. Turn a drinking glass upside down. Spoon a little ganache on the bottom and push it over the edge. If it drips slowly and steadily, it’s perfect. If it drips too fast, let it cool more. If it doesn’t drip at all, warm it up gently.
Now, chill your frosted cake in the freezer for about 20 to 30 minutes. A cold cake is key. It helps the ganache set as soon as it hits the surface. I like to use a squeeze bottle for the drips, but a piping bag with a small tip works too.
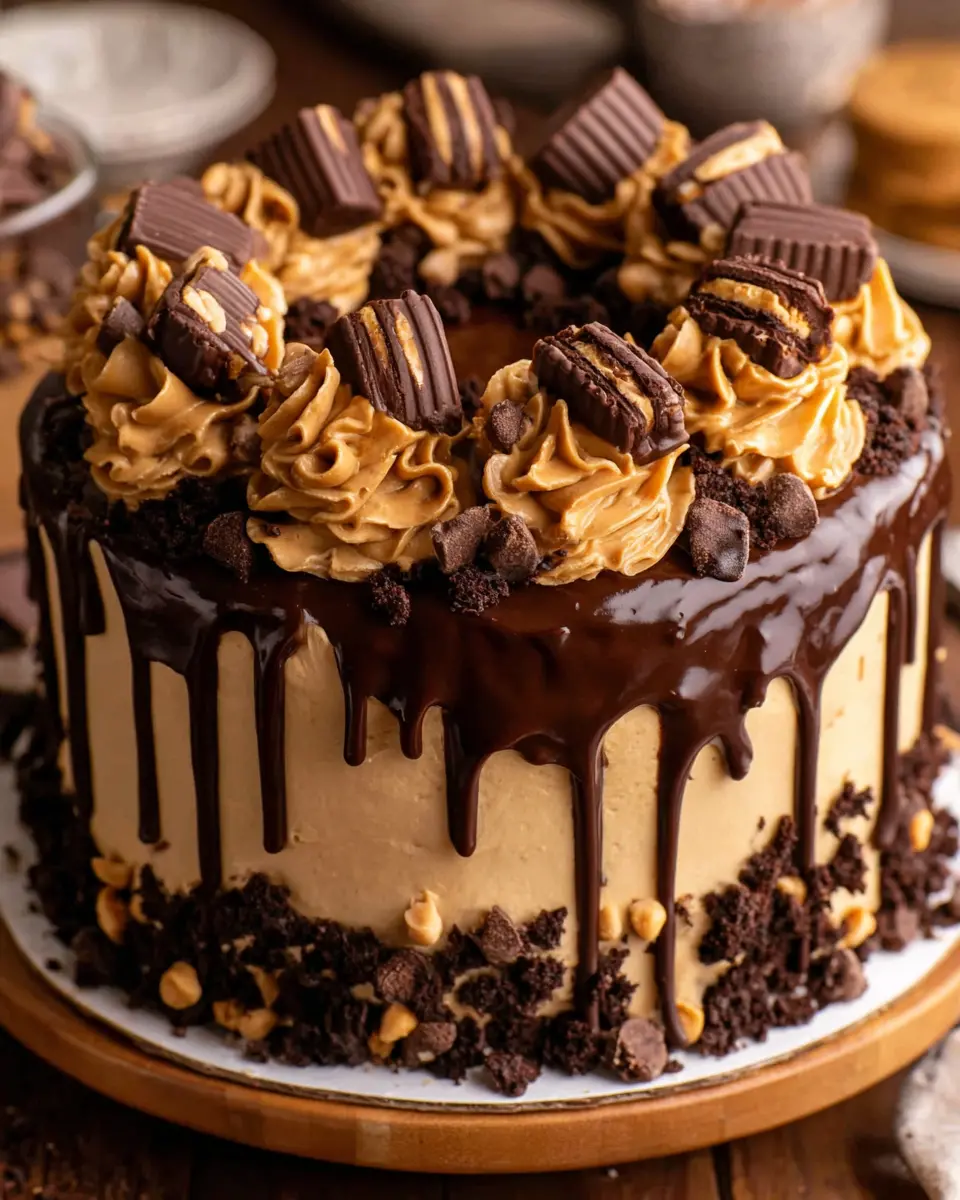
Start with the drips first. Go around the edges of the cake and pipe ganache drips at different lengths. Then pour the remaining ganache on top and spread it to the edges with an offset spatula. The drips will connect with the top layer, creating that seamless look. Add some halved peanut butter cups on top for extra flair.
Tips for the Best Chocolate Peanut Butter Drip Cake
I’ve made this cake more times than I can count. Here are the things I’ve learned along the way.
Start with a cold cake. I like to let mine chill in the freezer for 20 to 30 minutes before adding the ganache. It’s easier to spread the ganache without messing up the frosting. The cold surface helps set the drip faster too.
Weigh your flour. Using too much flour is the most common mistake that leads to dry cake. For the most accurate measurement, use a kitchen scale. If you don’t have one, fluff the flour in its container, spoon it into your measuring cup, and level it off with a knife.
Use room temperature ingredients. Set the butter, eggs, and buttermilk out in advance so they warm up. Room temperature ingredients incorporate better and create a more tender crumb. The butter takes the longest, so plan ahead.
If you’re adding toppings like peanut butter cups, make sure the cake is chilled first. Just a few minutes in the fridge or freezer makes a huge difference. The toppings will stay in place and not slide off.
The peanut butter frosting is definitely soft because I love the peanut butter taste without it being overly sweet. If you want it sweeter or stiffer, add powdered sugar by the cupful until you get your desired consistency.
For a professional-looking, totally level cake, level your cake layers before assembling. You can use a cake leveler or just a sharp knife. It makes stacking so much easier and gives you a clean final look.
The fudgy chocolate cake layers can be a bit fragile. Make sure to bake them until the edges start pulling away from the pan. Let them cool completely in the pan. Run a thin knife around the edges to release them. To remove, put a rack over the pan and flip it over. Gently tap the pan to release the layer. Remove the parchment paper. To flip back over, support the cake layer with your hand and gently flip it right-side up onto the cake stand.
Beware that the layers are somewhat crumbly. If you want frosting without crumbs, you definitely need a crumb coat. Use a small amount of frosting to make a thin layer around the cake. Put it in the fridge for about an hour. Then proceed with the final coat. You may need to increase the amount of frosting for this step.
To make a drip cake, the ganache has to be the right temperature. Too hot, and it will run down the cake. Too cool, and it will not drip at all. If it’s dripping too thinly, stop and let it cool further. If it’s too thick, reheat it gently in a double boiler over low heat.
I prefer to use hot brewed coffee in the cake batter. If you’ve made chocolate cake with coffee before, you know this cake will not taste like coffee. Instead, coffee acts as a flavor enhancer for a richer, more complex chocolate flavor.
Use creamy peanut butter. Crunchy peanut butter or natural peanut butter will not work well for this frosting. I prefer Jif or Skippy brand peanut butter. They have the right consistency and sweetness.
Wrap the cake pans with baking strips for flat layers. You can use fabric strips or make your own with damp paper towels and aluminum foil. It’s a game changer for even layers.
Let the ganache cool slightly. A warm ganache is best for dripping, but you don’t want it so warm that it runs right off the cake or melts the buttercream. If it cools down too much, it becomes too thick to drip. It should feel slightly warm to the touch when it’s ready.
Chill the cake first. The cold surface helps set the ganache drip faster. This is probably the most important tip for a clean, professional look.
Test it first. Pick one side of the cake or test it on a drinking glass before you try it on the cake. Turn a drinking glass upside down. Spoon a small amount of ganache on the bottom and push it over the edge. If it drips slowly, it’s just right. If it drips quickly, let it cool more. If it doesn’t drip at all, warm it up slightly.
Weigh the flour. Using too much flour is a common error that will cause the cake to turn out dry. For the most accurate measurement, use a kitchen scale. If you don’t have one, fluff the flour, spoon it into your measuring cup, and level it off.
Use room temperature ingredients. Set the refrigerated ingredients out in advance so they warm up. This makes them easier to incorporate. The butter takes the longest, so if you forget, see my tips for quickly softening butter.
Let the cake layers cool completely before frosting. Otherwise, the frosting will melt and slide off or cause the layers to be unstable. Patience here pays off.
If you’re adding a topping to your cake, be sure your cake is chilled beforehand. Just a few minutes in the fridge or freezer can make a huge difference.
For the ganache, use a squeeze bottle for more control. Piping bags with a small tip cut off also work. I prefer the squeeze bottle because it’s easier to control the flow.
Fun Variations to Try
This cake is pretty perfect as is, but sometimes you want to switch things up. Here are a few ideas.
You can bake this cake in three 8-inch pans instead of four. The layers will be a bit thicker and need a few more minutes in the oven. Or make it as a two-layer cake using 8-inch or 9-inch pans. The baking time will be longer, about 30 to 35 minutes for 8-inch pans.
For cupcakes, this recipe yields about 24 to 30. Bake for approximately 17 minutes or until a toothpick inserted in the center comes out clean or with moist crumbs. Top them with the peanut butter frosting and a mini ganache drip. So good.
For an even easier version, make the chocolate cake as a sheet cake and cover it with a layer of peanut butter frosting and ganache. It’s less fussy but just as delicious.
You can swap the peanut butter cups for chopped salted peanuts, chocolate shavings, or sprinkles. Or pipe peanut butter swirls on top for a different look. The possibilities are endless.
If you want to use a different nut butter, you can try almond butter or cashew butter. Just keep in mind that the consistency and flavor will be different. You may need to adjust the sweetness.
For a gluten-free version, use a good quality gluten-free all-purpose flour blend. I’ve had success with Bob’s Red Mill gluten-free baking flour. The texture will be slightly different, but it still tastes amazing.
Common Mistakes to Avoid
Common Mistakes & Fixes
Mistake: Using natural or crunchy peanut butter in the frosting.
Solution: Use creamy peanut butter like Jif or Skippy. Natural peanut butter separates and has a different consistency that won’t whip into a light, fluffy frosting.
Mistake: Not chilling the cake before adding the ganache drip.
Solution: Chill the frosted cake in the freezer for 20 to 30 minutes. The cold surface helps set the ganache quickly and prevents it from running off.
Mistake: Ganache is too hot or too cold.
Solution: Test the ganache on a drinking glass first. If it drips too fast, let it cool more. If it doesn’t drip, warm it up gently. It should feel slightly warm to the touch.
Mistake: Overmixing the cake batter or using too much flour.
Solution: Mix until just combined. Weigh your flour for accuracy. Too much flour or overmixing will make the cake dry and tough.
Mistake: Frosting cake layers before they are completely cool.
Solution: Let the cake layers cool completely on a wire rack. Warm layers will melt the frosting and cause the cake to slide.
Mistake: My ganache is dripping all the way down my cake.
Solution: The ganache is too hot. Let it cool slightly and test it again. Also, make sure your cake is well chilled before applying the drip.
Making in Advance and Storing Leftovers
This cake is great for making ahead. You can bake the cake layers up to two days in advance. Wrap them tightly in plastic wrap and store them at room temperature. Or freeze them for up to three months. Just thaw them in the refrigerator overnight before frosting.
The peanut butter frosting can be made a day or two ahead too. Store it in an airtight container in the refrigerator. Let it come to room temperature and give it a good stir before using it.
Once the cake is fully assembled, you have a few options. If you’re serving it the same day, keep it at room temperature. It’s best served at room temperature on the day it’s made. The flavors are more pronounced and the texture is perfect.
If you need to store leftovers, cover the cake and refrigerate it for up to five days. Just keep in mind that the shine on the ganache may dull a bit in the fridge. Let the cake sit at room temperature for about 30 minutes before serving to take the chill off.
You can also freeze the entire cake. Wrap it well with plastic wrap and aluminum foil. Store it in a freezer bag or airtight container for up to three months. Thaw slices in the refrigerator for a few hours before enjoying. The cake will still taste amazing, though the ganache might lose some of its gloss.
For the best experience, serve the cake at room temperature. The chocolate cake is moist and tender, the peanut butter frosting is creamy, and the ganache drip is rich and glossy. It’s a combination that’s hard to beat.
Frequently Asked Questions
Conclusion
When you make this chocolate peanut butter drip cake, prepare for applause. I mean it. This is one of those desserts that makes people stop and stare before they even take a bite. And then they take a bite and it’s even better than they expected.
I hope you give this recipe a try. It’s easier than you think, and the results are absolutely worth it. Whether it’s for a birthday, a holiday, or just because you deserve something amazing, this cake delivers every time.
When you make it, share your masterpiece with us! I’d love to see how it turns out. For more inspiration, check out my Pinterest boards. Happy baking, friends.
Source: Nutritional Information