


Rich Nutella Cheesecake Cake with Ferrero Rocher
Ingredients
Method
- CRUST
- Preheat oven to 325°F (163°C). Line a 9-inch (23cm) springform pan with parchment paper in the bottom and grease the sides.
- . Combine the crust ingredients in a small bowl. Press the mixture into the bottom and up the sides of the springform pan.
- . Bake the crust for 8-10 minutes, then set aside to cool.
- . Cover the outsides of the pan with aluminum foil so that water from the water bath cannot get in (see how I prepare a pan for a water bath). Set prepared pan aside. FILLING
- p id=”instruction-step-6″>1. Reduce oven temperature to 300°F (148°C). 2.
- In a large bowl, beat the cream cheese, sugar and flour on low speed until well completely combined and smooth. Be sure to use low speed to reduce the amount of air added to the batter, which can cause cracks. Scrape down the sides of the bowl. 3.
- Add the Nutella and vanilla extract and mix on low speed until well combined. 4.
- Add the eggs one at a time, mixing slowly to combine after each addition. Scrape down the sides of the bowl as needed to make sure everything is well combined. The batter will be thick and a little sticky. 5.
- Pour the cheesecake evenly batter into the crust. 6.
- Place the springform pan inside another larger pan. Fill the outside pan with enough warm water to go about halfway up the sides of the springform pan. The water should not go above the top edge of the aluminum foil on the springform pan. 7.
- Bake for 1 hour 30 minutes. The center should be set, but still jiggly. 8.
- Turn off the oven and leave the door closed for 30 minutes. The cheesecake will continue to cook, but slowly begin to cool as well. 9.
- Crack the door of the oven for 30 minutes to allow the cheesecake to continue to cool slowly. This process helps prevent cracking. 10
- Remove the cheesecake from the oven and water bath wrapping and refrigerate until firm, 5-6 hours or overnight. 11
- Remove the cheesecake from the springform pan and place on a serving dish. 12
- To make the Nutella ganache, add the Nutella, chocolate chips and heavy whipping cream to a medium bowl. Heat in 15-20 second increments, stirring well between each, until the mixture is melted and smooth. Allow it to cool for 5-10 minutes 13
- Pour about half of the ganache into the center of the cheesecake and lightly help it spread mostly to the edge of the cheesecake. It will continue to spread a little as it cools. Save the remaining ganache for later. 14
- Refrigerate until the ganache is firm, then make the chocolate whipped cream. 15
- Add the heavy whipping cream, cocoa powder, powdered sugar and vanilla extract to a large mixture bowl and whip on high speed until stiff peaks form. 16
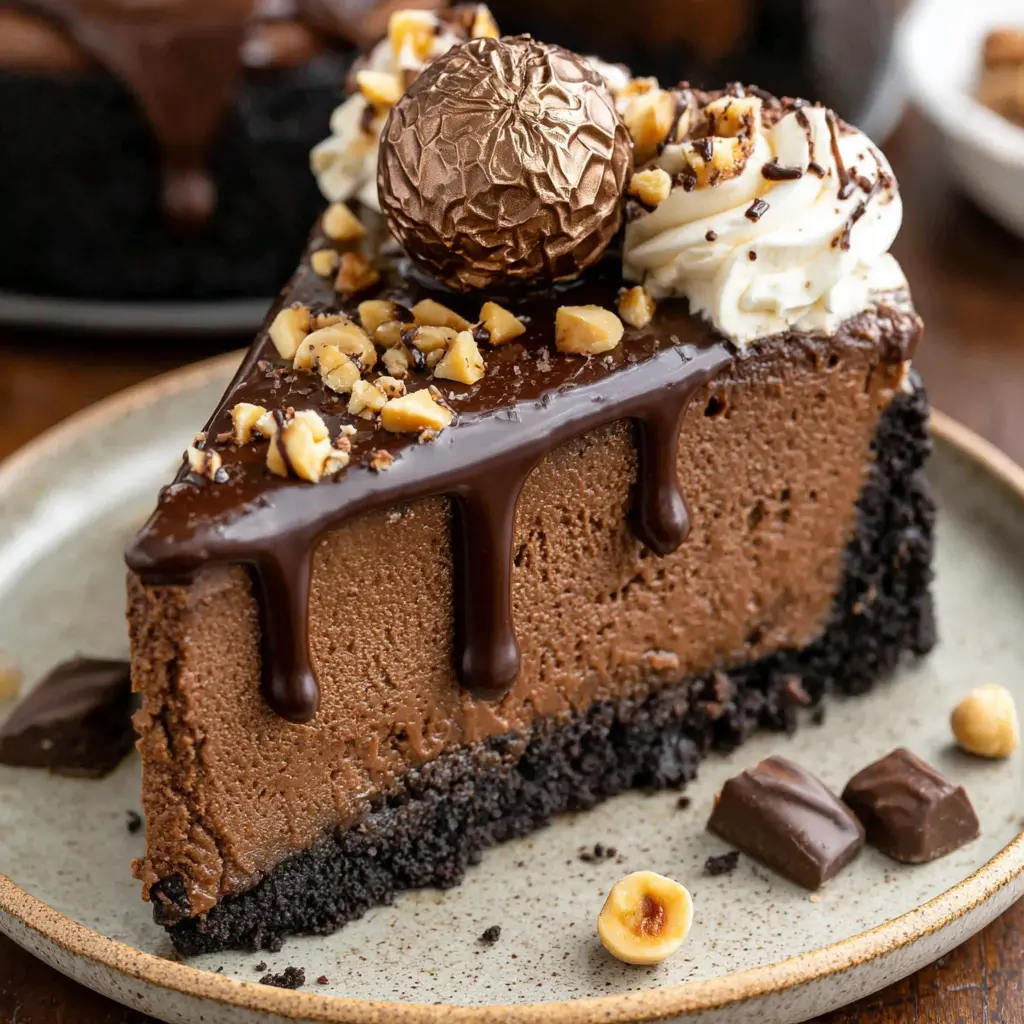
- Pipe the whipped cream around the outer edge of the cheesecake, then finish it off with a drizzle of some of the remaining ganache and Ferrero Rocher candies. If you have ganache remaining, serve it with the cheesecake slices. 17
- Refrigerate the cheesecake until ready to serve. Cheesecake is best if eaten within 3-4 days.
Nutrition
Notes
Tried this recipe?
Let us know how it was!What Even Is a Chocolate Hazelnut Cheesecake Cake?
Honestly, the first time I saw a picture of a Chocolate Hazelnut Cheesecake Cake, I thought it was some kind of bakery wizardry. I mean, how do you get a perfect layer of creamy cheesecake sandwiched between two layers of rich chocolate sponge, all wrapped in a silky hazelnut buttercream? It sounds impossible, right? But here’s the thing. It’s not. It’s actually just a series of simple steps that, when done in the right order, create something that looks like it took three days and a pastry degree.
I remember my first attempt. I had this vision of a perfect, tall cake for my mom’s birthday. I nearly cried when the cheesecake layer cracked right down the middle. But you know what? I learned exactly what went wrong. And now, I’m going to give you the blueprint so you skip all that drama. This isn’t just a recipe. It’s a guide to building a showstopper that will make you feel like a rockstar. This Chocolate Hazelnut Cheesecake Cake is the kind of dessert people request for every special occasion. And trust me, once you nail it, you’ll be that person.
Why This Recipe Works
So why bother with a layered cheesecake cake instead of just a plain cheesecake or a regular chocolate cake? Because you get the best of both worlds. You get that dense, creamy, slightly tangy cheesecake, and you get the light, airy crumb of a chocolate sponge. The hazelnut element ties it all together. It’s not just a chocolate cake with cheesecake on top. It’s a carefully balanced dessert where every bite has a little bit of everything.
The key is the structure. The chocolate sponge is sturdy enough to hold the weight of the cheesecake layer without getting soggy. The cheesecake is baked in a water bath so it stays silky smooth without cracking. And the hazelnut cream? That’s the glue that brings it all together. It adds moisture and that unmistakable nutty flavor that makes this cake so addictive. I’ve tested this combo more times than I can count, and this version is the one that works every single time.
No Bake vs Baked Cheesecake
You might be wondering, do I have to bake the cheesecake layer? Could I just use a no-bake version? You could, but you shouldn’t. Not for this cake. A no-bake cheesecake is softer, more like a mousse. It’s delicious on its own, but it won’t hold up as a layer in a tall cake. It’ll squish out the sides when you try to stack it. A baked cheesecake is denser and firmer. It slices cleanly and keeps its shape. For a Chocolate Hazelnut Cheesecake Cake, you need that structure.
Baking a cheesecake sounds intimidating, I know. But honestly, it’s just a matter of controlling the environment. A water bath, which I’ll explain in a minute, keeps the heat gentle and even. The result is a cheesecake that’s creamy all the way through, not cracked or dry. So for this recipe, we’re going baked. It’s worth the extra hour of baking time, I promise.
Tools You’ll Need
Before we jump into the ingredients, let’s talk gear. You don’t need a professional bakery setup, but a few specific tools will make your life a lot easier. First, you need a 9-inch springform pan. That’s non-negotiable for the cheesecake layer. You’ll also need two 9-inch round cake pans for the chocolate sponge. A stand mixer or a hand mixer is a must for getting that cream cheese filling smooth. And for the water bath, you need a large roasting pan or a deep baking dish that your springform pan can sit inside.
Other helpful items include a fine-mesh strainer for sifting dry ingredients, a rubber spatula for folding, and a bench scraper for smoothing the frosting. Oh, and a cake turntable makes decorating so much easier, but you can definitely get by without one. I used a lazy Susan for years. It’s not fancy, but it works.
Ingredients for Chocolate Hazelnut Cheesecake Cake
Let’s break down what you’ll need for each part of this cake. For the crust, you’ll need Oreo cookie crumbs and salted butter. The Oreos give a deep chocolate flavor that pairs perfectly with the hazelnut. For the cheesecake filling, you’ll need cream cheese, sugar, flour, Nutella, vanilla extract, and large eggs. The flour is the secret to a stable cheesecake. It helps prevent cracking. The Nutella gives that signature hazelnut flavor.
For the chocolate sponge, you’ll need Nutella again, semi-sweet chocolate chips, heavy whipping cream, natural unsweetened cocoa powder, powdered sugar, and vanilla extract. Yes, Nutella shows up twice. It’s in the cheesecake and the sponge. That’s what makes this cake so intensely hazelnut-flavored. And for the topping, you’ll need more heavy whipping cream, plus some Ferrero Rocher candies for that gorgeous finish. I’ll talk about specific brands in a second.
Ingredient Substitutions
I get it. Sometimes you can’t find exactly what the recipe calls for. Let’s talk swaps. If you can’t find Oreo crumbs, you can use any chocolate wafer cookie. Just crush them up yourself. For the cream cheese, use full-fat blocks. Low-fat or spreadable cream cheese has too much water and will make your cheesecake runny. If you’re out of Nutella, you can use another chocolate-hazelnut spread, but check the label. Some brands have more sugar or less hazelnut flavor. I’ve found that Nutella gives the most consistent results.
For the chocolate in the sponge, semi-sweet chips are ideal. But you can use dark chocolate if you prefer a less sweet cake. Just know it will be richer. And for the heavy cream, there’s no substitute. Whipped topping won’t work here. You need real cream for the buttercream and the ganache. If you’re worried about dairy, I’ll cover some dietary adaptations a bit later.

How to Make Chocolate Hazelnut Cheesecake Cake
Alright, let’s get into the actual process. The most important thing to know is the order of operations. You need to make the cheesecake layer first. It needs to chill for at least four hours, or overnight, before you can assemble the cake. So plan ahead. Start the day before you want to serve it.
First, make the Oreo crust. Mix the crumbs with melted butter and press them into the bottom of your springform pan. Bake it for about 10 minutes to set it. While that cools, make the cheesecake filling. Beat the cream cheese until it’s smooth. Then add the sugar, flour, Nutella, and vanilla. Mix until combined. Then add the eggs one at a time, mixing on low. Don’t overmix. Overmixing adds air bubbles, which can cause cracks. Pour the filling over the crust and smooth the top.
Now for the water bath. Wrap the bottom of your springform pan in a double layer of heavy-duty aluminum foil. Place it in a large roasting pan and pour hot water into the roasting pan until it comes about halfway up the sides of the springform pan. Bake the cheesecake at 325°F for about 55 to 65 minutes. The edges should be set, but the center should still jiggle like Jell-O. That’s your visual cue. Turn off the oven and crack the door. Let the cheesecake sit in the oven for an hour. Then take it out and let it cool completely on a wire rack. Then chill it in the fridge for at least four hours.
What is a Water Bath?
A water bath is exactly what it sounds like. You place your cheesecake pan inside a larger pan filled with hot water. The water creates a humid, gentle environment in the oven. This prevents the cheesecake from cooking too quickly on the outside while the inside is still raw. That uneven cooking is what causes cracks. The water bath also keeps the cheesecake creamy. Without it, you’d end up with a dry, rubbery texture. It’s a simple technique that makes a huge difference. Don’t skip it.
Tips for Perfect Cheesecake Cake
I’ve made this cake more times than I can count, and I’ve learned a few things the hard way. Let me save you some trouble. First, use room temperature ingredients. Cream cheese, eggs, even the Nutella. Cold ingredients don’t blend smoothly, and you’ll end up with lumps. Take everything out of the fridge an hour before you start. Second, don’t overbake the cheesecake. That jiggle in the center is your friend. It will set as it cools. Overbaking is the number one cause of cracks.
Third, cool the cheesecake slowly. That oven door method I mentioned is crucial. It prevents the sudden temperature change that causes cracking. Fourth, when you’re ready to slice the finished cake, run your knife under hot water and wipe it dry between cuts. This gives you those clean, bakery-style slices. And finally, if your cheesecake does crack, don’t panic. The hazelnut buttercream and chocolate ganache will cover it. I’ve hidden many a crack under a thick layer of frosting. No one will ever know.
How to Slice Cheesecake Cleanly
Slicing a layered cake can be a disaster if you don’t do it right. The cheesecake layer is soft, and the sponge can crumble. Here’s the trick. Use a long, sharp knife. Run it under hot water and dry it off. Make one clean cut straight down. Don’t saw back and forth. Wipe the blade clean and reheat it before each slice. This gives you those perfect, Instagram-worthy slices. It takes a little extra time, but it’s worth it.
Common Mistakes & Fixes
Mistake: The cheesecake layer cracked.
Solution: This usually happens from overbaking or cooling too fast. Next time, use the water bath and the oven door method. For now, cover the crack with frosting. No one will see it.
Mistake: The chocolate sponge is dry.
Solution: You probably overbaked it or measured the flour wrong. Spoon the flour into your measuring cup and level it off. Don’t scoop directly from the bag. And check the cake a few minutes early. Ovens vary.
Mistake: The hazelnut buttercream is too thick or too thin.
Solution: If it’s too thick, add a tablespoon of cream at a time until it’s spreadable. If it’s too thin, chill it for 15 minutes and whip it again. The texture should be like soft ice cream.
Mistake: The cake layers are sliding apart.
Solution: You didn’t chill the cheesecake long enough. It needs to be fully cold and firm. Also, make sure you’re using a sturdy enough sponge. This recipe’s sponge is designed to hold up.
Storage and Leftovers
This cake is best served the day it’s assembled, but you can definitely make it ahead. In fact, I recommend it. You can bake the cheesecake and the sponge a day or two ahead. Wrap them tightly in plastic wrap and keep them in the fridge. Assemble and frost the cake on the day you plan to serve it. Leftovers should be stored in an airtight container in the fridge. They’ll keep for about 3 days. The texture is still great, but the sponge might absorb a little moisture from the frosting.
To freeze the whole cake, chill it uncovered in the fridge for an hour to firm up the frosting. Then wrap it tightly in a double layer of plastic wrap and then a layer of aluminum foil. Freeze for up to 3 months. Thaw it overnight in the fridge before serving. Add the Ferrero Rocher candies after thawing, not before. They can get soggy in the freezer. For individual slices, wrap each one in plastic and freeze them. Then you can pull out a slice whenever you want a treat.
Frequently Asked Questions
Final Thoughts
When you serve this Chocolate Hazelnut Cheesecake Cake, be ready for the silence. That first bite where everyone just stops talking. It’s the kind of dessert that makes people close their eyes and smile. I’ve brought this to family dinners, birthday parties, and even a casual potluck. It always steals the show. And honestly, it feels amazing to be the person who made it.
So go ahead. Give it a try. Yes, it has a few steps. Yes, you need to plan ahead. But every single step is worth it. You’ve got this. Your family is about to be blown away. And when they ask for the recipe, you can just smile and say, “I’ll send it to you.” For more inspiration, check out my Pinterest boards where I share tons of variations and decorating ideas.
Source: Nutritional Information


