
Why You’ll Love This Chocolate Coconut Lava Cake
You know that moment when you want a dessert that feels both sophisticated and incredibly satisfying? The kind that makes you look like you spent hours in the kitchen, but really you just wanted something warm and chocolatey in under an hour? That’s exactly what this Chocolate Coconut Lava Cake delivers.
I’ll be honest with you my first lava cake attempt was a disaster. I pulled what I thought were perfect little cakes out of the oven, flipped them onto plates, and got… chocolate muffins. Flat, fully-cooked, sad chocolate muffins. The molten center? Nowhere to be found. I’d overbaked them by maybe two minutes, and that was all it took.
So I went back to the drawing board. I tested, I failed, I tested again. And what I landed on is this recipe a chocolate coconut lava cake that actually works. The secret? A muffin tin instead of ramekins, a precise baking window, and a generous helping of toasted coconut for that tropical twist. Trust me on this one.
This isn’t just a plain lava cake with coconut sprinkled on top as an afterthought. The coconut flavor comes through in the texture and the topping, complementing the rich chocolate without overpowering it. It’s a decadent chocolate dessert that feels special enough for a dinner party but simple enough for a Tuesday night.
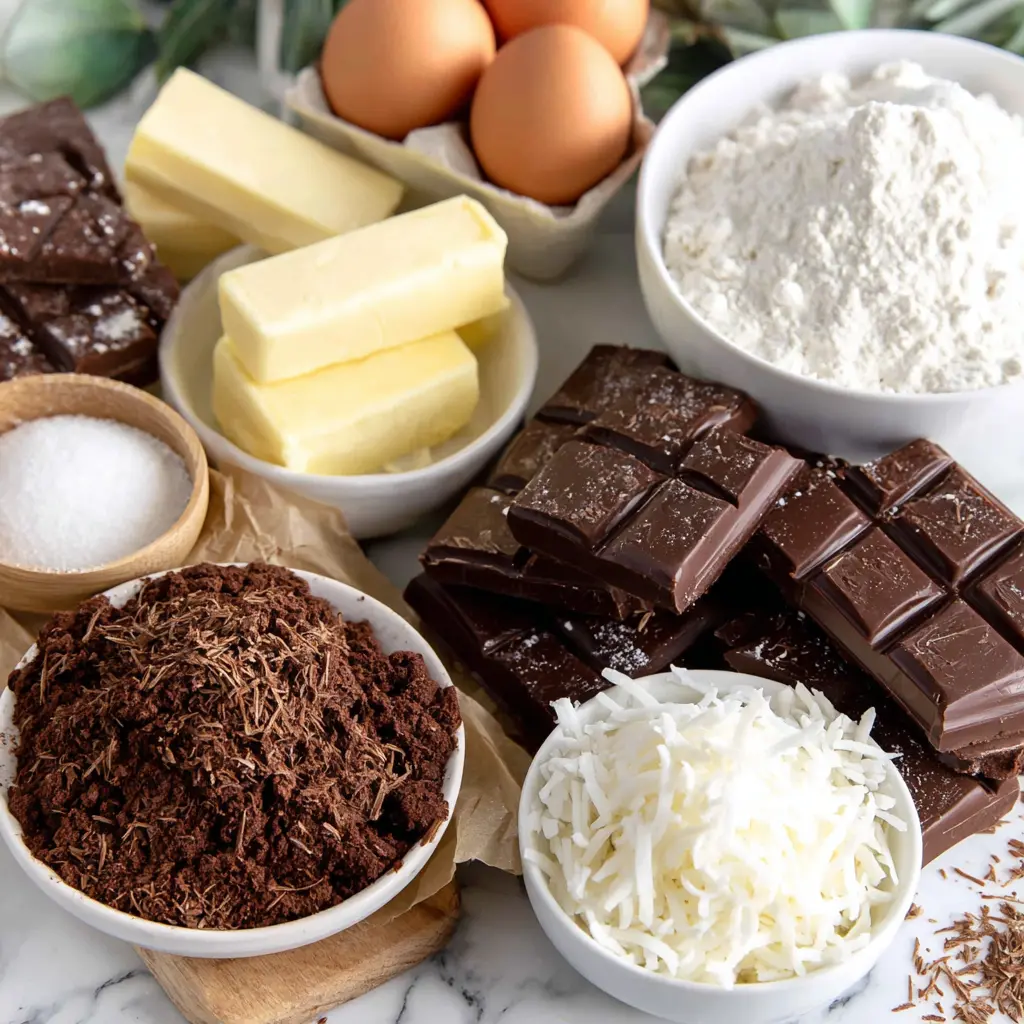
Key Ingredients & Substitutions
Let’s talk about what goes into this molten coconut chocolate cake and why each ingredient matters. The right choices here make all the difference between a gooey center and a chocolate brick.
- Semi-sweet chocolate and dark chocolate: I use a mix of both 6 ounces semi-sweet and 6 ounces dark (60-70% cacao). The semi-sweet adds sweetness and creaminess, while the dark gives that deep, intense chocolate flavor. Use high-quality baking bars, not chocolate chips. Chips have stabilizers that prevent that gooey lava cake tropical center from forming properly.
- Unsalted butter: A full cup (2 sticks). Butter is the backbone here, providing richness and helping the cake set at the edges while staying molten in the middle. If you need a dairy-free version, you can substitute with a high-quality vegan butter or coconut oil though coconut oil will add a more pronounced coconut flavor.
- All-purpose flour: Just half a cup. This is not a flourless chocolate cake, so the flour gives it just enough structure to hold together when inverted. For a gluten-free option, you can substitute with a 1:1 gluten-free flour blend or cassava flour.
- Powdered sugar: A full cup, sifted if lumpy. Powdered sugar dissolves more easily than granulated, creating a smoother batter. Don’t skip the sifting lumps in the sugar mean lumps in your cake.
- Eggs and egg yolks: Four whole eggs plus four extra yolks. This is the magic combination. The yolks add richness and help create that soft molten cake center, while the whites provide structure. Room temperature eggs are crucial here they emulsify into the batter much more smoothly.
- Sweetened shredded coconut: Half a cup, toasted for topping. Toasting brings out the coconut’s natural oils and adds a wonderful crunch and nutty flavor that contrasts beautifully with the soft, rich chocolate lava dessert.
- Cocoa powder: For dusting the muffin tin. This replaces the usual flour or butter-and-flour method, adding a thin chocolate layer to the outside of the cakes.
Equipment You’ll Need
One of the best things about this recipe is that you don’t need fancy equipment. A standard 12-cup muffin tin replaces the traditional ramekins, making this much more accessible. Here’s what you’ll need:
- 12-cup muffin tin (non-stick works best)
- Microwave-safe bowl (or use a double boiler if you prefer)
- Small bowl for dry ingredients
- Medium bowl for eggs
- Rubber spatula
- Whisk
- Small spoon or offset spatula for loosening cakes
- Baking spray
If you don’t have a muffin tin, you can use 6-ounce ramekins instead. Just reduce the number of servings this recipe makes 12 mini cakes, but you could make 6 larger ones in ramekins. The baking time will be slightly longer, about 11-13 minutes, but the visual cues are the same.
How to Make Chocolate Coconut Lava Cake
Alright, let’s get into the process. I’ll walk you through the four main stages, explaining the why behind each step so you understand what’s happening. This is where the lava cake troubleshooting knowledge comes in handy.
Stage 1: Prepare the Pan and Melt the Chocolate
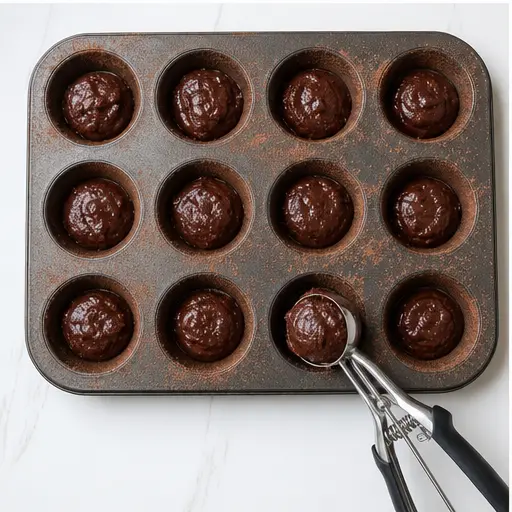
Start by preheating your oven to 425°F. Spray your muffin tin with non-stick baking spray, then dust evenly with cocoa powder. Tap out any excess. This step is non-negotiable the cocoa powder creates a thin chocolate crust on the outside of the cakes and ensures they release cleanly.
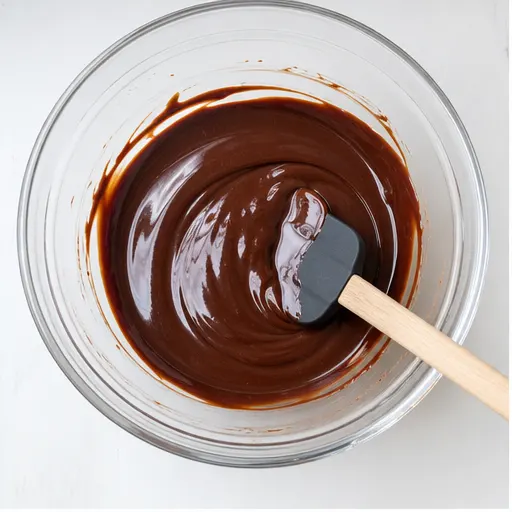
Now, melt your chocolate and butter. Place the chopped semi-sweet chocolate, dark chocolate, and butter in a microwave-safe bowl. Microwave on high for 1 minute, then stir. Continue in 30-second bursts, stirring after each, until the mixture is completely smooth and glossy. Be careful not to overheat chocolate can seize if it gets too hot. If you prefer, you can use a double boiler on the stovetop for more control.
Stage 2: Mix the Batter
In a small bowl, whisk together the flour, powdered sugar, and salt until well combined and free of lumps. In a separate bowl, whisk the whole eggs and egg yolks together until frothy about 30 seconds of vigorous whisking.
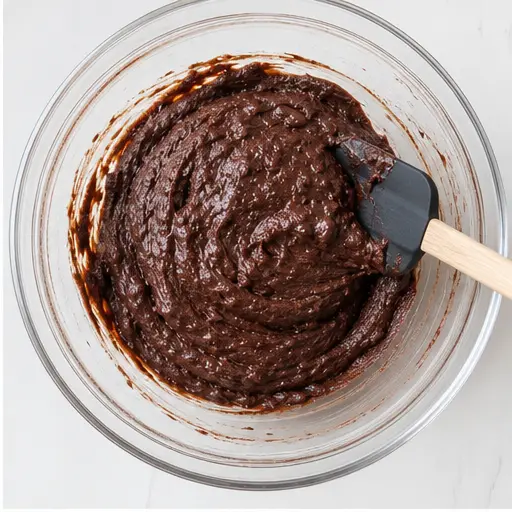
Pour the egg mixture and the flour mixture into the bowl of melted chocolate. Here’s where patience matters: stir gently with a rubber spatula until just combined. If you see a few small lumps, whisk them out carefully. But don’t overmix overmixing develops gluten and can make the cakes tough. The batter will be thick and fudgy, almost like a brownie batter but slightly looser.
Stage 3: Fill and Bake
Divide the batter evenly among the 12 prepared muffin cups, filling each about three-quarters full. A cookie scoop works great here for even portions. Now, this is the critical moment the baking time.
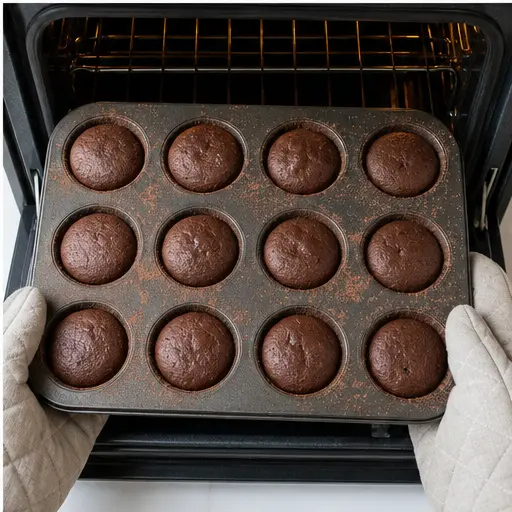
Bake for 8 to 10 minutes. But don’t just set a timer and walk away. Watch for visual cues: the edges should look set and slightly pulling away from the sides of the pan, the tops should look dry, but the centers should still jiggle slightly when you gently shake the pan. Think of it like a Jell-O wobble that’s your signal that the underbaked chocolate cake center is perfectly molten.
Don’t stress about a 30-second range. This cake forgives a little flexibility, but two minutes too long and you’ll be back in chocolate muffin territory.
Stage 4: Cool, Invert, and Serve
Let the cakes rest in the pan for exactly 1 minute. Not 5 minutes, not 30 seconds 1 minute. This allows them to set just enough to hold their shape when inverted, but not so long that they stick.
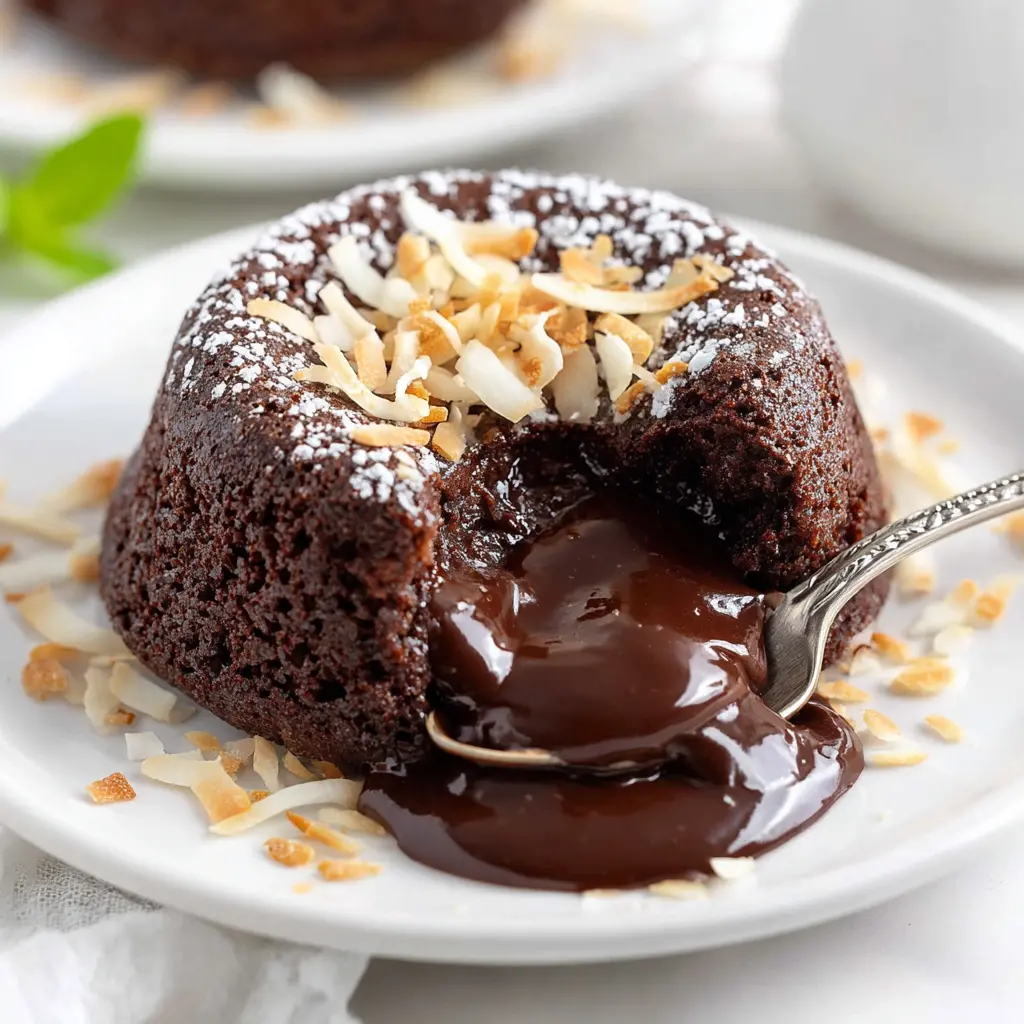
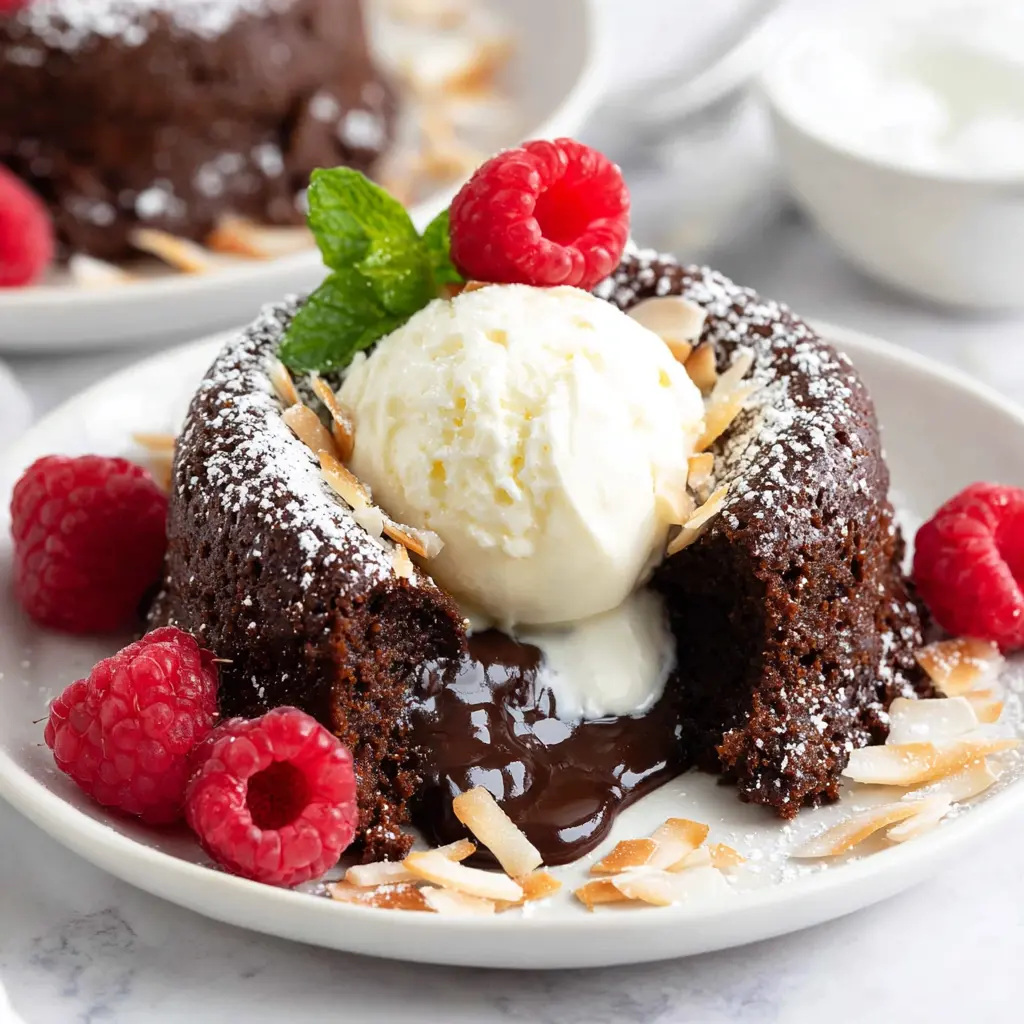
Using a small spoon or offset spatula, carefully loosen the edges and invert each cake onto a serving plate. They should release easily if you greased and dusted the pan properly. Top with toasted shredded coconut and your choice of toppings vanilla ice cream, whipped cream, fresh berries, or a dusting of powdered sugar. Serve immediately while the centers are still molten.
Tips for Perfect Lava Cakes Every Time
After many, many batches (and a few failures), here are my non-negotiable tips for nailing this molten chocolate cake recipe every single time.
- Don’t overbake. This is rule number one. The difference between a molten center and a fully-cooked cake is about 60 seconds. When in doubt, underbake slightly. You can always pop a cake back in for 30 seconds, but you can’t uncook a baked center.
- Use quality chocolate. This is not the time for generic chocolate chips. Spend the extra dollar on good baking bars. Ghirardelli, Guittard, or even Trader Joe’s brand work beautifully. The flavor difference is night and day.
- Sift your powdered sugar. I know, it’s an extra step. But lumps in powdered sugar create lumps in your batter, and those lumps won’t melt during the short baking time. Just do it.
- Don’t overmix. Stir until the flour just disappears. A few streaks are fine. Overmixing develops gluten and makes the cakes tough instead of tender.
- Use room temperature eggs. Cold eggs don’t emulsify well into the melted chocolate-butter mixture. Let them sit on the counter for 30 minutes before starting, or place them in a bowl of warm water for 5 minutes.
- Trust the jiggle. The center should look slightly underdone and wobbly. That’s the goal, not a mistake.
Common Mistakes & Troubleshooting
Even experienced bakers run into issues with lava cakes. Here’s how to fix the most common problems with this chocolate coconut lava cake.
❌ Mistake: The cakes came out fully cooked with no molten center.
✅ Solution: You overbaked them. Next time, reduce the baking time by 1-2 minutes. Also, make sure your oven temperature is accurate use an oven thermometer to verify. Many ovens run hotter than the dial says.
❌ Mistake: The cakes stuck to the muffin tin and broke apart.
✅ Solution: You either didn’t grease well enough or didn’t let them rest long enough. Make sure you spray every crevice of the muffin tin, and dust thoroughly with cocoa powder. Let them rest exactly 1 minute before inverting. If they still stick, run a small offset spatula around the edges before flipping.
❌ Mistake: The cakes are dry and crumbly.
✅ Solution: You overmixed the batter or overbaked. Gently fold the ingredients until just combined, and watch that baking time closely.
❌ Mistake: The centers are too runny and the cakes collapse.
✅ Solution: You underbaked them slightly. That’s actually better than overbaking, but next time add 30-45 seconds to the baking time. The center should be molten but not liquid.
❌ Mistake: The cakes taste flat or one-dimensional.
✅ Solution: You might be using low-quality chocolate. The chocolate is the star here, so use the best you can find. Also, make sure you’re toasting the coconut it adds a nutty depth that balances the sweetness.
Storage & Make-Ahead Instructions
One of the best things about this recipe is how well it works for entertaining. You can prepare everything in advance and bake just before serving.
Make ahead (unbaked batter): Prepare the batter, scoop it into the muffin tin, cover tightly with plastic wrap, and refrigerate for up to 24 hours. When ready to bake, remove from the fridge and bake straight from cold, adding 1-2 minutes to the baking time. The batter will be firmer, so check for the jiggle test.
Freeze baked cakes: Bake the cakes as directed, let them cool completely in the pan, then wrap each one individually in plastic wrap. Place them in a freezer-safe bag and freeze for up to 3 months. To reheat, remove the plastic wrap, place a cake on a microwave-safe plate, and microwave for about 30 seconds with a damp paper towel over it. The center will become molten again.
Storage for leftovers: Store leftover mini chocolate cakes in an airtight container in the fridge, separated by layers of parchment paper. Reheat in the microwave for 15-20 seconds. They won’t be as perfectly molten as fresh-baked, but they’re still delicious.
Serving Suggestions
This chocolate coconut dessert is beautiful on its own, but a few thoughtful toppings take it over the top. Here are my favorite ways to serve it:
- Toasted coconut: Don’t skip this. Spread the shredded coconut on a baking sheet and toast at 350°F for 5-7 minutes, stirring halfway, until golden brown. The nutty crunch against the soft cake is perfection.
- Vanilla ice cream: The classic pairing. Cold, creamy vanilla against warm, molten chocolate is a match made in dessert heaven. The vanilla ice cream pairing also helps balance the richness.
- Whipped cream: A dollop of lightly sweetened whipped cream adds a light, airy contrast.
- Fresh berries: Raspberries or strawberries add a bright, tart note that cuts through the chocolate. The acidity really makes the chocolate shine.
- Dusting of powdered sugar: A simple, elegant finish that makes the cakes look bakery-worthy.
Frequently Asked Questions
Final Thoughts
This chocolate coconut lava cake has become my go-to dessert for everything from casual weeknights to dinner parties. It’s impressive enough to earn compliments and get asked for the recipe, but simple enough that you don’t need to be a pastry chef to pull it off.
The moment you spoon in and that molten center cascades like a chocolate waterfall, you’ll feel like a pro baker. And the smell of toasted coconut mixing with dark chocolate in the oven? Pure magic.
I’d love to see how yours turn out. Share your Chocolate Coconut Lava Cake creations on Pinterest and tag me I’m always inspired by what you all make. Now go make your kitchen smell like paradise!

Chocolate Coconut Lava Cake
Ingredients
Method
- Preheat your oven to 425°F. Spray a 12-cup muffin tin with non-stick baking spray, then dust evenly with cocoa powder, tapping out any excess. Set aside.
- Place the chopped semi-sweet chocolate, dark chocolate, and butter in a microwave-safe bowl. Microwave on high for 1 minute, then stir. Continue microwaving in 30-second bursts, stirring after each, until the mixture is completely smooth and glossy.
- In a small bowl, whisk together the flour, powdered sugar, and salt until well combined and free of lumps. In a separate bowl, whisk the whole eggs and egg yolks together until frothy.
- Pour the egg mixture and the flour mixture into the bowl of melted chocolate. Stir gently with a rubber spatula until just combined. If you see a few small lumps, whisk them out carefully—overmixing can make the cakes tough. The batter will be thick and fudgy.
- Divide the batter evenly among the 12 prepared muffin cups, filling each about three-quarters full. Bake for 8 to 10 minutes, or until the edges are set and the tops look dry but the centers still jiggle slightly when you gently shake the pan.
- Let the cakes rest in the pan for exactly 1 minute. Using a small spoon or offset spatula, carefully loosen the edges and invert each cake onto a serving plate. Top with toasted shredded coconut and your choice of ice cream, whipped cream, fresh berries, or a dusting of powdered sugar. Serve immediately while the centers are still molten.
Nutrition
Notes
Tried this recipe?
Let us know how it was!Source: Nutritional Information


