
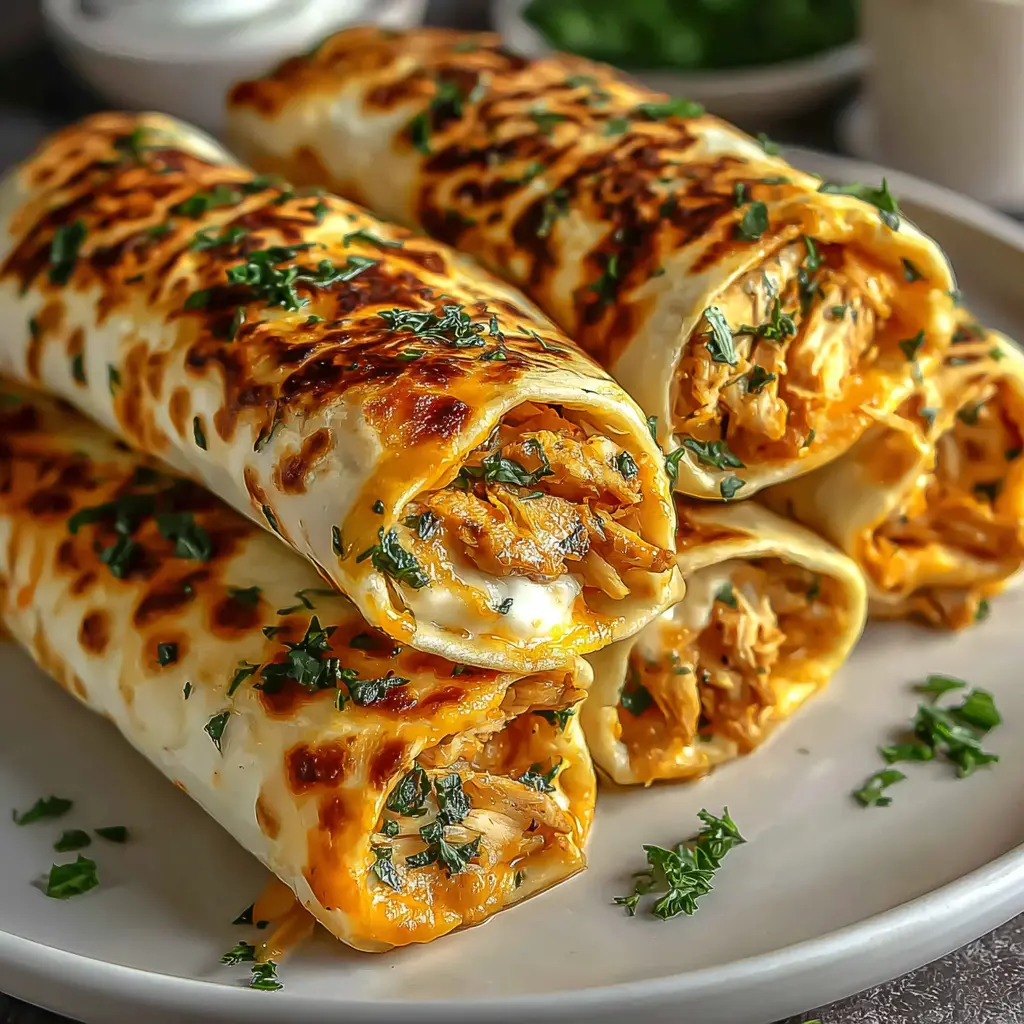

Air Fryer Chicken Garlic Wrap with California Avocado
Ingredients
Method
- Preheat the air fryer to 350°F (175°C) and lightly grease the basket with cooking spray.
- In a skillet over medium heat, melt the butter. Add the minced garlic and sauté for about 1 minute until fragrant.
- Add the chicken pieces to the skillet. Cook, stirring occasionally, until browned on all sides and cooked through, about 6-8 minutes. Season with salt and black pepper.
- Reduce heat to low. Stir in the softened cream cheese and shredded cheese blend until melted and evenly coating the chicken. Remove from heat.
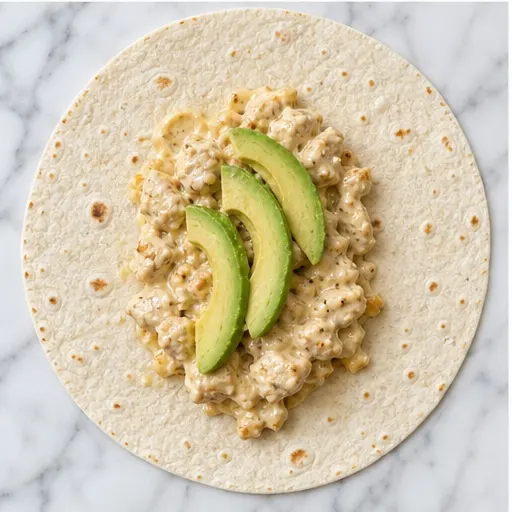
- Warm the tortillas in the microwave for 15-20 seconds to make them pliable. Lay each tortilla flat and spoon about 1/4 of the cheesy chicken mixture onto the center.
- If using, add a few slices of avocado on top of the chicken mixture. Fold the sides of the tortilla inward, then roll tightly to enclose the filling.
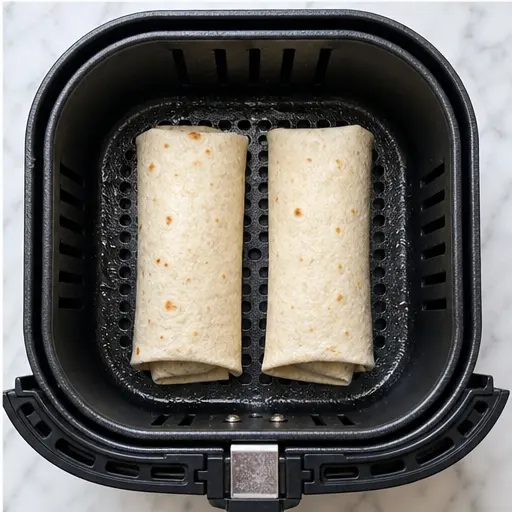
- Place the wraps seam-side down in the air fryer basket in a single layer (work in batches if needed). Air fry at 350°F (175°C) for 5-7 minutes, until the tortillas are golden and crispy.
- Remove from the air fryer, garnish with fresh parsley if desired, and serve warm.
Nutrition
Notes
Tried this recipe?
Let us know how it was!Why You’ll Love This Air Fryer Chicken Garlic Wrap
It’s 5:30 PM, you just walked in the door, and everyone is hungry. I’ve been there. You’re staring into the fridge, hoping something magical will appear. That’s exactly why I created this Air Fryer Chicken Garlic Wrap. It’s the dinner rescue mission you didn’t know you needed.
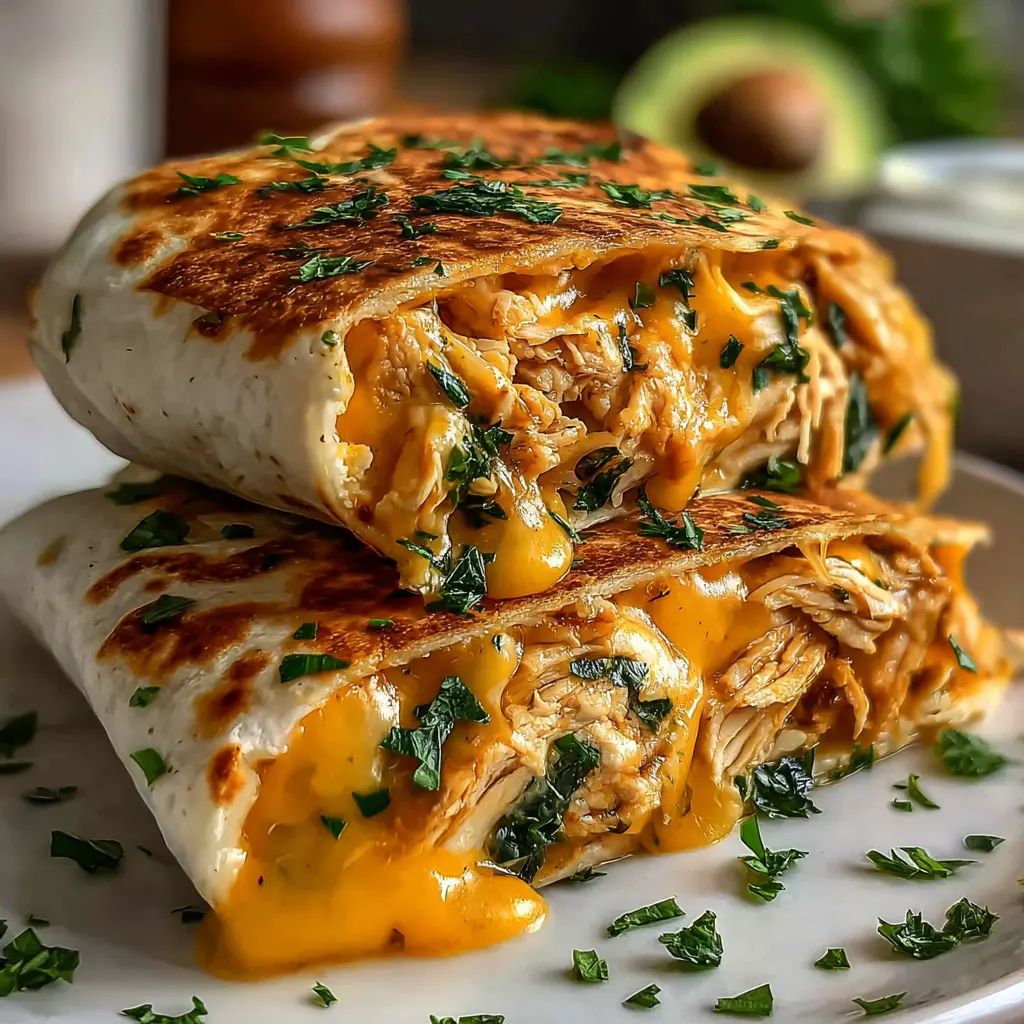
This isn’t just another wrap. We’re talking about a crispy, golden tortilla that shatters when you bite into it. Inside, there’s a creamy, cheesy garlic chicken filling that’s so savory, it’ll make you forget about takeout. And the best part? It’s ready in under 20 minutes. Seriously.
The air fryer does all the heavy lifting here. No standing over a hot skillet, no messy deep frying. Just a quick cook that gives you that perfect crunch without all the grease. Plus, the cleanup is basically nothing. One skillet, one bowl, and you’re done.
I’ve made this for my own family on nights when we’re all running in different directions. Soccer practice, homework, late meetings. You know the drill. And every time, these wraps disappear. My kids call them “the good ones.” That’s high praise in my house. So if you’re looking for a quick weeknight dinner air fryer recipe that actually delivers, you just found it.

Key Ingredients and Substitutions
Let’s talk about what makes this cheesy garlic chicken wrap so good. It’s all about the balance of flavors and textures. The creamy, savory filling against that crispy tortilla. It’s a match made in dinner heaven.
Here’s what you’ll need and a few swaps that work great:
- Boneless, skinless chicken: I use chicken fillets cut into bite-sized pieces. They cook fast and stay juicy. You can also use leftover rotisserie chicken or even pre-cooked grilled chicken strips. Just shred or chop it up. If you’re using leftover chicken, add it to the cheese sauce at the end to warm through.
- Garlic: Three cloves, minced fresh. This is non-negotiable for that savory punch. Pre-minced from a jar works in a pinch, but fresh is so much better.
- Butter: Two tablespoons. It adds richness and helps sauté the garlic and chicken. You could use olive oil, but butter gives that extra flavor.
- Shredded cheese blend: A cup of Mexican blend or mozzarella. The Mexican blend melts beautifully and has a nice flavor. Cheddar Jack or Colby Jack are also great choices. For a healthy air fryer wrap, you can reduce the cheese a bit, but honestly, the melty middle is the best part.
- Cream cheese: Four ounces, softened. This is the secret to that ultra-creamy, luscious filling. It binds everything together and adds a tangy richness. Make sure it’s softened so it melts smoothly.
- Flour tortillas: Four large ones, 8-inch or burrito size. You want them big enough to hold all that filling. Warm them up first so they don’t crack when you roll them. Low-carb or flavored tortillas work too if you’re watching your carbs.
- Hass avocado: Optional, but I highly recommend it. Creamy, fresh, and it cuts through the richness of the cheese. A California avocado is perfect here. Just slice it up and add it before rolling.
Salt and pepper are your seasonings here. Simple, but effective. The garlic and cheese do the heavy lifting. If you want a loaded chicken garlic roll, you can add things like sautéed bell peppers or spinach, but the base recipe is already pretty perfect.
How to Make Air Fryer Chicken Garlic Wraps: Step-by-Step
Alright, let’s get cooking. I’ll walk you through the four main stages. It’s easier than you think, and I promise you’ll nail it on the first try.
Stage One: Sauté the Garlic and Chicken
Start by preheating your air fryer to 350°F (175°C). This is the air fryer wrap temperature that gives you a golden, crispy exterior without burning the tortilla. While it’s heating, grab a skillet and melt the butter over medium heat. Toss in the minced garlic and let it sizzle for about a minute. Your kitchen is going to smell amazing. Then add the chicken pieces. Cook them, stirring occasionally, until they’re browned on all sides and cooked through. About 6 to 8 minutes. Season with a pinch of salt and pepper. You’re looking for that golden-brown color and a little bit of browning on the pan.

Stage Two: Make the Cheesy Sauce
Once the chicken is cooked, turn the heat down to low. Add the softened cream cheese and the shredded cheese blend. Stir everything together until the cheeses melt and coat the chicken in a thick, creamy sauce. This only takes a minute or two. The cream cheese makes it extra luscious. If the mixture seems a little thick, you can add a splash of water or chicken broth, but it’s usually perfect as is. Take it off the heat.

Stage Three: Assemble the Wraps
Now for the fun part. Warm your tortillas in the microwave for about 15 to 20 seconds. This makes them pliable and prevents tearing. Lay a tortilla flat and spoon about a quarter of the cheesy chicken mixture onto the center. If you’re using avocado, add a few slices on top. Now, fold the sides of the tortilla inward, then roll it up tightly from the bottom. You want a snug little package. Don’t overfill it, or it might burst open in the air fryer. That’s a common mistake, but if it happens, no big deal. Just eat it with a fork. Trust me, it still tastes amazing.
Stage Four: Air Fry to Crispy Perfection
Place the wraps seam-side down in the air fryer basket. Make sure they’re in a single layer. You might need to work in batches depending on the size of your air fryer. Air fry at 350°F (175°C) for 5 to 7 minutes. You’ll know they’re done when the tortillas are golden brown and crispy. That first bite – the crispy tortilla gives way to melty cheese and savory garlic chicken. It’s pure magic. Remove them from the basket, garnish with fresh parsley if you like, and serve warm.
Expert Tips for Perfect Wraps
I’ve made these wraps more times than I can count, and I’ve learned a few things along the way. Here are my best tips to make sure your air fryer wrap recipe comes out perfect every time.
Pro Tips for Crispy Success
- Warm your tortillas. This is a game changer. Cold tortillas crack and tear. A quick 15-second zap in the microwave makes them soft and easy to roll.
- Don’t overfill. It’s tempting to pile on the filling, but less is more. Overstuffed wraps are hard to roll and might burst open. Stick to about a cup of filling per wrap.
- Seam-side down. Always place the wraps with the seam facing down in the air fryer basket. This helps seal them shut as they cook and prevents them from unrolling.
- Work in batches. Air fryers need airflow to crisp things up. If your basket is overcrowded, the wraps will steam instead of getting crispy. Give them some space.
- Check for doneness. The tortilla should be golden brown and feel firm to the touch. If you’re unsure, give them an extra minute. Every air fryer runs a little differently.
Common mistakes I see people make? ❌ Overfilling tortillas making them hard to wrap. ✅ Solution: Use about ¾ cup of filling per large tortilla. Another one: ❌ Not warming tortillas before filling makes them less pliable. ✅ Solution: Always warm them. And ❌ assembling wraps ahead of time can make them soggy. ✅ Solution: Assemble right before air frying for the crispiest results.
For the best tortillas for air fryer, go with large flour tortillas. They hold up well and get beautifully crispy. Corn tortillas are smaller and more fragile, so they’re not ideal for this recipe.
Recipe Variations and Add-In Ideas
One of the best things about this air fryer chicken garlic wrap is how adaptable it is. You can switch things up based on what you have in the fridge or what your family loves. Here are some of my favorite variations.
- Spicy Kick: Add a pinch of cayenne pepper or some diced jalapeño to the chicken mixture. It gives the wrap a nice little heat that pairs perfectly with the creamy cheese.
- Veggie Loaded: Sauté some bell peppers, onions, or mushrooms along with the chicken. You can also add a handful of fresh spinach to the filling right before rolling. It wilts down nicely.
- Different Cheeses: Swap the Mexican blend for shredded cheddar, pepper jack for heat, or even a smoky gouda. Each cheese changes the flavor profile in a fun way.
- Low-Carb Option: Use low-carb tortillas or large lettuce wraps instead of flour tortillas. The cooking time might be a bit shorter, so keep an eye on them.
- Make it a Meal Prep: Prepare the chicken filling ahead of time and store it in the fridge for up to 3 days. When you’re ready to eat, just assemble and air fry. It’s a lifesaver on busy nights.
- Leftover Filling Ideas: If you have extra filling, don’t throw it away. Use it in quesadillas, stuffed baked potatoes, or even on top of a salad. It’s delicious anywhere.
This is your kitchen, so feel free to get creative. The base recipe is solid, but the variations are endless. That’s what makes this simple garlic chicken air fryer recipe a keeper.
Storage and Reheating Instructions
So you made a batch of these amazing wraps and somehow have leftovers. Lucky you. Here’s how to store and reheat them so they stay just as good as the first time.
Storing Leftovers: Place any leftover wraps in an airtight container in the refrigerator. They’ll stay fresh for up to 2 days. If you want to keep them longer, store the filling separately in the fridge for up to 3 days. The tortillas can get a bit soggy if stored with the filling for too long.
Freezing: You can freeze the cooked chicken filling for up to a month. Just let it cool completely, then transfer it to a freezer-safe bag or container. When you’re ready to use it, thaw it in the fridge overnight and assemble fresh wraps.
Reheating: The air fryer is your best friend here. Preheat it to 350°F (175°C) and reheat the wraps for about 3 to 4 minutes. They’ll crisp right back up. You can also use a skillet over medium heat, flipping once, until the tortilla is crispy again. Avoid the microwave unless you’re in a huge hurry. It will make the tortilla soft and chewy rather than crispy.
What to Serve With These Wraps: These wraps are pretty filling on their own, but they’re even better with a few sides. I love serving them with a simple green salad dressed with a light vinaigrette. The acidity cuts through the richness of the cheese. You can also serve them with salsa, sour cream, or a dollop of guacamole. For a heartier meal, add some roasted vegetables or a side of Mexican rice. My kids love them with a handful of tortilla chips and some salsa for dipping. It’s a complete meal that everyone will love.
Frequently Asked Questions
Now go make these wraps and enjoy a stress-free dinner win. You’ve got this. And when you do make them, I’d love to hear how they turned out. Drop a comment below or tag me in your photos. Happy cooking!
Source: Nutritional Information


