


Ghost Meringue Cookies: Light Vanilla Halloween Treats
Ingredients
Method
- Separate the eggs while cold, catching only the whites in a spotless deep mixing bowl. Make sure no yolk, shell fragment, grease, or residue touches the whites. Save the yolks for another use and let the whites stand at room temperature for about 30 minutes.
- Beat the egg whites and cream of tartar with an electric mixer on high speed until soft peaks form. With the mixer still running, add the sugar one tablespoon at a time, then continue beating until stiff, glossy peaks hold and a small pinch of the meringue feels completely smooth between your fingers. Beat in the vanilla extract.
- Preheat the oven to 200 degrees F. Line two baking sheets with parchment paper, dabbing a little meringue under the corners and pressing down so the parchment stays flat while you pipe.
- Transfer the meringue to a gallon-size zip-top bag, seal it, and snip off about 1/2 inch from a lower corner. Using the bag as a piping bag, pipe freeform ghost shapes about 2 inches wide and 3 to 4 inches tall onto the prepared sheets, spacing the ghosts about 2 inches apart. Gently press two mini chocolate chips into each ghost for eyes.
- Bake the meringues until lightly golden, about 90 minutes, rotating and switching the baking sheets between racks halfway through. Turn off the oven and leave the ghosts inside with the door closed for an additional 60 minutes to dry completely before removing and cooling.
Nutrition
Notes
Tried this recipe?
Let us know how it was!What Are Ghost Meringue Cookies?
Halloween is about nine weeks out, which means you have two choices. You can scramble in mid-October like everyone else, or you can get ahead of it this weekend. These ghost meringue cookies are the easiest early-bird move you’ll make all season.
Here’s a secret. Meringue isn’t scary. I know it has a reputation. My first attempt collapsed into a flat, sticky pancake that my wife Sarah still teases me about. But once I learned a few fundamentals, ghost meringue cookies became my signature Halloween treat. Nonna would approve. She always said food is love, and honestly, these are pure love in cookie form.
Each bite starts with a crackly snow-white shell, then gives way to a soft, marshmallowy center. They’re naturally gluten-free and dairy-free, which makes them the perfect halloween meringue cookies for school parties where half the kids have allergies. Bring them to one gathering and suddenly you’re the person who always makes the cute stuff.
Ingredients for Ghost Meringue Cookies
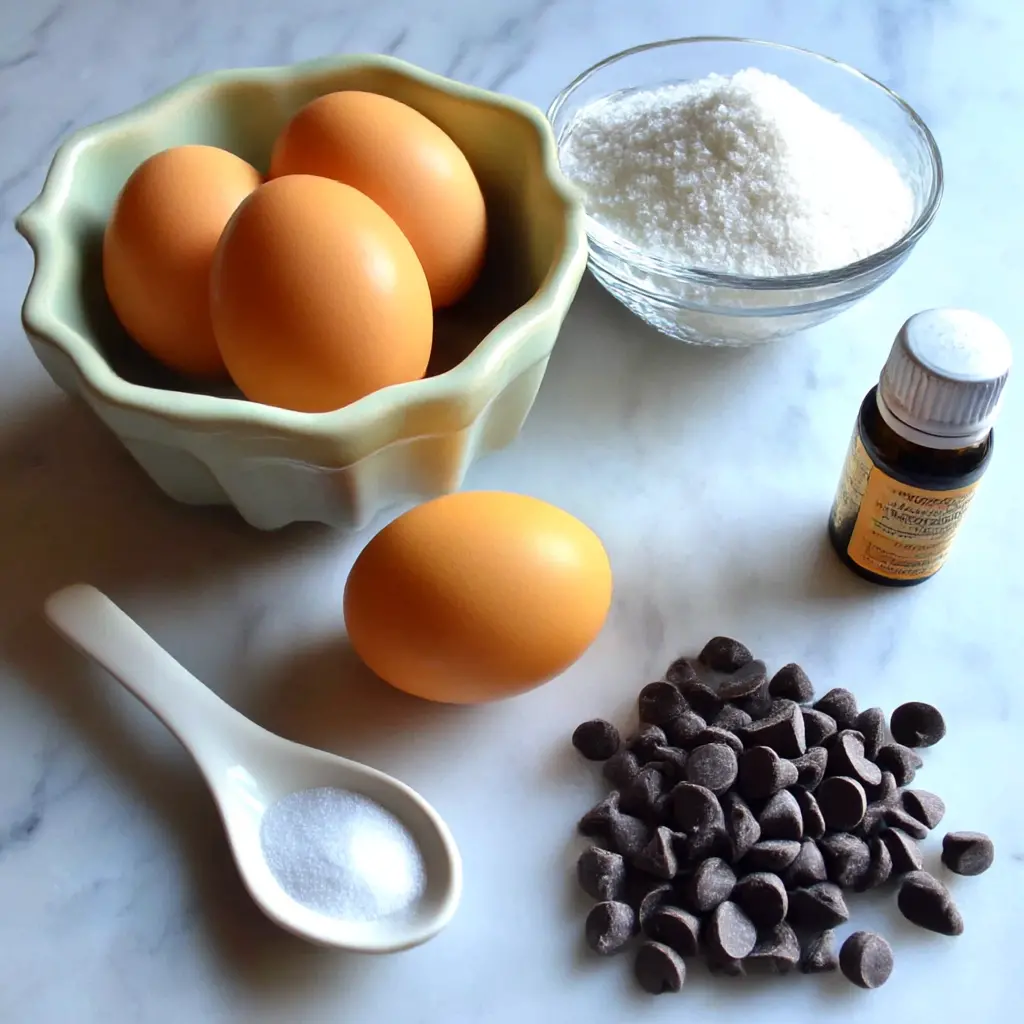
These ghost meringue cookies come together with just five ingredients, and most are probably in your kitchen right now. Here’s why each one earns its spot:
- Egg whites: Room temperature whites whip up higher and faster than cold ones. Let them sit on the counter for about 30 minutes before you start.
- Cream of tartar: This is the insurance policy for your egg whites. It stabilizes the foam so your ghosts hold their shape instead of collapsing.
- Granulated sugar: Plain white sugar works perfectly. For an extra-smooth meringue, give it a quick whirl in the blender before beating. Superfine sugar or caster sugar also works great.
- Vanilla extract: Just half a teaspoon adds that classic, warm vanilla note that makes these smell incredible while they bake.
- Mini semisweet chocolate chips: These become the ghosts’ eyes. The mini size is absolutely perfect for their little faces.
The best part? Ghost meringue cookies don’t require special equipment either. A hand mixer works beautifully, and a zip-top bag replaces a piping bag. Just clean bowls and a little patience.
Leftover Egg Yolks
Separating three eggs leaves you with three yolks. Please don’t toss them. Whisk them into tomorrow’s scrambled eggs, stir them into lemon curd, or make a simple hollandaise for Sunday brunch. They’ll keep covered in the fridge for two or three days, so you have time to figure it out.
How to Make Ghost Meringue Cookies
This is where the magic happens. The recipe card above has the full details, but understanding the why behind each stage takes the intimidation out of meringue. Let’s walk through the four stages that turn egg whites into an army of adorable ghosts.
Stage 1: Whip to Stiff Peaks
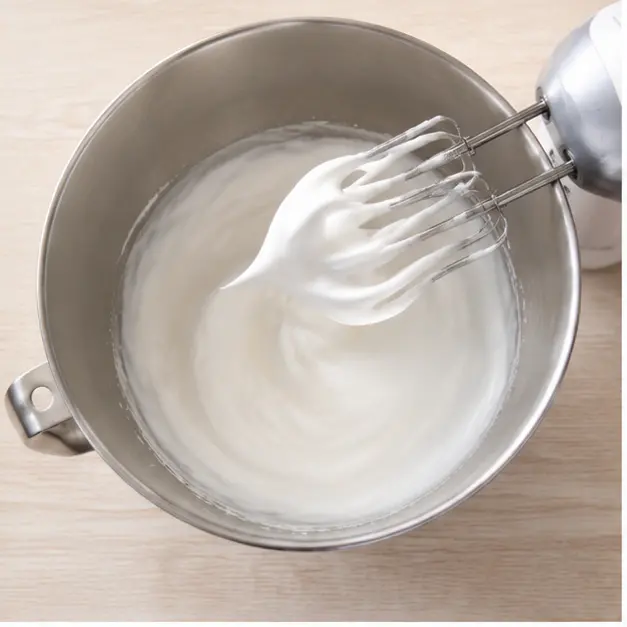
This is where most meringue disasters happen, but it’s also the most fixable. Your bowl and beaters must be spotless. Any trace of grease or yolk and your foam won’t stiffen, period. Beat the egg whites with cream of tartar on high speed until soft peaks form, then add the sugar one tablespoon at a time. That slow addition matters. Dumping it all at once deflates the foam.
Keep beating until the stiff peaks hold their shape and the meringue looks glossy. You’ll know it’s ready when you lift the beater and the peak stands straight up without drooping. Rub a little between your thumb and forefinger. Smooth means the sugar dissolved. Gritty means keep going.
Stage 2: Pipe the Ghosts
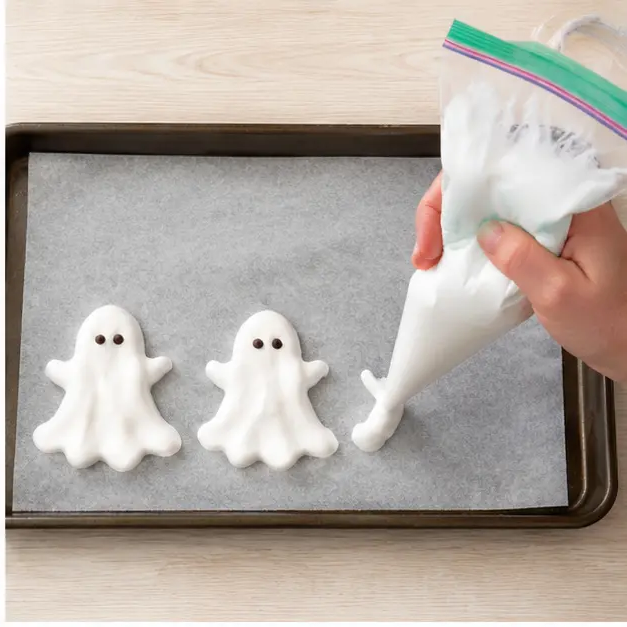
Here’s my favorite shortcut. Skip the fancy piping bag and use a gallon-size zip-top bag. Seal it, snip about half an inch off a lower corner, and you have a perfectly good piping tool. If you do want to use a large round piping tip, that works beautifully too. Pro tip: set the bag in a tall glass and fold the top over before filling. Way less messy.
Pipe freeform ghost shapes about two inches wide and three to four inches tall, spacing them two inches apart so they don’t merge into ghost blobs. And don’t stress over symmetry. Wonky meringue ghosts are charming. They just had a boo-boo.
Stage 3: Add the Eyes
This is where they come alive. Gently press two mini chocolate chips into each ghost while the meringue is still soft, right after piping. The chips soften during baking and get slightly melty, which makes the ghosts look extra sweet. Just two eyes, no mouth needed. That’s the classic recipe for cute.

Stage 4: Bake Low and Slow
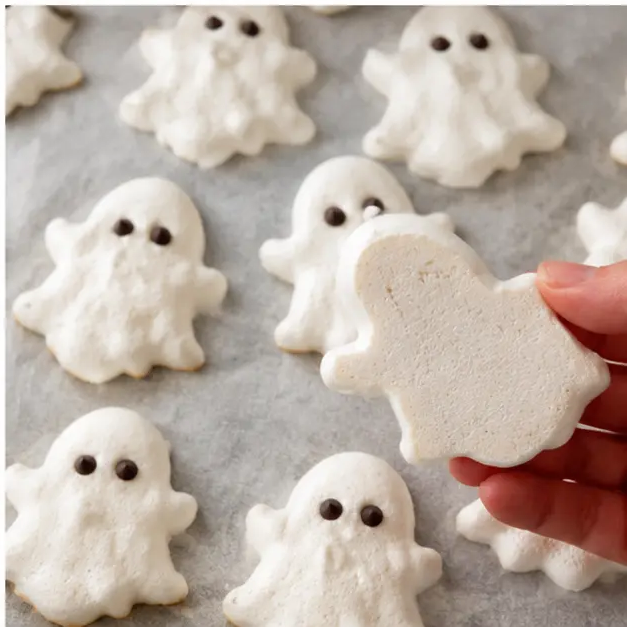
Here’s the golden rule. Bake at 200°F for about 90 minutes, rotating the baking sheets halfway through and switching racks. Forget everything you know about cookie baking. This is a low and slow oven situation. The gentle temperature dries the meringue without browning it, which is how you keep these ghost meringue cookies pure white instead of tan.
After 90 minutes, turn the oven off and leave the ghosts inside with the door closed for a full hour. This extra drying time is what creates that crispy meringue shell with the soft center. Skip it and you’ll get chewy meringues. Trust me on this one. When they’re done, they should lift cleanly off the parchment.
Tips for Perfect Ghost Meringues
After dozens of test batches, these are the tips that actually matter. I wish someone had told me all of this before my pancake incident.
- Wipe your bowl with vinegar or lemon juice before starting. It removes invisible grease that ruins meringue, especially in plastic bowls.
- Make these on a dry day. Humidity and meringue are arch-enemies. Damp weather turns crisp ghosts sticky and chewy. If you live somewhere rainy, pick the driest day you can find.
- Use an oven thermometer. Ovens lie about their temperature. At 200°F, accuracy is everything, and it costs a few dollars to know the truth.
- If your meringues get chewy anyway, pop them back into a 200°F oven for about 10 minutes to re-crisp them. It works like magic.
- Bake on the middle or upper rack to avoid overcooked bottoms.
Fun Variations to Try
Once you can pipe ghosts in your sleep, branch out. These ghost cookies are a blank canvas, and the possibilities keep Halloween feeling fresh every year.
- Colored ghosts: Add a drop of gel food coloring at the end of whipping for pink, mint green, or lavender ghosts. Gel coloring works best since it doesn’t add extra liquid.
- Different faces: Swap the chocolate chips for melted chocolate eyes piped into smiles, or use an edible marker to draw spooky expressions. My niece drew a whole family of ghosts with different moods last year.
- Flavor swaps: Use vanilla bean paste instead of extract for a deeper vanilla flavor, or try a tiny splash of almond extract. If you keep vanilla sugar in your pantry, use it in place of the granulated sugar for extra aroma.
- Different shapes: The same meringue works for classic meringue kisses, little drops, or piped pumpkins colored orange. One batch, endless possibilities.
How to Store and Serve Ghost Meringues
Here’s the thing about meringue storage tips that most people learn the hard way. Store these ghost meringue cookies in an airtight container at room temperature, and they’ll stay crisp for up to one week. No fridge, ever. The refrigerator’s moisture makes meringues sticky and sad.
Don’t freeze them either. I know it’s tempting to make a huge batch of make-ahead halloween treats, but freezing changes the texture and makes them brittle. Bake them a day or two before your Halloween party and keep them sealed. They’ll be perfect when you need them.
For serving, a simple platter is all you need. They’re also adorable toppers for cakes and pies, and they crumble beautifully over a bowl of vanilla ice cream. Honestly, they rarely make it past the platter at my house.

Troubleshooting Common Meringue Problems
Meringue can be dramatic, but almost every failure has a fix. Here’s how to handle the most common ghost meringue cookie disasters:
- ❌ My meringue won’t stiffen. → ✅ A trace of grease or yolk in the bowl sabotages the foam. Start over with a clean bowl and wipe it with vinegar or lemon juice first.
- ❌ My meringues are weeping. → ✅ Weeping, little puddles forming on the sheet, means the sugar wasn’t fully dissolved or the whites were under-whipped. Beat longer and add the sugar more slowly.
- ❌ My meringues came out brown. → ✅ Your oven runs hot. Use an oven thermometer and confirm the temperature stays at 200°F.
- ❌ My meringues are chewy and sticky. → ✅ Humidity is usually the culprit, or they didn’t dry long enough in the turned-off oven. Re-crisp them at 200°F for about 10 minutes.
- ❌ My ghosts cracked. → ✅ Sudden temperature changes cause cracking. Always let them cool slowly in the oven with the door closed.
Ghost Meringue Cookie FAQs
Bring on the Halloween Magic
Halloween is still weeks away. Use that time. Whip up a batch this weekend, then another for the big day. By October 31st, you’ll be the person who walks in with a platter of ghost meringue cookies and watches them vanish in minutes. Trust me, that feeling never gets old.
If you want more Halloween baking ideas, I’m always adding new finds to my Pinterest board, come say hi. And when your ghost army is ready, tag me. I genuinely love seeing what you create. Happy haunting, happy baking. You’ve got this.
Source: Learn More About This Dish