
Peanut Butter Oatmeal Cookies with Banana
Ingredients
Method
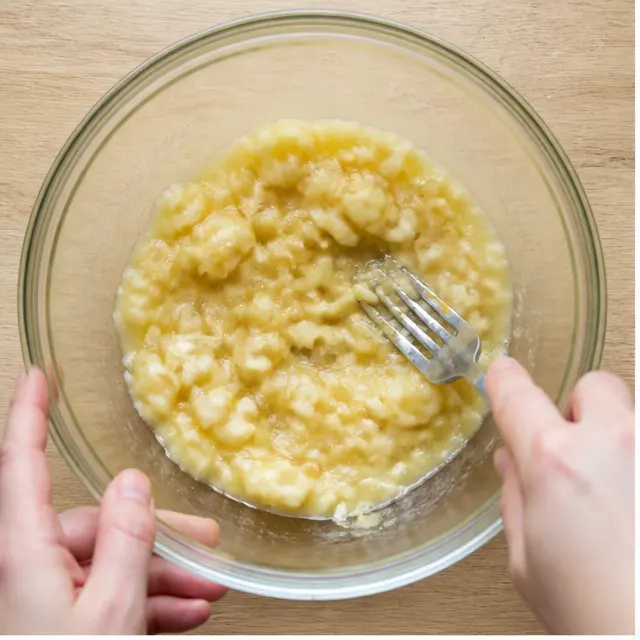
- Preheat the oven to 350°F and line a large baking sheet with parchment paper. In a large bowl, mash the ripe bananas until mostly smooth. Add the peanut butter, egg, honey, and vanilla extract, then whisk until the mixture is smooth and well combined.
- Stir in the rolled oats, oat flour, cinnamon, and salt. Fold in the mini dark chocolate chips if using. The batter will be soft and scoopable. Let it rest for 5 minutes so the oats absorb some moisture and the batter thickens.
- Use a regular eating spoon to scoop the batter onto the prepared baking sheet, leaving about 2 inches between cookies. Flatten each cookie to about 1/2 inch thick. If you like, press a few extra chocolate chips onto the tops.
- Bake for 12 to 14 minutes, until the tops look set. Let the cookies cool on the baking sheet for 10 minutes, then transfer to a wire rack to cool completely.
Nutrition
Notes
Tried this recipe?
Let us know how it was!Why You’ll Love These Peanut Butter Oatmeal Cookies
Okay, real talk. It’s 4pm, the snack drawer is empty, and a small human is already hovering asking what’s for an after-school snack. You could reach for the packaged stuff. Or you could whip up these peanut butter oatmeal cookies and look like a hero in 22 minutes flat.
Honestly, this recipe started as a desperate “please use up those sad bananas” experiment one chaotic back-to-school week. Now it’s the cookie my kids request for lunchboxes, road trips, and “Mom, can we bake?” days. The best part? The base is only 4 things: ripe bananas, peanut butter, oats, and an egg. Everything else is pure upgrade.
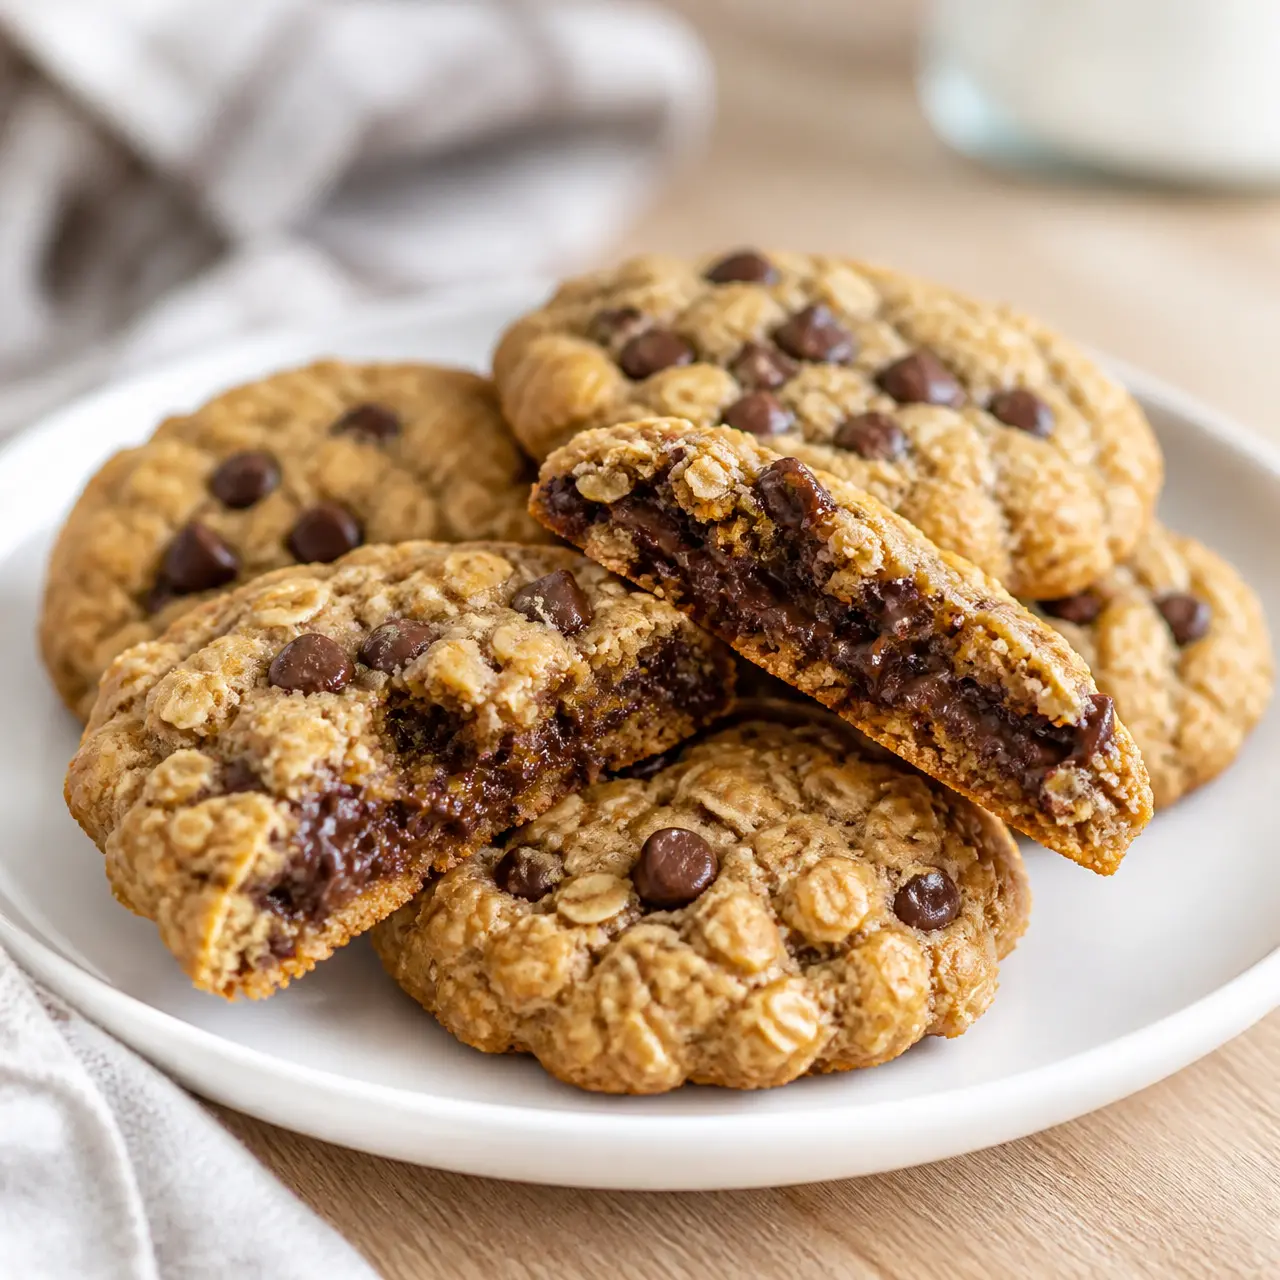
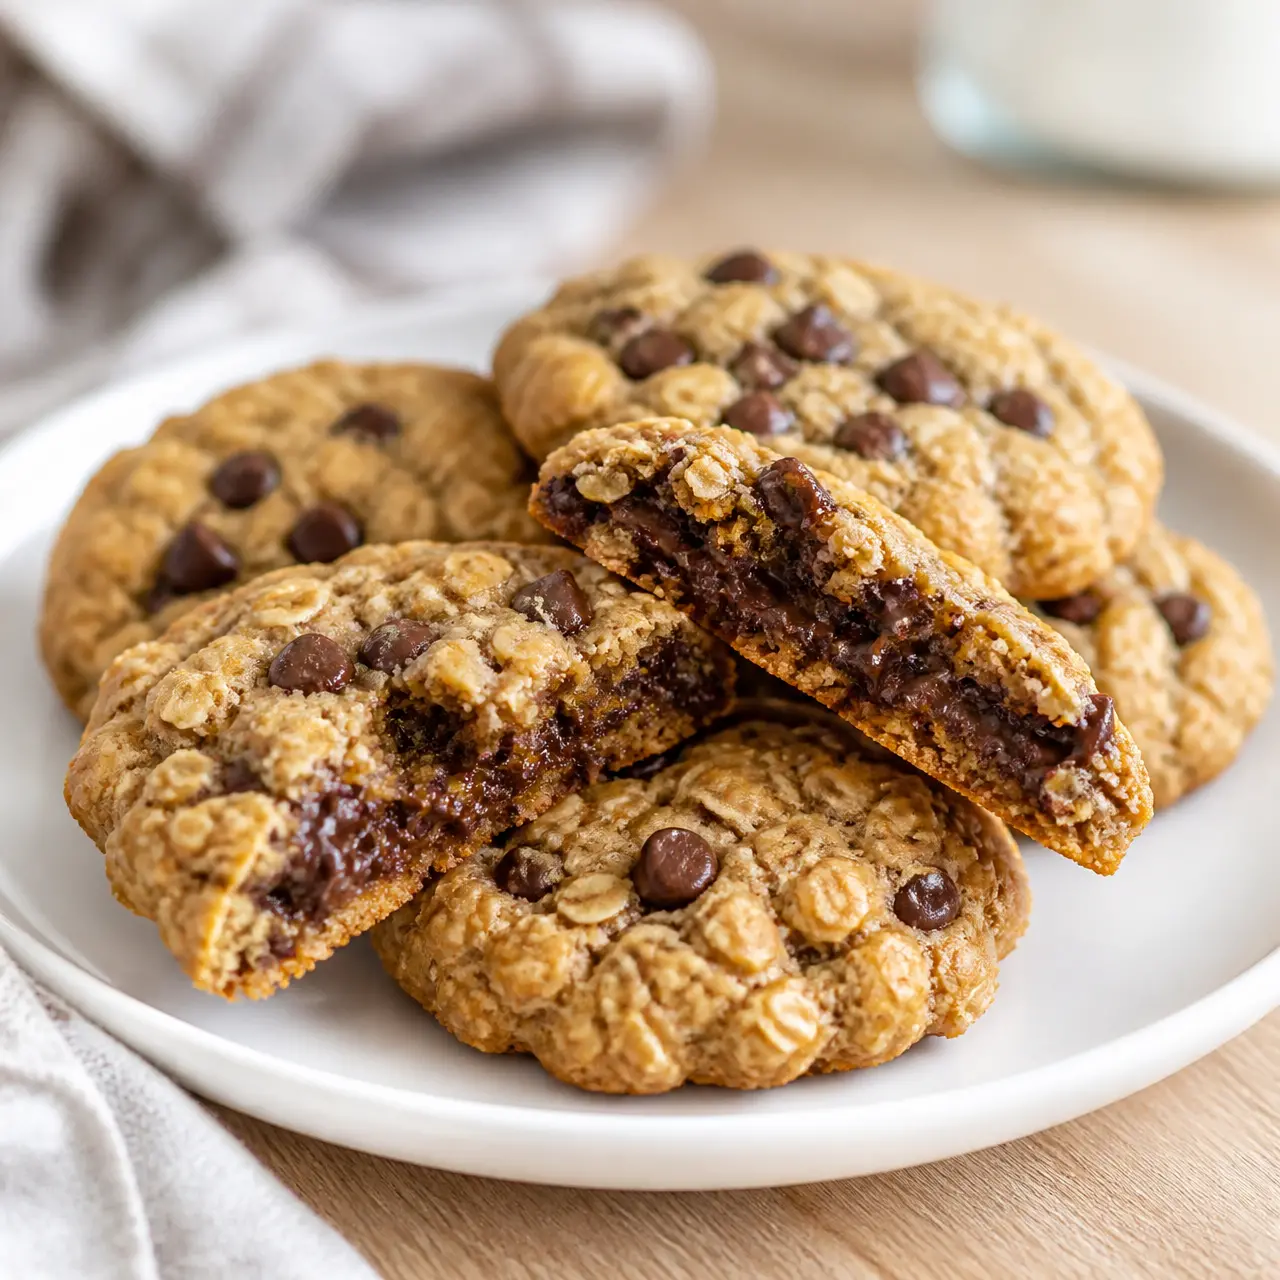
These aren’t your typical bakery cookies. These peanut butter oatmeal cookies are soft in the middle, chewy at the edges, speckled with mini dark chocolate chips, and secretly wholesome enough for breakfast. No mixer. No chilling the dough. No fancy ingredients.
Here’s what you’re getting:
- 22 minutes total, from bowl to cookie jar
- 7g protein and 4g fiber per cookie, thanks to peanut butter and oats
- These peanut butter oatmeal cookies are gluten-free when you use certified gluten-free oats
- Pantry staple baking, no emergency store run required
Key Ingredients & Substitutions
Let’s talk about what goes into these peanut butter oatmeal cookies, because every ingredient is doing a specific job. No fillers here.
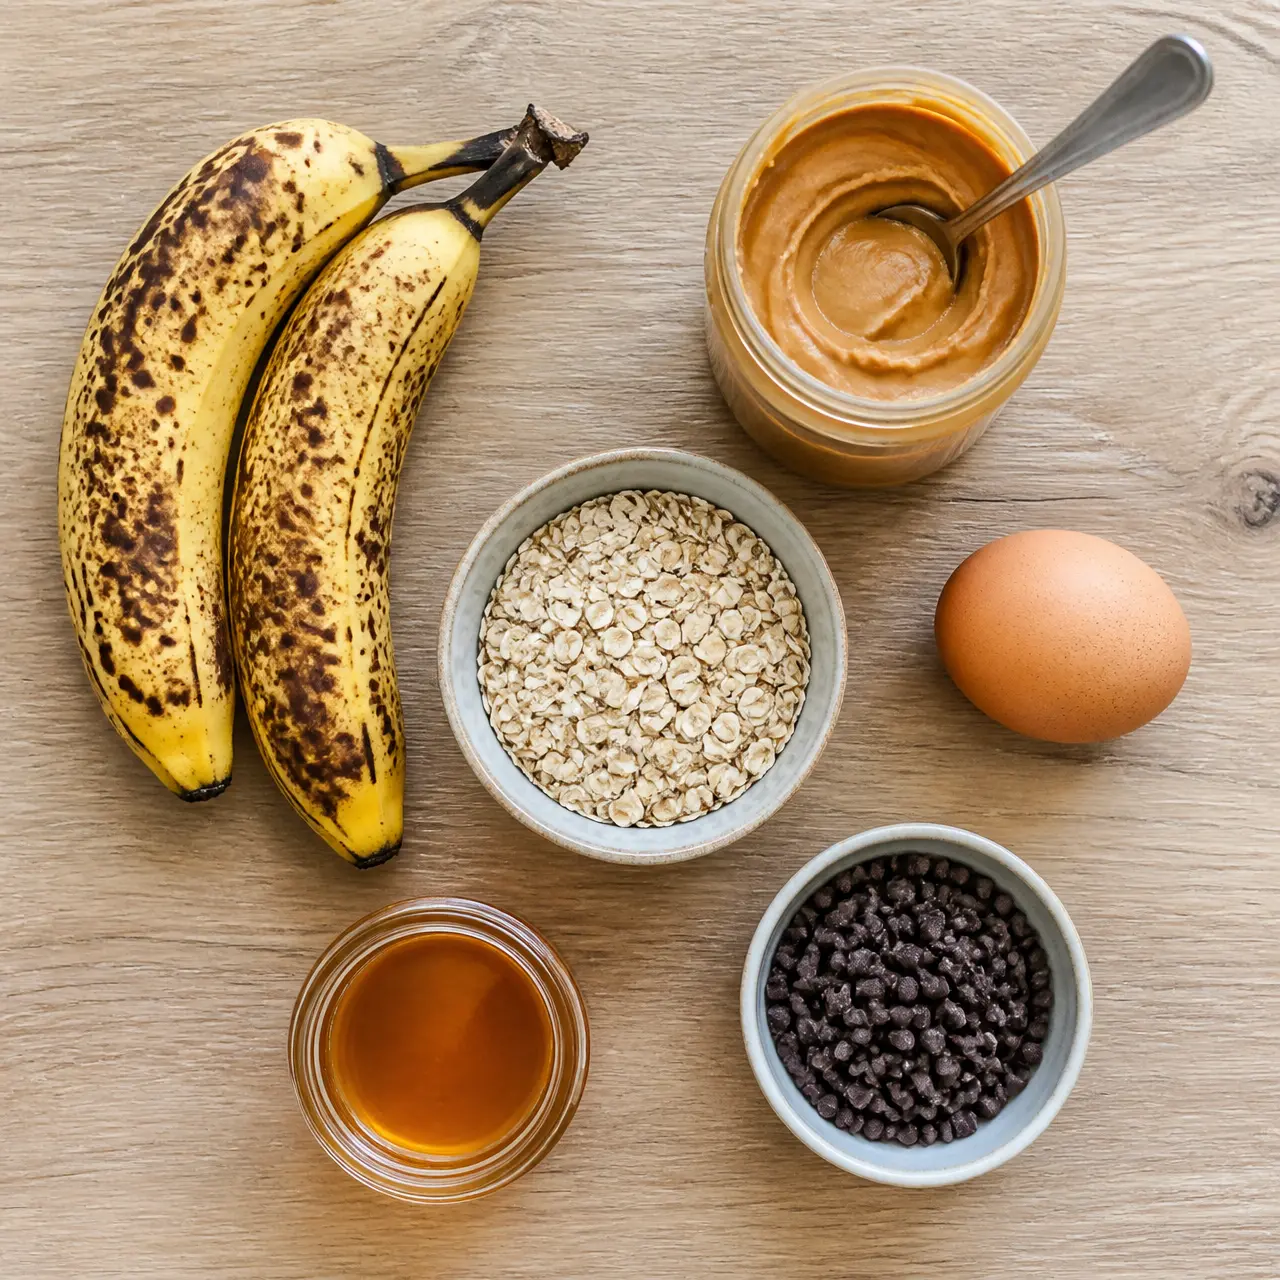
- Ripe bananas: The spottier, the sweeter. Mashed bananas add moisture and natural sweetness, so you barely need the honey.
- Natural peanut butter: Stir it well before measuring. Seriously. If you scoop from the top of an unstirred jar, you lose the oil and end up with dry, crumbly dough.
- Rolled oats: Old-fashioned oats give that hearty, chewy texture. Quick oats soak up more moisture and turn gummy.
- Oat flour: Just blend rolled oats in a blender for a few seconds. It gives structure without any wheat flour.
You might be wondering, no flour? No problem. These are essentially flourless peanut butter oatmeal cookies, and the oat flour plus banana and peanut butter hold everything together beautifully.
Need swaps? For nut-free peanut butter oatmeal cookies, use sunflower seed butter. For vegan peanut butter oatmeal cookies, use a flax egg and maple syrup instead of honey. And if you’re out of honey, maple syrup swaps in 1 to 1, easy.
How to Make Peanut Butter Oatmeal Cookies
Making peanut butter oatmeal cookies is almost stupidly simple. No creaming butter, no sifting flour, no stand mixer. Just a bowl, a spoon, and a sheet pan. Here are the four stages, plus the little details that make them turn out right.
Stage 1: Mash the bananas, then mix the wet ingredients. Grab the ripest bananas you own and mash them until mostly smooth. Whisk in the peanut butter, egg, honey, and vanilla until the mixture is glossy and fully combined. This is where the whole cookie’s flavor comes from, so don’t rush it.
Stage 2: Stir in the dry ingredients and rest the batter. Fold in the rolled oats, oat flour, cinnamon, and salt, then the mini dark chocolate chips. The batter will be soft and scoopable, like a thick muffin batter. Let it sit for 5 minutes. This matters more than you’d think: the oats need time to soak up moisture and thicken, and that’s your best defense against peanut butter oatmeal cookies that spread into one giant pancake. I learned that one the hard way.
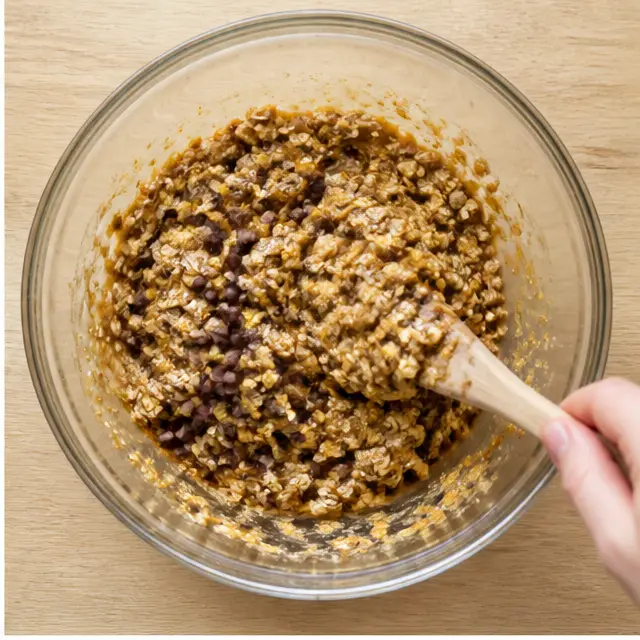
Stage 3: Scoop and flatten. Use a regular eating spoon to drop the dough onto a parchment-lined sheet, leaving about 2 inches between each cookie. Flatten every cookie to about 1/2 inch thick. The dough is sticky, so wet your fingers slightly before pressing down. This trick makes everything easier, I promise.
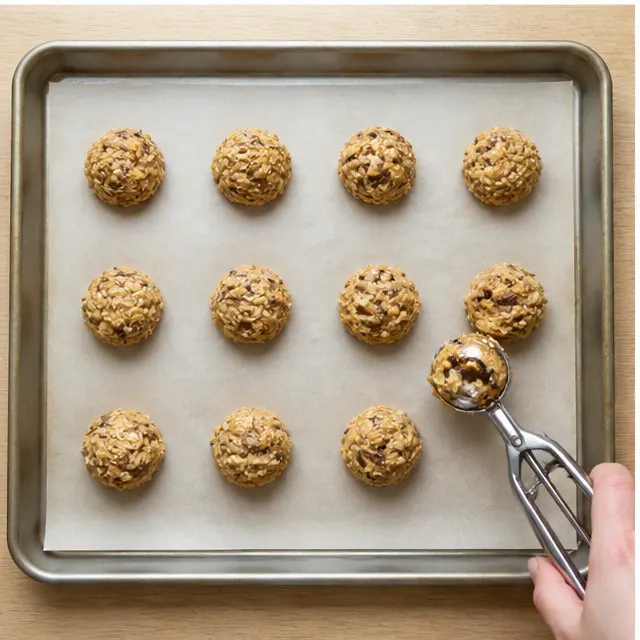
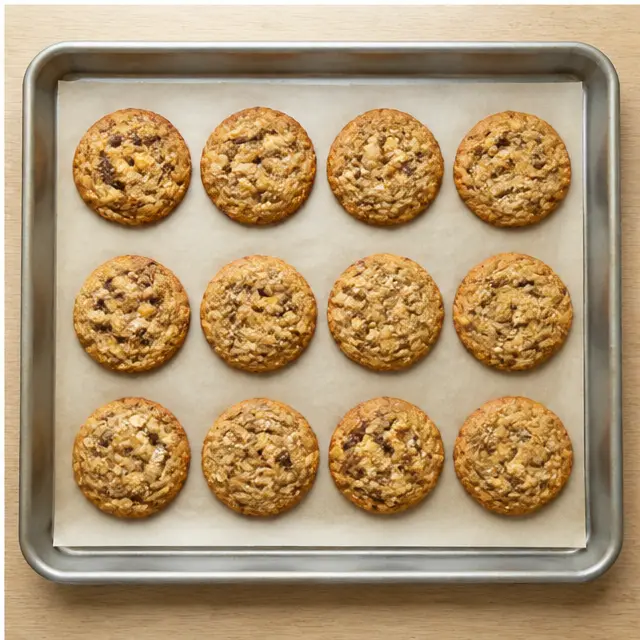
Stage 4: Bake until the edges are set. Slide the sheet into a 350°F oven for 12 to 14 minutes. The tops should look set while the centers still feel soft. That’s exactly what you want. These peanut butter oatmeal cookies finish baking on the hot sheet while they cool for 10 minutes, so if you wait until they look “done” in the oven, you’ll get dry cookies. Trust me on this one.
And that 10-minute rest on the hot sheet? It’s not just a suggestion it’s the difference between cookies that shatter and cookies that bend. After that, transfer them to a wire rack and let the centers finish setting up. The chocolate chips firm back into melty pockets instead of turning into one giant smear. Try to let them cool for at least a few minutes before the first taste test. I know. It’s hard. But the texture rewards your patience, I promise.
Storage & Freezing
Let me break the storage question into two categories: cookies that already exist, and dough that hasn’t met the oven yet. Both have a solid game plan.
Baked Cookies at Room Temperature
Keep the baked cookies in an airtight container at room temperature for up to 4 days. A glass meal-prep container or a zip-top bag works great. Here’s a grandma trick that sounds weird but genuinely works: toss a slice of sandwich bread into the container. The cookies draw moisture from the bread and stay soft and chewy instead of drying out. I would never steer you wrong.
Freezing Baked Cookies
These freeze beautifully for up to 3 months. Lay the cooled cookies in a single layer in a freezer bag, press out the extra air, and seal. To bring them back, let one sit on the counter for 10 minutes, or hit it with 10-15 seconds in the microwave for that fresh-from-the-oven warmth. Straight-from-the-freezer is also a legitimate choice honestly, they taste like frozen cookie dough bites, and there’s a special place in my heart for that.
Refrigerating the Unbaked Dough
The dough keeps in the fridge for up to 4 days. Just cover the bowl tightly so it doesn’t dry out, then scoop and bake when you’re ready. Since the dough starts cold, you might need to add a minute to the bake time. This is my favorite strategy for busy weeks: make the dough on Sunday, bake fresh cookies on Tuesday.
Freezing the Dough Balls
This is the meal-prep move I recommend to every busy parent I know. Scoop the dough into individual balls, freeze them on a parchment-lined sheet until solid, then transfer to a freezer bag. When cookie cravings hit, bake the frozen dough balls straight from the freezer at 350°F and add about 1 minute to the bake time. No thawing needed. Future-you will be extremely grateful on a chaotic school morning.
Tips for the Best Results
These peanut butter oatmeal cookies are forgiving, but these are the small details that separate “good” from “wait, can I have another one?” in no particular order.
- Weigh your bananas if you have a scale. The recipe is built around medium bananas. If yours are huge, you’ll have extra moisture and the dough will spread more. No scale? Just use medium bananas and add a tablespoon of extra oat flour if the dough looks loose.
- Wet your fingers before flattening. This dough is sticky by design. A quick water dip makes flattening effortless and keeps the dough exactly where you want it.
- Don’t judge doneness by color alone. Bananas don’t brown the way butter does, so these cookies stay pale even when they’re fully baked. Use the edge-set test instead: the edges should look firm and slightly golden while the centers still feel soft.
- Make oat flour fresh. It’s literally one blender pulse away. Fresh oat flour binds better and gives a more consistent texture than store-bought, which can sit on the shelf for months and turn stale.
- Rest the dough. Always. If you remember nothing else from this entire article, remember the five-minute rest. It’s the cheapest insurance you’ll ever get against flat, sad cookies.
The Science Behind These Peanut Butter Oatmeal Cookies
Let me put on my nerd hat for a second, because understanding why this recipe works makes you a better baker even when you’re not following this exact recipe.
Why bananas, peanut butter, and oats hold together without flour: Bananas are doing triple duty here. They’re a binder, thanks to their natural pectin and starch. They’re a sweetener, because ripe bananas are packed with natural sugars. And they’re the moisture source, which means you don’t need butter or oil at all. The peanut butter adds fat and protein, which create that soft, tender crumb and help the cookies hold their shape. The oats, meanwhile, act like a sponge. They absorb the liquid from the bananas and peanut butter, swell up, and form the structure that wheat flour would in a traditional cookie.
Why the dough rest is non-negotiable: Oats hydrate slowly. When you first mix the dough, it looks loose and scoopable. Five minutes later, it’s noticeably thicker. That’s the oats doing their job. This hydration step is what prevents the dough from spreading into one giant cookie pancake in the oven. It’s also why I don’t recommend chilling the dough overnight instead the oats absorb even more liquid, and you end up with a drier, denser cookie. A short rest is the sweet spot.
Why oat flour instead of wheat flour: Oat flour is just rolled oats blended into a fine powder. It’s naturally gluten-free, adds a subtle nutty sweetness, and because oats are high in beta-glucan (a type of soluble fiber), it creates a soft, moist texture without making the cookies tough. To make your own, pulse rolled oats in a blender for 10-15 seconds. That’s it. One cup of oats becomes roughly one cup of oat flour.
Natural peanut butter vs. conventional: Conventional peanut butter like Jif or Skippy contains stabilizers, so it stays emulsified and predictable. Natural peanut butter separates and can make the dough oilier, which leads to more spread. For this specific recipe, I actually prefer conventional peanut butter for the most reliable results. If you only have natural on hand, stir it very well and accept that the dough will be a little softer. They’ll still taste fantastic.
Flavor Variations
The base recipe is a winner on its own, but it’s also a blank canvas. These are my favorite ways to change it up when I’m feeling fancy or just running low on chocolate chips.
- Crunchy peanut butter: Swap in crunchy for little peanut pieces in every bite. Fair warning: crunchy peanut butters tend to be a bit drier, so the cookies may come out slightly less soft. Still delicious, just different.
- Almond butter or cashew butter: Both swap in 1-to-1 for peanut butter and give the cookies a softer, more buttery flavor. Almond butter makes them taste almost like marzipan dangerous stuff.
- Sunflower seed butter: The nut-free hero works perfectly 1-to-1. One thing worth knowing: sunflower seeds contain a compound that can react with leavening ingredients and give baked goods a greenish tint. It’s totally harmless and barely visible once you add chocolate chips, but I’d rather you hear it from me than think you did something wrong.
- Dried fruit: Raisins, dried cranberries, chopped dates, or dried cherries all work beautifully in place of chocolate chips. No other adjustments needed.
- Chopped nuts: Fold in toasted pecans or walnuts for extra crunch. Walnuts especially love the company of oats and banana.
- Spices: A pinch of nutmeg, a quarter teaspoon of cardamom, or even some ground ginger can take these in a whole new direction. Cinnamon is the classic, but don’t be afraid to experiment.
- Flaky salt finish: Sprinkle a little flaky sea salt on top of each cookie right before baking. The salty-sweet combo with peanut butter and chocolate is genuinely dangerous.
Dietary Adaptations
This recipe is already a lot friendlier than your average cookie, but here’s how to adapt it for specific needs.
Vegan peanut butter oatmeal cookies: Swap the egg for a flax egg (1 tablespoon ground flaxseed mixed with 3 tablespoons water, rested for 5 minutes until it thickens) and use maple syrup instead of honey. Everything else stays the same. The flax egg binds the dough just as well, and the cookies keep their soft, chewy texture. I’ve made this swap more times than I can count.
Gluten-free peanut butter oatmeal cookies: These are already gluten-free as long as you use certified gluten-free oats. Since there’s no wheat flour anywhere in this recipe, oats are the only potential source of gluten contamination. Check the label and you’re good to go.
Egg-free: The flax egg swap above works here too, as does a chia egg (1 tablespoon chia seeds mixed with 3 tablespoons water, rested for 5 minutes). Both create the same binding effect as a regular egg.
Lower sugar: Cut the honey down to 1 tablespoon and make sure your bananas are extra ripe. The chocolate chips already add sweetness, so you won’t miss it.
How to Tell When They’re Done
Peanut butter oatmeal cookies are notoriously hard to judge because they don’t dramatically change color while baking. Here’s my visual checklist so you never second-guess yourself again.
- Perfectly done: The edges are set and lightly golden, the tops look matte and dry, and the centers still have a tiny bit of softness when you press them gently. The cookie springs back slowly when you poke it, like a memory foam pillow.
- Over-baked: The entire surface looks uniformly brown, the edges are darker and slightly crisp, and the cookie feels firm all the way across. These will crumble once they cool. They’re still edible just call them “crispy style” and move on.
- Under-baked: The centers look wet, shiny, and unset, and the cookie doesn’t hold its shape when you try to lift it. Pop the sheet back in for another 2-3 minutes and check again.
Remember: carry-over baking is real. The residual heat of the hot sheet continues cooking these cookies for the full 10 minutes they rest. Pull them while the centers are still slightly soft, and they’ll finish baking perfectly on the counter. This one habit will improve every cookie you ever bake, not just these.
Frequently Asked Questions
How ripe should the bananas be?
The spottier, the better. Fully ripe bananas with brown spots (or even mostly brown ones) are sweeter, softer, and mash more smoothly. If your bananas are still bright yellow, the cookies will be less sweet and slightly starchier. Leave them on the counter for a day or two good things come to those who wait.
Can I use regular peanut butter instead of natural?
Yes, and honestly, for the most consistent results, I recommend conventional peanut butter like Jif or Skippy. It stays emulsified and gives the dough a more predictable structure. If you only have natural, stir it thoroughly before measuring and keep in mind the dough may be slightly softer.
Can I make these cookies vegan or eggless?
Yes. Use a flax egg (1 tablespoon ground flaxseed + 3 tablespoons water, rested 5 minutes) and maple syrup instead of honey. The cookies stay soft, chewy, and delicious. A chia egg works just as well.
Can I use quick oats or instant oats?
You can, but I don’t recommend it. Quick oats absorb more moisture and turn the cookies gummy and dense. Instant oats are even worse. Old-fashioned rolled oats are the texture you want hearty, chewy, and intact. If quick oats are all you have, reduce the resting time and expect a softer, denser cookie.
Why did my cookies spread into flat disks?
A few likely culprits: you skipped the 5-minute dough rest, your bananas were extra large (adding too much moisture), or your peanut butter was too oily. Fix it by resting the dough, using medium bananas, and stirring your peanut butter well before measuring. If the dough still feels too loose, add an extra tablespoon of oat flour.
Can I omit the chocolate chips?
Of course. The cookies are just as good without them. Swap in raisins, dried cranberries, chopped nuts, or just leave them plain. You could also press a few chocolate chips on top of each cookie right before baking for a prettier look, which is my go-to move when I’m baking for company.
How do I make oat flour at home?
Pulse rolled oats in a blender or food processor for 10-15 seconds until they turn into a fine powder. No need to sift, though sifting gives you a more consistent texture. One cup of oats yields about one cup of oat flour. Store any extra in an airtight jar it keeps for months.
Expert Notes & Data Insights
Since I’ve made these peanut butter oatmeal cookies roughly a hundred times (not an exaggeration, my family will confirm), let me share the insights that come from obsessively testing the same recipe.
Banana ripeness is the #1 flavor lever. A spotty banana can be up to 50% sweeter than a bright yellow one because the starches convert to sugar as the banana ripens. When I tested this recipe side by side, the spotted-banana batch needed no extra honey and tasted noticeably more complex. The yellow-banana batch was fine, but flatter in flavor. Moral of the story: patience pays off, even in baking.
The dough rest is the #1 texture lever. I’ve tested batches with no rest, a 5-minute rest, and a 30-minute rest. The no-rest cookies spread into thin disks. The 5-minute rest cookies held their shape and baked up thick and chewy. The 30-minute rest cookies were slightly denser, which is fine, but the 5-minute mark is genuinely the sweet spot. The oats have just enough time to hydrate without going overboard.
You can skip the chilling step entirely. Unlike traditional peanut butter cookies that rely on creamed butter and need fridge time to firm up, this banana-based dough is ready as soon as it rests. That’s a real advantage when you’re baking with impatient kids or a tight after-school schedule. Every minute matters.
Nutritional perspective: Compared to a typical bakery-style cookie, these deliver about 7g of protein and 4g of fiber per serving, with no refined sugar and no butter. The peanut butter provides healthy monounsaturated fats, and the oats contribute beta-glucan, a soluble fiber that’s been shown to support heart health. Are these a health food? No. But as far as cookies go, they’re a genuinely smarter choice one you can feel good about packing in a lunchbox or grabbing with your afternoon coffee.
What the storage data says: In my testing, these cookies actually improved after 24 hours in an airtight container. The moisture from the bananas continues to distribute through the oats, making the texture even more uniform on day two. So don’t stress about eating them all immediately. You can’t, anyway. Trust me, they won’t last that long.
So go ahead mash those bananas, stir that peanut butter, and let the oats do their thing. Whether you’re feeding a lunchbox crowd or just looking for a 22-minute escape from snack-time chaos, these peanut butter oatmeal cookies have your back. And if you double the batch like I always do, you’ll have a freezer stash ready for the next emergency. You’ll thank yourself later.