
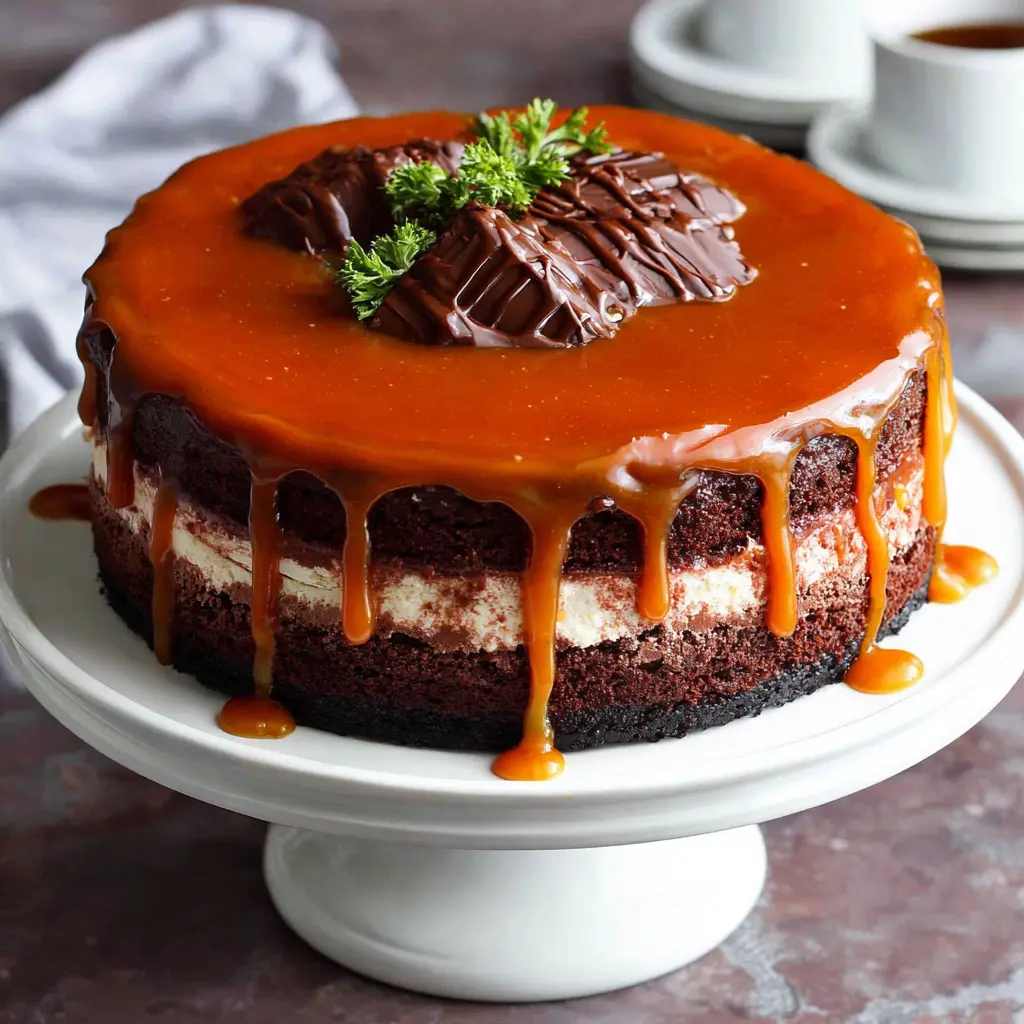

Chocolate Caramel Cheesecake Cake
Ingredients
Method
- Preheat your oven to 350°F. Spray a 9-inch springform pan with nonstick spray and line the bottom with parchment paper.
- In a large bowl, beat the cream cheese, sour cream, sugar, flour, and vanilla with an electric mixer on medium speed until smooth. Stir in the beaten eggs until just combined.
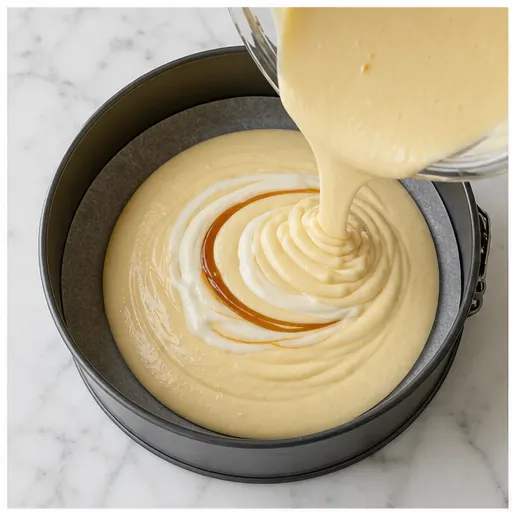
- Pour the cheesecake filling into the prepared springform pan.
- Place the springform pan inside a larger roasting pan. Pour hot water into the roasting pan until it reaches about 1 inch up the sides of the springform pan, creating a water bath.
- Bake for 40 to 50 minutes, until the cheesecake is set around the edges but still slightly jiggly in the center. Remove from the oven and let cool in the pan on a wire rack for 15 minutes.
- Cover and refrigerate for at least 2 hours, or until fully chilled and firm.
- Preheat your oven to 350°F. Spray two 8-inch round cake pans with nonstick spray.
- In a large bowl, sift together the flour, sugar, cocoa powder, baking soda, baking powder, and salt. Whisk to combine.
- In a separate bowl, whisk together the buttermilk, oil, eggs, and vanilla.
- With the mixer on low speed, slowly add the wet ingredients to the dry ingredients. Then, with the mixer still on low, pour in the hot coffee and mix just until smooth, scraping down the sides as needed.
- Divide the batter evenly between the two prepared pans. Bake for 30 to 40 minutes, until a toothpick inserted into the center comes out clean or with a few moist crumbs.
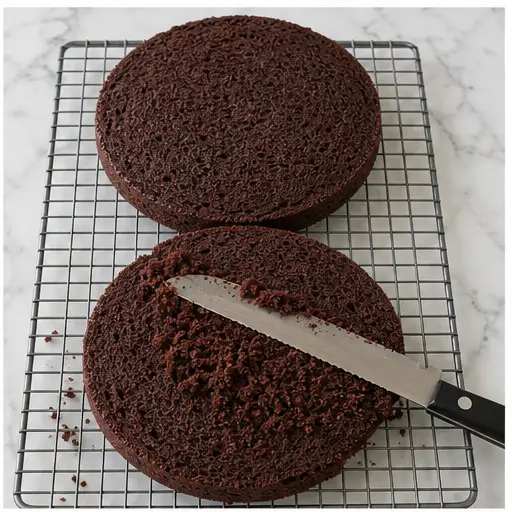
- Let the cakes cool in the pans for 30 minutes, then turn them out onto a wire rack to cool completely.
- In the bowl of a stand mixer fitted with the whisk attachment, beat the butter and confectioners' sugar on medium-high speed until very pale and fluffy, about 5 minutes. Scrape down the bowl halfway through.
- Turn off the mixer and add the cocoa powder, vanilla, and salt.
- Mix on low speed for about 30 seconds to incorporate the dry ingredients.
- Add the heavy cream, one tablespoon at a time, mixing on low after each addition.
- Once all the cream is added, scrape down the sides of the bowl.
- Increase the speed to medium-high and whisk for 3 to 5 minutes, until the buttercream is light, fluffy, and shiny with visible air bubbles.
- Place one chocolate cake layer on a cake stand or serving plate.
- Carefully place the chilled cheesecake on top of the cake layer. If needed, trim the cheesecake to match the diameter of the cake layers.
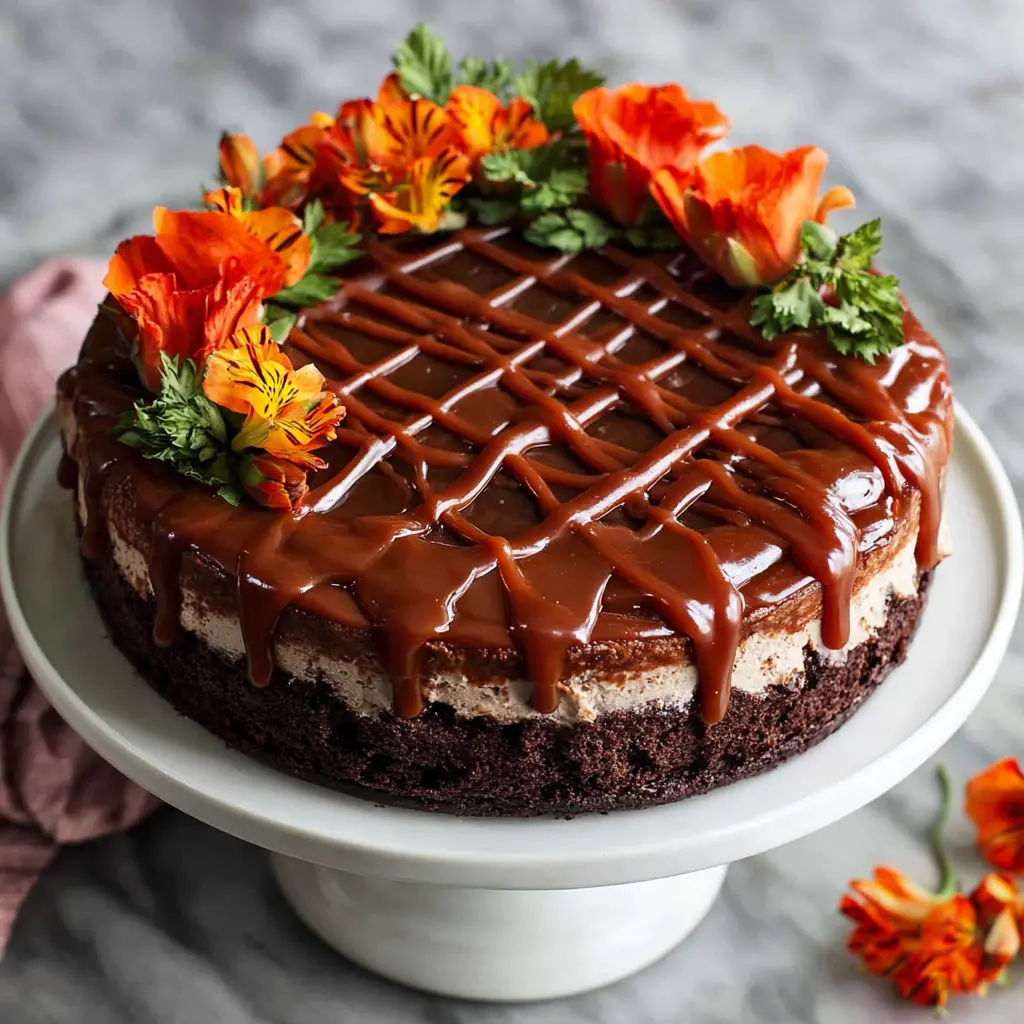
- Drizzle a generous amount of salted caramel sauce over the cheesecake.
- Place the second chocolate cake layer on top of the cheesecake.
- Spread a thin crumb coat of chocolate buttercream over the entire cake to seal in crumbs.
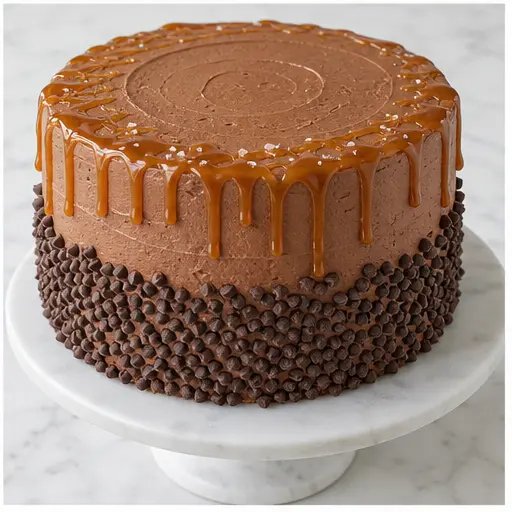
- Press mini chocolate chips into the sides of the cake, covering them completely.
- Pipe dollops of the remaining buttercream around the top edge of the cake. Drizzle more salted caramel sauce over the top. Chill until ready to serve.
Nutrition
Notes
Tried this recipe?
Let us know how it was!Why You’ll Love This Chocolate Caramel Cheesecake Cake
I used to think layered cakes were only for professionals. You know, the kind you see on those Instagram feeds with perfect sharp edges and glossy drips. The kind that seem to require a pastry degree and a whole lot of patience I didn’t have. But this Chocolate Caramel Cheesecake Cake? It changed my mind.
This isn’t just a cake. It’s a three-part masterpiece that comes together with a little planning and a lot of love. You get a dense, fudgy chocolate cake that’s sturdy enough to hold up a whole layer of creamy, tangy cheesecake. Then there’s the salted caramel, which weaves through everything, adding that sweet-and-salty pop. And let’s not forget the chocolate buttercream that ties it all together. It’s the kind of dessert that makes people stop mid-bite and just stare at their plate.
I remember the first time I attempted something like this. I was nervous, honestly. I had visions of the cheesecake layer sliding off the cake like a hockey puck. But I learned a few tricks along the way, and I’m sharing every single one of them with you. This recipe is built for success, even if you’re not a professional baker. It’s a showstopper for spring celebrations like Memorial Day, Father’s Day, or just a weekend when you want to impress yourself.
So, let’s get into it. You’ve got this.
Ingredient Notes
Before we dive into the process, let’s talk about what makes this cake tick. Each component has a job, and the right ingredients make all the difference. Here’s what you need to know.
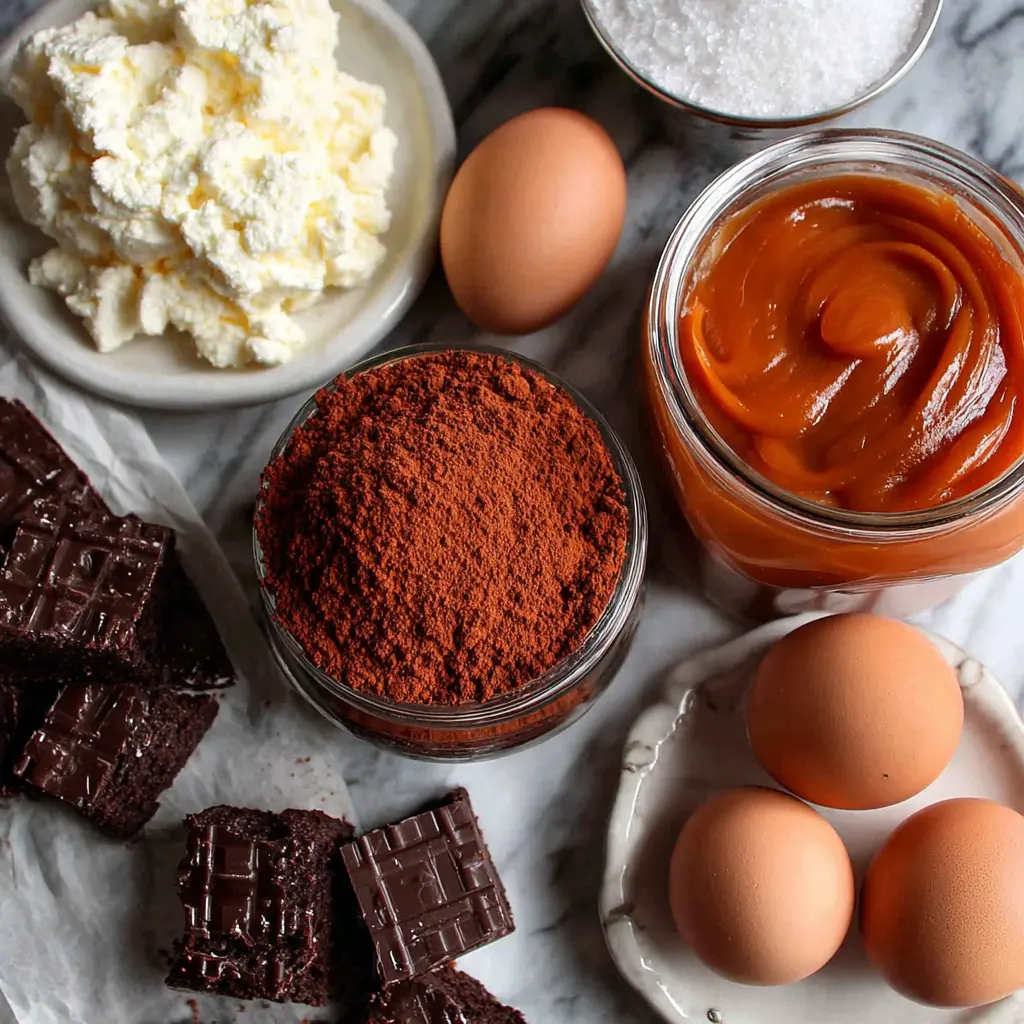
For the Cheesecake: You’ll need a full 16 ounces of cream cheese, softened. Don’t skip the sour cream it adds that signature tang and keeps the cheesecake incredibly creamy. The flour is a little secret; it helps stabilize the cheesecake so it bakes up firm enough to slice without cracking. And the eggs should be at room temperature. Cold eggs can seize the batter, leading to a lumpy texture.
For the Chocolate Cake: This is my go-to chocolate cake recipe. The buttermilk makes it tender, and the hot brewed coffee is the secret weapon. Don’t worry, you won’t taste the coffee. It just deepens the chocolate flavor, making it rich and complex. You can use decaf if you prefer. The oil keeps the cake moist for days, which is crucial since you’ll be assembling this over time.
For the Buttercream and Toppings: We’re making a classic American buttercream with cocoa powder. It’s simple but so good. The heavy cream helps get that silky, spreadable consistency. For the caramel, you can use a good quality store-bought salted caramel sauce. I like the one from Trader Joe’s or you can make your own. The mini chocolate chips are for the sides they add a lovely crunch and a professional-looking finish.
How to Make Chocolate Caramel Cheesecake Cake
This is where the magic happens. The key to this cake is planning. You’ll make the cheesecake first, let it chill, then bake the cake layers, and finally assemble everything. It sounds like a lot, but it’s totally doable. Let’s break it down into four major stages.
Stage 1: The Cheesecake Layer
Start with the cheesecake. You want it fully chilled and firm before you even think about stacking it. Preheat your oven to 350°F. Spray a 9-inch springform pan and line the bottom with parchment. In a large bowl, beat the cream cheese, sour cream, sugar, flour, and vanilla until smooth. Then stir in the beaten eggs just until combined. Overmixing here can incorporate too much air, leading to cracks.
Now, the water bath. This is non-negotiable for a smooth, crack-free cheesecake. Wrap the outside of your springform pan in foil to prevent water from seeping in, then place it inside a larger roasting pan. Pour hot water into the roasting pan until it reaches about an inch up the sides of the springform pan. Bake for 40 to 50 minutes. The edges should be set, but the center should still jiggle slightly when you gently shake the pan. Let it cool in the pan on a wire rack for 15 minutes, then cover and refrigerate for at least 2 hours. Overnight is even better.
Stage 2: The Chocolate Cake Layers
While the cheesecake is chilling, you can bake the cake layers. Preheat the oven again to 350°F and spray two 8-inch round cake pans. In a large bowl, sift together the flour, sugar, cocoa powder, baking soda, baking powder, and salt. In another bowl, whisk together the buttermilk, oil, eggs, and vanilla.
With your mixer on low, slowly add the wet ingredients to the dry. Then, with the mixer still on low, pour in the hot coffee. The batter will be thin that’s okay. Divide it evenly between the two pans. Bake for 30 to 40 minutes, until a toothpick inserted in the center comes out clean or with a few moist crumbs. Let the cakes cool in the pans for 30 minutes, then turn them out onto a wire rack to cool completely. You can level them with a serrated knife if you want perfectly flat layers.
Stage 3: The Chocolate Buttercream
This buttercream is a dream. In the bowl of a stand mixer with the whisk attachment, beat the softened butter and confectioners’ sugar on medium-high until pale and fluffy. This takes about 5 minutes. Scrape down the bowl halfway through. Then add the cocoa powder, vanilla, and a pinch of salt. Mix on low to combine, then add the heavy cream, one tablespoon at a time. Once it’s all in, scrape the bowl and whip on medium-high for another 3 to 5 minutes. You’re looking for a light, fluffy, and shiny texture with visible air bubbles.
Stage 4: Assembling the Cake
This is the fun part. Place one chocolate cake layer on your serving plate or cake stand. Carefully place the chilled cheesecake on top. If your cheesecake is a little wider than the cake layers, you can trim it with a sharp knife to match. Then drizzle a generous amount of salted caramel sauce over the cheesecake. Don’t be shy here.
Place the second chocolate cake layer on top of the cheesecake. Now, spread a thin crumb coat of chocolate buttercream over the entire cake. This seals in any loose crumbs. Pop it in the fridge for 15 minutes to set. Then, press the mini chocolate chips into the sides of the cake. You can use your hands or a small offset spatula. Finally, pipe dollops of the remaining buttercream around the top edge and drizzle more caramel over the top. Chill until you’re ready to serve.

Tips and Tricks for a Perfect Cake
I’ve made this cake more times than I can count, and I’ve picked up a few things along the way. Here are my best tips to make sure yours turns out perfectly.
- Make ahead of time: This is a great make-ahead dessert. Bake the cheesecake and cake layers a day in advance. Wrap the cake layers tightly in plastic wrap and store them at room temperature. Keep the cheesecake in the fridge. Assemble the next day. It takes the pressure off.
- Use a water bath for the cheesecake: I know it’s a little extra work, but it’s the best way to prevent cracks. The steam helps the cheesecake bake evenly and slowly.
- Don’t overbake the cheesecake: It will continue to set as it cools. You want the center to be slightly jiggly when you take it out of the oven. If it’s fully set, it might be overbaked and crack.
- Level your cake layers: If your cake layers have domed tops, use a serrated knife to trim them flat. This ensures your cake stacks evenly and doesn’t lean.
- Chill between steps: After you apply the crumb coat, chill the cake for 15 minutes. This makes the final coat of buttercream much easier to apply without picking up crumbs.
- Slice yourself the first piece: The first slice is always a little messy. It’s the baker’s tax. Take it for yourself, and your guests will get perfect slices.
Recipe FAQs
How to Store and Freeze
This cake is a bit of a project, so you’ll want to make sure you can enjoy it for days. Here’s how to handle leftovers and make-ahead plans.
Refrigeration: Cover the cake loosely with plastic wrap or store it in a cake carrier in the refrigerator. It will stay fresh for up to 5 days. The flavors actually meld together beautifully overnight, so day two is often even better than day one.
Freezing: You can freeze the fully assembled, unfrosted cake. Wrap it tightly in a layer of plastic wrap, then a layer of foil. Freeze for up to a month. When you’re ready to serve, thaw it in the refrigerator overnight. Make the buttercream and caramel fresh, then frost and decorate. The texture of the cake and cheesecake will be just as good as fresh.
Reheating: This cake is best served cold or at room temperature. If you want a slightly warm slice, you can microwave individual slices for about 15 seconds. The chocolate cake will warm up beautifully, but the cheesecake will stay cool and creamy.
More Decadent Desserts
If you love this Chocolate Caramel Cheesecake Cake, you might also enjoy some of my other favorite showstopper desserts. They’re all designed to impress without a ton of fuss.
For something a little different, try my Best Ever Chocolate Cake it’s the same base cake recipe I use here, but in a simple layer cake with a silky chocolate ganache. Or, if you’re in the mood for something with a bit of fruit, my Lemon Blueberry Cheesecake is a perfect spring dessert. It’s tangy, creamy, and so refreshing.
And for those who just can’t get enough of the caramel-chocolate combo, my Salted Caramel Brownies are a quick and easy alternative. They have that same sweet-and-salty magic, but they come together in under an hour. Perfect for a last-minute craving.
You’ve got this. I know it seems like a lot, but take it one step at a time. Plan ahead, trust the process, and don’t be afraid of a little imperfection. If your layers aren’t perfectly even, a swirl of extra caramel hides everything. And when you pull that first slice out and see those beautiful, distinct layers of chocolate cake, creamy cheesecake, and rich caramel, you’ll feel like a rockstar. Your family will think you bought it from a bakery. Enjoy every bite.
Source: Health & Nutrition Research


