

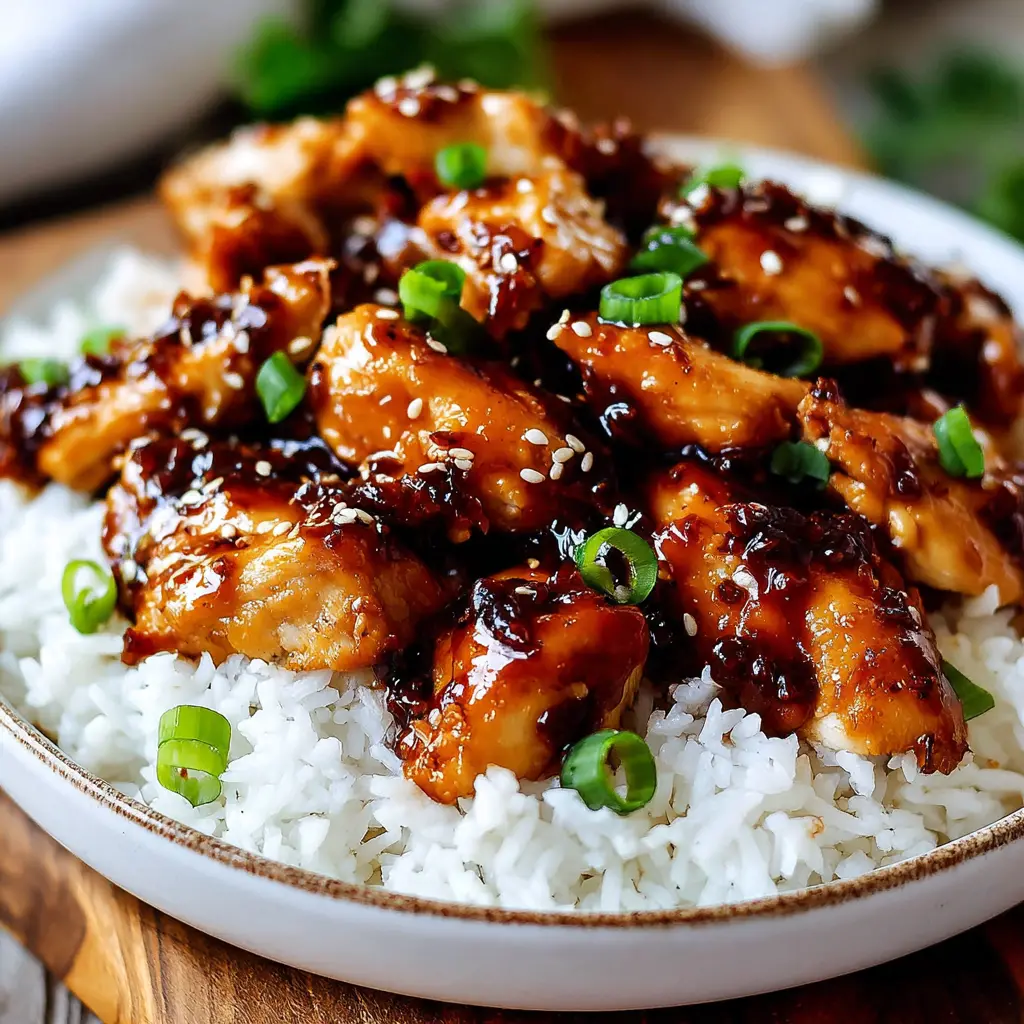
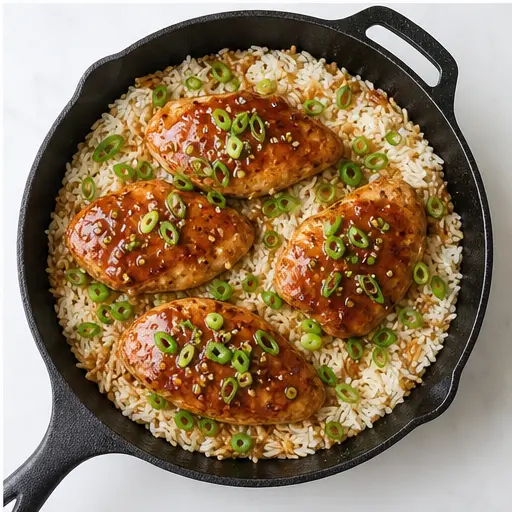
Honey Garlic Chicken Rice Skillet
Ingredients
Method
- Season the chicken pieces generously with salt and pepper on both sides.
- Heat the olive oil in a large skillet over medium-high heat until shimmering. Add the chicken and cook for 5-7 minutes per side, until golden brown and cooked through. Transfer to a plate and set aside.
- In a small bowl, whisk together the honey, soy sauce, minced garlic, and grated ginger (if using) until well combined.
- Pour the sauce into the same skillet and bring to a simmer over medium heat. If using cornstarch, mix it with 1 tablespoon of water to form a slurry, then stir it into the sauce. Let the sauce simmer for 1-2 minutes, until slightly thickened.
- Return the chicken to the skillet, turning to coat with the sauce. Cover and cook for 15-20 minutes, turning occasionally, until the chicken is fully cooked and the sauce has thickened.
- Remove from heat and let rest for 2 minutes. Serve the chicken over cooked rice, spooning the remaining sauce on top. Garnish with sliced green onions.
Nutrition
Notes
Tried this recipe?
Let us know how it was!Why This Honey Garlic Chicken Rice Skillet Works
I used to dread chicken and rice night. Honestly. The burnt honey, the mushy grains, the sad dry chicken… it was a mess. I’d end up ordering takeout more often than I’d like to admit. But then I figured out the secret to a one-pan meal that actually delivers. And this honey garlic chicken rice skillet? It’s the one that finally broke the cycle.
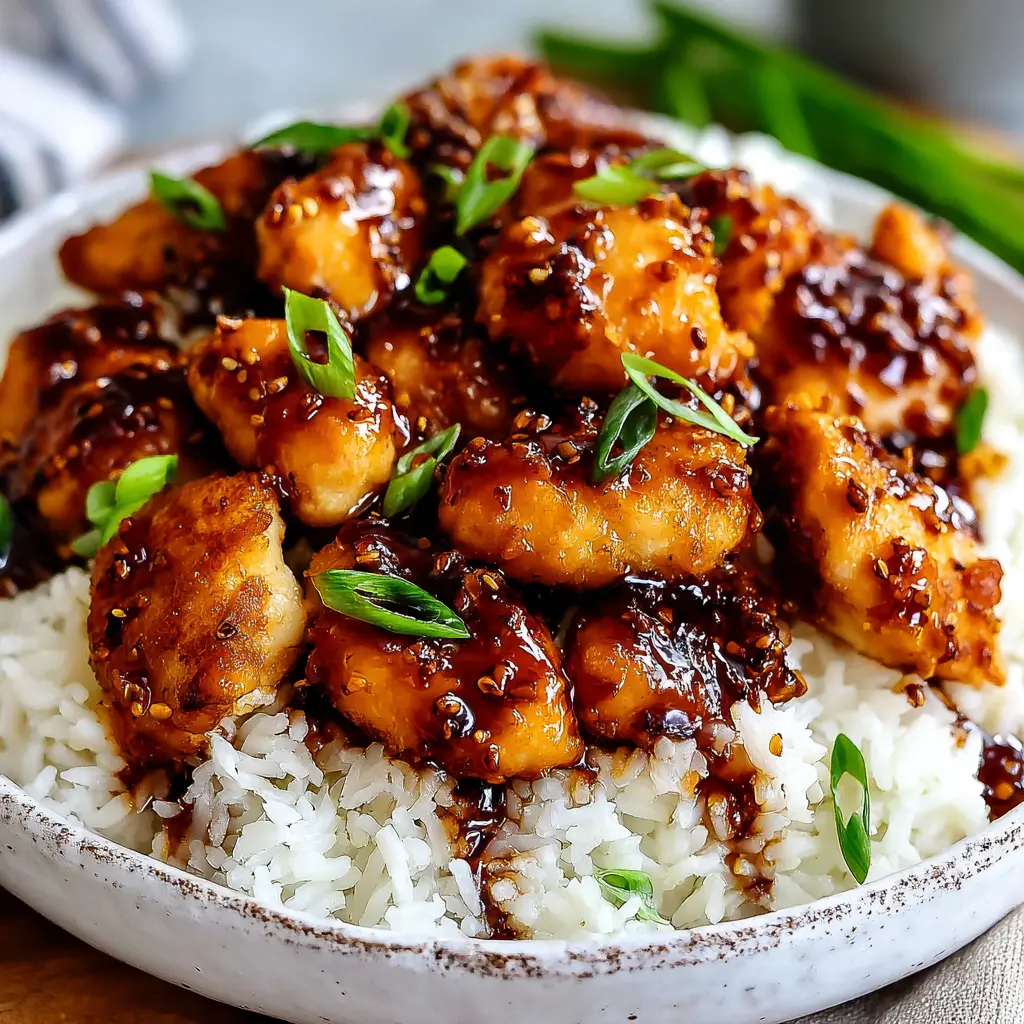
So, here’s the thing. This isn’t just another sticky chicken recipe. It’s the kind of meal that makes you feel like a kitchen rockstar with almost zero effort. The chicken gets perfectly golden and caramelized. The sauce turns into this thick, sticky, sweet-and-savory glaze that coats every single bite. And the rice? It soaks up all those honey-garlic juices, so every forkful is packed with flavor.
Honestly, this skillet dinner recipe is a lifesaver. It’s ready in about 30 minutes. It uses just one pan. And it’s the kind of easy weeknight meal that even the pickiest eaters will devour. I promise.
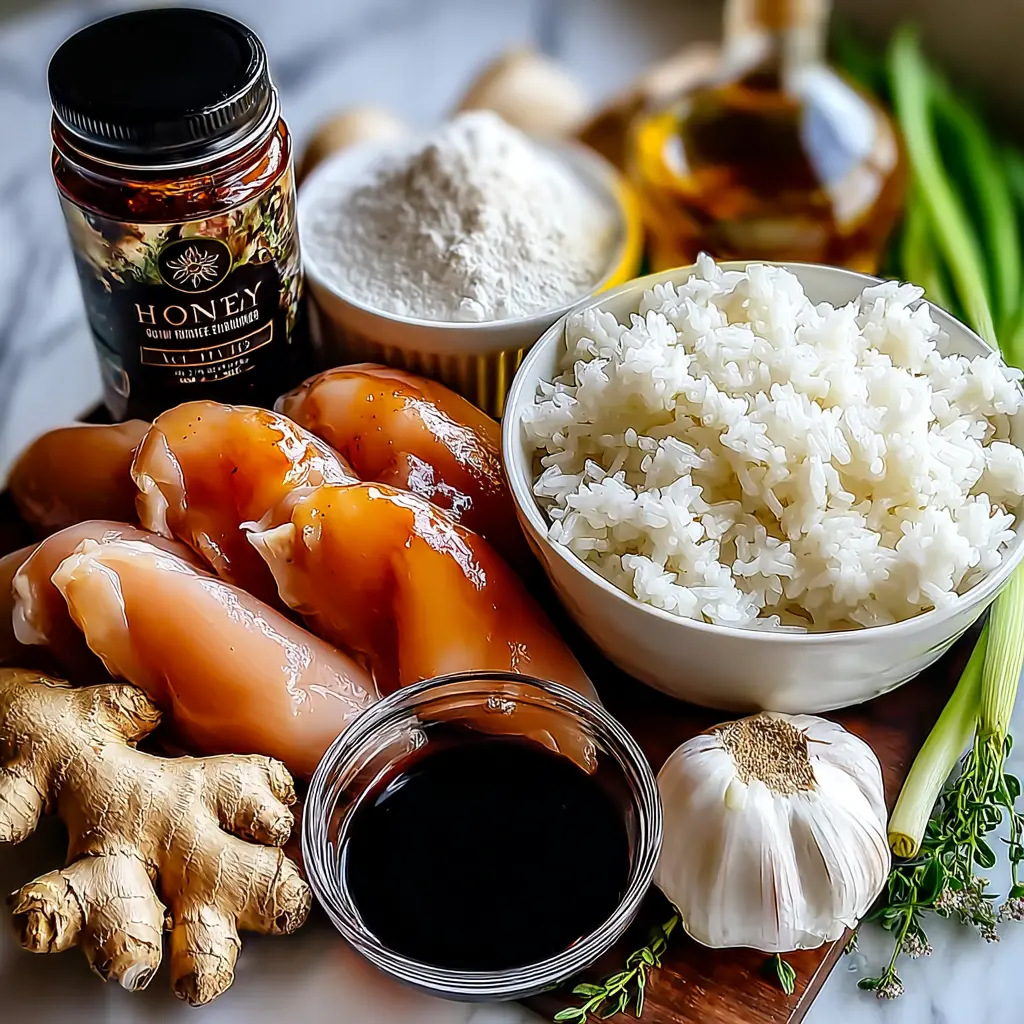
Ingredient Notes
Let’s talk about what you need. The ingredient list is short, but each one plays a crucial role. No weird stuff here, just pantry staples and a few fresh things.
- Chicken: You can use boneless, skinless chicken fillets (thighs or leg cuts). Thighs are more forgiving and stay juicier, but breasts work great too if you watch the cooking time. I like to leave a little fat on the thighs it crisps up beautifully.
- Honey: The star of the show. Use a good quality honey for the best flavor. It’s what gives the sauce that signature sweetness and sticky texture.
- Low-Sodium Soy Sauce: This provides the savory balance. Low-sodium is key so the dish doesn’t end up too salty. You can use tamari for a gluten-free version.
- Garlic: Four cloves, minced. Fresh is non-negotiable here. The aroma when it hits the pan is just incredible.
- Fresh Ginger: Optional, but I highly recommend it. A teaspoon of grated ginger adds a warm, slightly spicy note that elevates the whole dish.
- California Olive Oil: For searing the chicken. It has a high smoke point and a clean flavor that won’t overpower the sauce.
- Cornstarch: This is the secret to the restaurant-quality sauce. It thickens the honey garlic mixture into a glossy glaze that clings to the chicken.
- Cooked Rice: White or brown, it’s your call. The rice is the perfect bed for the saucy chicken. You can even use leftover rice from takeout.
- Green Onions: For garnish. They add a fresh, mild oniony pop and a bit of color.
Step by Step Directions
Alright, let’s get cooking. I’ll walk you through the four main stages. It’s simpler than you think.
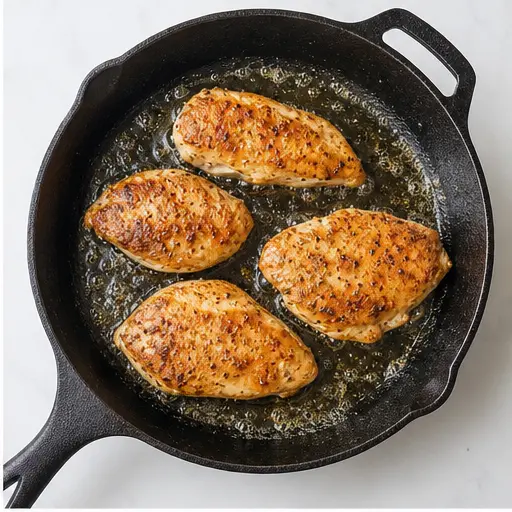
Stage 1: Prep and Sear the Chicken
First things first, season your chicken fillets generously with salt and pepper on both sides. Don’t be shy here this is the base layer of flavor. Then, heat your California olive oil in a large skillet over medium-high heat until it shimmers. You want it hot enough that the chicken sizzles the second it hits the pan. Add the chicken and cook for 5-7 minutes per side. You’re looking for a deep golden-brown crust. That’s where the flavor lives. Once it’s cooked through, transfer the chicken to a plate and set it aside.

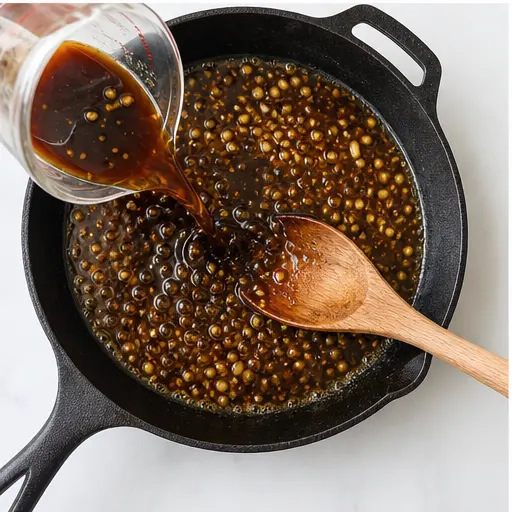
Stage 2: Make the Sauce
Now, in a small bowl, whisk together the honey, low-sodium soy sauce, minced garlic, and grated ginger (if you’re using it). That’s it. The sauce comes together in seconds. Pour this mixture into the same skillet you used for the chicken. Don’t clean it out! All those browned bits from the chicken are flavor gold. Bring the sauce to a simmer over medium heat. If you want that thicker, stickier glaze, mix the cornstarch with a tablespoon of water to make a slurry and stir it in. Let it simmer for 1-2 minutes until it starts to thicken.
Stage 3: Combine and Simmer
Return the seared chicken to the skillet, turning each piece to coat it in that gorgeous honey-garlic sauce. Cover the skillet and let it cook for 15-20 minutes over medium-low heat. Turn the chicken occasionally so every side gets glazed. You’ll know it’s done when the chicken is fully cooked and the sauce has thickened into a glossy, sticky coating. The smell at this point? Unreal.
Stage 4: Rest and Serve
Once the chicken is done, remove the skillet from the heat and let it rest for 2 minutes. This helps the juices redistribute. Then, serve the chicken over a bed of cooked rice. Spoon that extra sauce from the pan right on top don’t waste a drop. Garnish with sliced green onions. And that’s it. You just made an incredible honey garlic chicken rice skillet.
Expert Tips & Variations
I’ve made this recipe more times than I can count, so I’ve picked up a few tricks. Here’s how to nail it every single time.
Pro Tips for Perfect Results
Don’t overcrowd the pan: If you’re cooking more than a pound of chicken, do it in batches. Overcrowding makes the chicken steam instead of sear, and you’ll lose that beautiful golden crust.
Watch the heat: Honey can burn quickly. If you notice the sauce darkening too fast, just add a splash of water and lower the heat. We’ve all been there.
Cornstarch is your friend: Don’t skip it. It’s what gives the sauce that restaurant-quality thickness that clings to every bite of chicken and rice.
As for variations, the sky’s the limit. You can toss in some steamed broccoli or peas at the end for a complete one-pot meal. If you like a little heat, add a pinch of red pepper flakes to the sauce. And if you’re out of fresh ginger, a pinch of ground ginger works in a pinch.
This is also a great meal prep recipe. Make a big batch on Sunday, and you’ve got lunches sorted for the week. Just store the chicken, rice, and any veggies in separate airtight containers.
Storage & Leftovers
If you have any leftovers (which is rare in my house), here’s how to handle them. Let the honey garlic chicken rice skillet cool completely before storing. Place the chicken and rice in separate airtight containers. They’ll keep in the fridge for 3-4 days.
For reheating, the microwave works just fine. Just add a splash of water to the rice to keep it from drying out. You can also reheat everything in a skillet over low heat. If you want to freeze it, the dish will keep for 2-3 months. Just thaw it overnight in the fridge before reheating.
Frequently Asked Questions
More Delicious Chicken Recipes
If you loved this honey garlic chicken rice skillet, you’ll want to check out some of my other favorites. I’ve got a creamy lemon chicken skillet that’s just as easy, a spicy peanut chicken bowl for when you want a kick, and a classic chicken and rice casserole that’s pure comfort food. They all follow the same one-pan philosophy minimal cleanup, maximum flavor.
Honestly, once you master this skillet dinner recipe, you’ll find yourself making it on repeat. It’s become my go-to for busy weeknights when I need something fast, satisfying, and guaranteed to please everyone at the table. And if the kids devour it? That’s your victory lap.
You’ve got this. For more inspiration, check out my Pinterest board for even more quick and easy dinner ideas.
Source: Nutritional Information


