
Why This Strawberry Vanilla Cream Cheesecake Cake Works
Let’s be honest for a second. Combining a rich, creamy cheesecake with a light, fruity cake sounds like a baking gamble. Too often, you end up with something that’s either too dense or just falls apart. But this Strawberry Vanilla Cream Cheesecake Cake? It’s the real deal. It’s the kind of dessert that makes people stop mid-conversation and just stare at the slice on their plate.
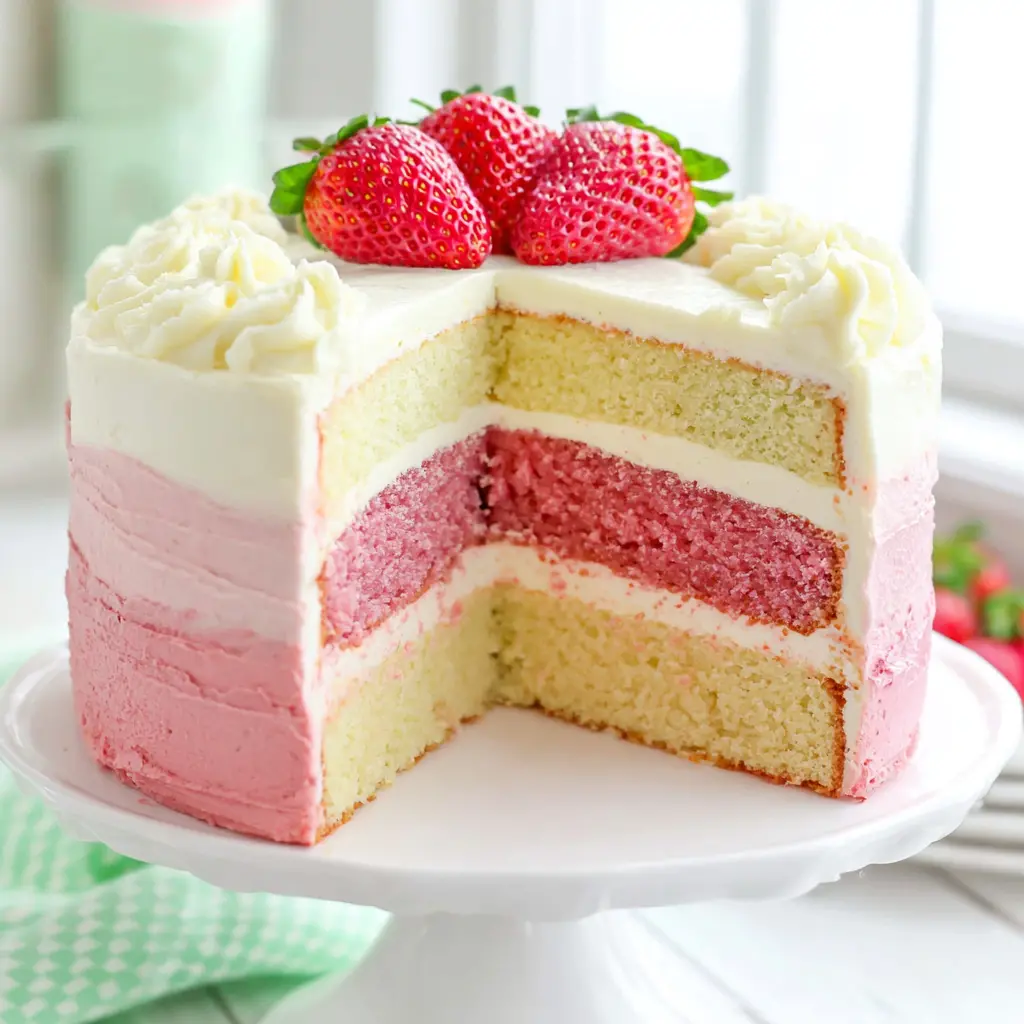
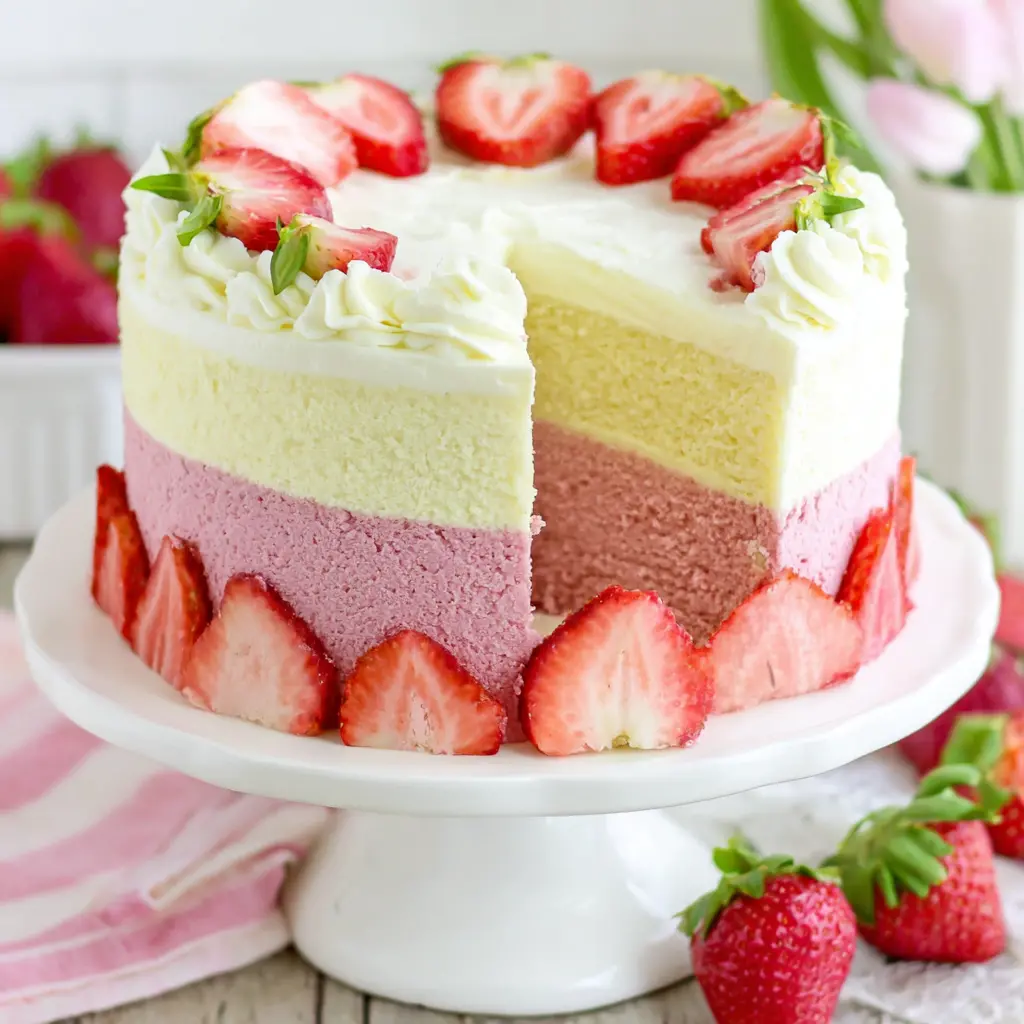
This isn’t just another layered dessert recipe. It’s a carefully engineered cheesecake cake hybrid. You get a perfectly baked vanilla cheesecake layer that’s dense and velvety, sandwiched between two moist strawberry cake layers that are anything but dry. The whole thing is wrapped in a light-as-air cream cheese frosting that’s more whipped cream than buttercream. The result is a spring berry cake that looks like it came from a bakery but is totally doable in your own kitchen.
What really sets this apart is the structure. The cheesecake is baked in a water bath to ensure it stays silky and crack-free. The cake layers get their flavor from real strawberry puree and extract, not just artificial coloring. And the frosting? It’s stable enough to pipe beautiful swirls but light enough that it doesn’t overwhelm the other flavors. It’s a balancing act, and honestly, it works beautifully.
Ingredient Notes
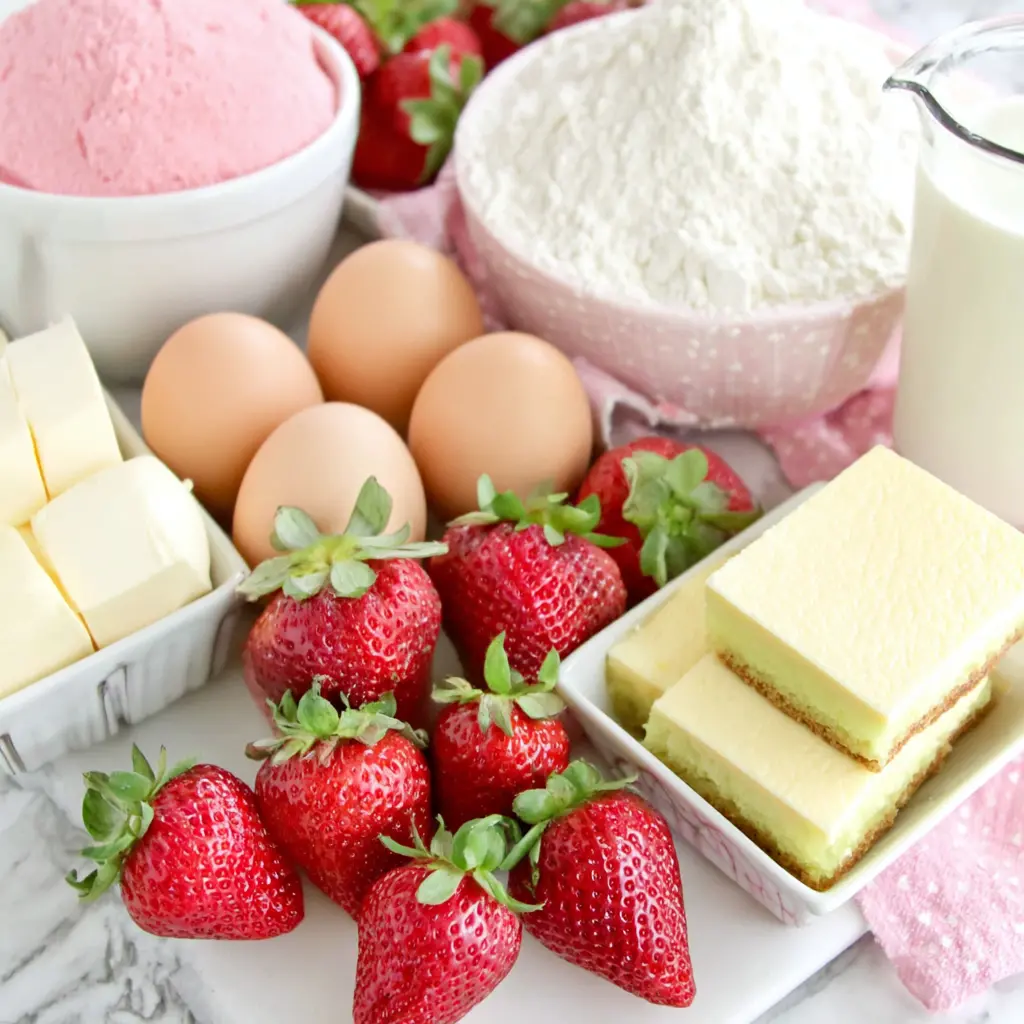
Before we dive into the process, let’s talk about what you’ll need. The ingredient list for this Strawberry Vanilla Cream Cheesecake Cake is straightforward, but a few choices make a big difference. Getting these right is half the battle.
Cream Cheese: This is the star of two components. For the cheesecake layer, you need full-fat blocks of cream cheese. Not the spreadable kind from a tub. For the frosting, same rule applies. Let it soften to room temperature before you start. Cold cream cheese leads to lumpy batter and frosting.
Strawberry Puree: You can make this by pulsing fresh or frozen strawberries in a food processor. For a smoother texture, strain the puree through a fine-mesh sieve to remove the seeds. This gives the cake layers a more refined crumb and a cleaner pink color.
Sour Cream: This appears in both the cheesecake and the cake batter. It adds moisture and a slight tang that balances the sweetness. Make sure it’s at room temperature so it incorporates smoothly.
Strawberry Extract: This is key for getting that intense strawberry flavor in the cake layers. Fresh puree alone isn’t enough. The extract concentrates the flavor without adding extra liquid.
Egg Whites: The cake layers get their lightness from whipped egg whites folded into the batter. This is a different approach than using whole eggs, and it makes the cake layers fluffy and tender, not dense. Make sure your bowl and beaters are completely clean and free of any grease.
How to Make the Cheesecake Layer
The cheesecake layer is the heart of this dessert. It needs to be baked first because it requires several hours to chill and set. Think of it as the foundation you build everything else on. Here’s how to get it right.
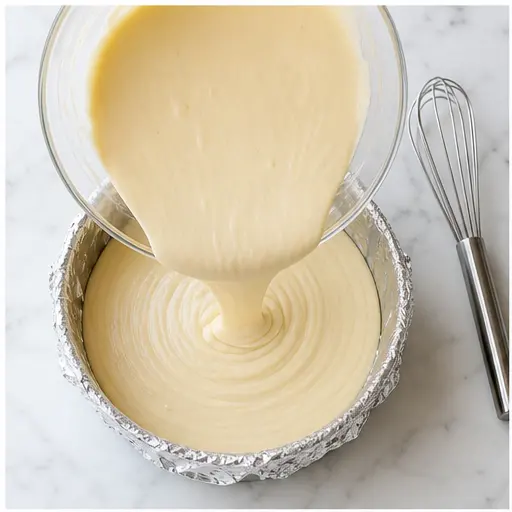
Start by preheating your oven to 300°F. Line a 9-inch cake pan with aluminum foil. Press the foil smoothly against the sides and bottom. This helps you lift the cheesecake out later without any drama. In a large bowl, beat the cream cheese, sugar, and flour on low speed until it’s smooth and well combined. Scrape down the sides of the bowl. You don’t want any lumps.
Add the sour cream and vanilla extract, mixing on low until fully incorporated. Then add the eggs one at a time, mixing on low after each addition. Scrape the bowl as needed. The batter should be silky and uniform. Pour it into the prepared pan. Now, here’s the important part: place this pan inside a larger roasting pan or cake pan. Pour warm water into the larger pan until it reaches halfway up the sides of the cheesecake pan. This is the water bath. It creates a gentle, humid environment that prevents the cheesecake from cracking.
Bake for 55 minutes. The center should be set but still jiggle slightly when you shake the pan. Don’t be tempted to bake it longer. A slight jiggle is perfect. Turn off the oven and leave the cheesecake inside with the door closed for 30 minutes. Then crack the oven door open and let it cool for another 30 minutes. This gradual cooling is crucial. It prevents the sudden temperature change that causes cracks. Remove the cheesecake from the oven and refrigerate until completely firm. That’s about 5 to 6 hours. Plan ahead for this.
How to Make the Strawberry Cake Layers
Once the cheesecake is chilling, you can move on to the cake layers. These are moist, tender, and packed with strawberry flavor. The key is not to over-mix the batter and to fold the egg whites gently.
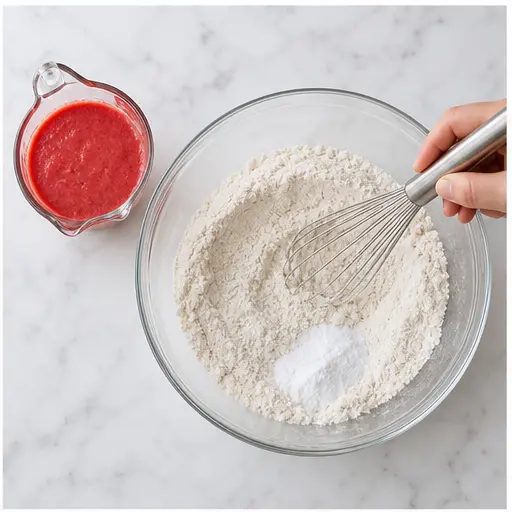
Preheat the oven to 350°F. Line the bottoms of two 9-inch cake pans with parchment paper and grease the sides. In a medium bowl, whisk together the flour, baking powder, and salt. In a liquid measuring cup, combine the milk and strawberry puree. Set both aside. In a large mixer bowl, cream the butter and sugar on medium speed until light and fluffy. This takes about 2 to 3 minutes. You want the mixture to look pale and airy.
Add the sour cream and strawberry extract, mixing until combined. Then add half of the flour mixture, mixing on low until just combined. Pour in the milk-puree mixture and mix. Add the remaining flour mixture and mix until smooth. If you’re using the pink food coloring, stir it in now. Set the batter aside.
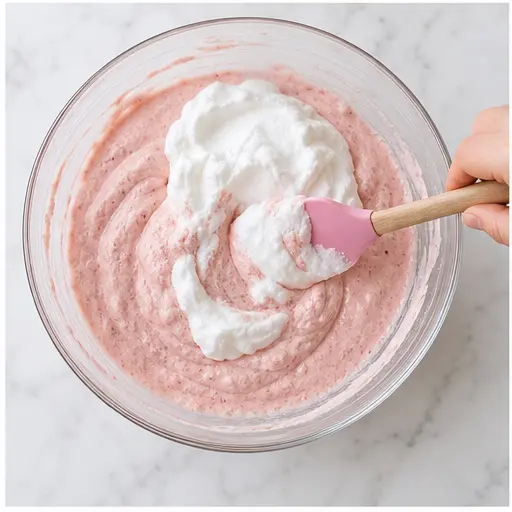
In a separate clean bowl, whip the egg whites on high speed until stiff peaks form. This means when you lift the beater, the egg whites stand up straight without drooping. Gently fold the whipped egg whites into the cake batter in two batches. Use a light hand here. You want to incorporate them without deflating all the air you just whipped in. Divide the batter evenly between the prepared pans. Bake for 27 to 30 minutes, or until a toothpick inserted in the center comes out with a few moist crumbs. Let the cakes cool in the pans for 2 to 3 minutes, then transfer to a wire rack to cool completely.
How to Make the Cream Cheese Frosting
This frosting is a game changer. It’s a cream cheese whipped cream frosting, which means it’s lighter than traditional cream cheese buttercream but still holds its shape beautifully. It pipes like a dream and tastes amazing.
In a large mixer bowl, beat the cream cheese until smooth. Set it aside. In another bowl, whip the heavy cream, powdered sugar, and vanilla extract until it begins to thicken. You want it to look like soft peaks. Then add the beaten cream cheese to the cream mixture. Whip on low until incorporated, then increase the speed to medium and whip until stiff peaks form. Be careful not to over-whip, or it can turn grainy. The frosting should be thick, fluffy, and spreadable.
How to Assemble the Cake
This is where it all comes together. Assembly is the most satisfying part, but it requires patience. Make sure all your components are completely cool or chilled before you start. Warm layers will melt the frosting and create a mess.
Use a serrated knife to level the tops of the cake layers. Place one cake layer on a serving plate or cake board. Spread about 1 cup of frosting evenly over it. Lift the chilled cheesecake out of the pan using the foil. Peel off the foil carefully. Place the cheesecake on top of the frosted cake layer. Spread another cup of frosting over the cheesecake. Top with the second cake layer. Trim any uneven edges with a serrated knife so the cake stands straight.
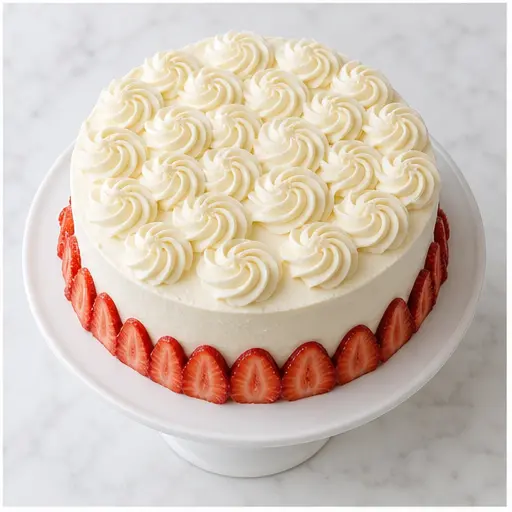
Frost the outside of the cake with the remaining frosting. Use an offset spatula for a smooth finish or go for a rustic look. Pipe decorative swirls around the top edge using an Ateco 844 tip or a similar large star tip. Press sliced strawberries around the bottom edge of the cake. Place strawberry halves on top inside the piped swirls. If you want, pipe a small shell border around the bottom edge. It adds a professional touch.
Tips for Success
Over the years, I’ve learned a few things that make this Strawberry Vanilla Cream Cheesecake Cake come out perfectly every time. Here are the non-negotiables.
- Room temperature ingredients are not optional. Cold cream cheese, eggs, and sour cream create lumpy batters that don’t emulsify properly. Set everything out 30 to 60 minutes before you start.
- Don’t skip the water bath. It’s the single most important step for a crack-free cheesecake. The steam keeps the oven humid and the cheesecake cooks evenly.
- Measure your flour correctly. Use a kitchen scale if you have one. If not, spoon the flour into your measuring cup and level it off with a knife. Scooping directly from the bag packs the flour and makes the cake dense.
- Chill the layers before assembling. The cheesecake needs to be fully set. The cake layers should be completely cool. If they’re even slightly warm, the frosting will slide right off.
- Use a serrated knife to level the cakes. It gives you a flat, even surface for stacking. A crooked cake is a sad cake.
- Fold the egg whites gently. Over-mixing deflates the air and makes the cake layers tough. Use a spatula and a gentle hand.
Variations to Try
This recipe is fantastic as is, but it’s also a great base for experimenting. Here are some ideas if you want to switch things up.
Swap the cake layers: You can use a lemon cake, white cake, chocolate cake, or even a boxed cake mix for convenience. The strawberry and vanilla flavors work with many cake bases. Just make sure the cake is sturdy enough to hold the cheesecake layer.
Change the cheesecake flavor: Add a swirl of strawberry jam to the cheesecake batter before baking. Or try a key lime version by adding lime zest and juice. A chocolate cheesecake layer with a strawberry cake would be incredible.
Use a different frosting: A classic cream cheese buttercream works well if you prefer a stiffer frosting. Strawberry buttercream would double down on the berry flavor. Or keep it simple with a vanilla whipped cream.
Switch the fruit: Replace the strawberry puree with raspberry, blueberry, or peach puree. The process is the same, but the flavor profile changes completely. Mixed berries are a great option for a summer dessert.
Storage and Make-Ahead Tips
One of the best things about this Strawberry Vanilla Cream Cheesecake Cake is that it’s a fantastic make-ahead dessert. It actually tastes better the next day after the flavors have had time to meld together.
Make-Ahead Timeline: You can bake the cheesecake layer up to 2 days in advance. Wrap it tightly in plastic wrap once it’s fully chilled and keep it in the fridge. The cake layers can be baked a day ahead. Wrap them in plastic wrap and store at room temperature. The frosting can be made a day ahead and stored in the fridge. Just re-whip it for a few seconds before using to bring back the fluffiness.
Storage: Once assembled, store the cake in an airtight container in the refrigerator. It will keep well for 3 to 4 days. The fresh strawberry garnish should be added just before serving, as they can release moisture and make the frosting weep over time.
Freezing: You can freeze the entire cake or individual slices. Flash freeze the assembled cake on a baking sheet for an hour, then wrap it in a double layer of plastic wrap and a layer of aluminum foil. It will keep in the freezer for up to 3 months. Thaw it in the fridge overnight before serving.
Frequently Asked Questions
Troubleshooting Common Issues
Even experienced bakers run into problems sometimes. Here are the most common issues with this Strawberry Vanilla Cream Cheesecake Cake and how to fix them.
❌ Cracked Cheesecake: This usually happens from over-baking or rapid temperature changes. ✅ Make sure you use a water bath and let the cheesecake cool gradually in the oven with the door cracked open. Don’t open the oven door during baking.
❌ Dense Cake Layers: Over-mixing the batter or deflating the egg whites causes dense cakes. ✅ Mix only until the flour is incorporated. Fold the egg whites gently in two batches. Use a light hand.
❌ Runny Frosting: This happens if the cream cheese or cream is too warm. ✅ Make sure the cream cheese is softened but not warm. Use cold heavy cream straight from the fridge. If the frosting becomes too soft while you’re working, chill it for 15 minutes.
❌ Layers Sliding Apart: If the components aren’t chilled enough, the weight of the cheesecake can cause the cake layers to slide. ✅ Make sure the cheesecake is fully set and the cake layers are completely cool. A thin layer of frosting between each layer acts as glue.
❌ Strawberry Flavor is Too Subtle: Fresh strawberry puree alone isn’t always enough. ✅ Use strawberry extract to boost the flavor. It’s concentrated and doesn’t add extra liquid.
This Strawberry Vanilla Cream Cheesecake Cake is the kind of dessert that turns a regular gathering into a celebration. It takes a little planning, but the payoff is huge. When you cut that first slice and see the distinct layers of pink cake, creamy cheesecake, and white frosting, you’ll know it was worth every minute. Serve it with a cup of coffee or a handful of fresh berries on the side. Your guests will be asking for the recipe before they finish their first bite.
If you make this, I’d love to hear how it turns out. Drop a comment below or tag me in your photos. Happy baking!
Source: Nutritional Information

Strawberry Vanilla Cream Cheesecake Cake
Ingredients
Method
- Preheat the oven to 300°F. Line the inside of a 9-inch cake pan with aluminum foil, pressing it smoothly against the sides and bottom.
- In a large mixing bowl, beat the cream cheese, sugar, and flour on low speed until smooth and well combined. Scrape down the sides of the bowl.
- Add the sour cream and vanilla extract, mixing on low until fully incorporated.
- Add the eggs one at a time, mixing on low after each addition and scraping the bowl as needed.
- Pour the cheesecake batter into the prepared pan. Place this pan inside a larger roasting pan or cake pan. Pour warm water into the larger pan until it reaches halfway up the sides of the cheesecake pan.
- Bake for 55 minutes. The center should be set but still jiggle slightly when shaken.
- Turn off the oven and leave the cheesecake inside with the door closed for 30 minutes. Then crack the oven door open and let it cool for another 30 minutes.
- Remove the cheesecake from the oven and refrigerate until completely firm, about 5 to 6 hours.
- Preheat the oven to 350°F. Line the bottoms of two 9-inch cake pans with parchment paper and grease the sides.
- In a medium bowl, whisk together the flour, baking powder, and salt. In a liquid measuring cup, combine the milk and strawberry puree. Set both aside.
- In a large mixer bowl, cream the butter and sugar on medium speed until light and fluffy, about 2 to 3 minutes.
- Add the sour cream and strawberry extract, mixing until combined.
- Add half of the flour mixture, mixing on low until just combined. Pour in the milk-puree mixture and mix. Add the remaining flour mixture and mix until smooth. Stir in the pink food coloring if using. Set aside.
- In a separate clean bowl, whip the egg whites on high speed until stiff peaks form.
- Gently fold the whipped egg whites into the cake batter in two batches, being careful not to deflate the mixture.
- Divide the batter evenly between the prepared pans. Bake for 27 to 30 minutes, or until a toothpick inserted in the center comes out with a few moist crumbs.
- Let the cakes cool in the pans for 2 to 3 minutes, then transfer to a wire rack to cool completely.
- In a large mixer bowl, beat the cream cheese until smooth. Set aside.
- In another bowl, whip the heavy cream, powdered sugar, and vanilla extract until it begins to thicken.
- Add the beaten cream cheese to the cream mixture and whip on low until incorporated, then increase speed to medium and whip until stiff peaks form. Set aside.
- Use a serrated knife to level the tops of the cake layers. Place one cake layer on a serving plate or cake board. Spread about 1 cup of frosting evenly over it.
- Lift the chilled cheesecake out of the pan using the foil, peel off the foil, and place the cheesecake on top of the frosted cake layer.
- Spread another cup of frosting over the cheesecake, then top with the second cake layer. Trim any uneven edges with a serrated knife.
- Frost the outside of the cake with the remaining frosting. Pipe decorative swirls around the top edge using an Ateco 844 tip or similar.
- Press sliced strawberries around the bottom edge of the cake. Place strawberry halves on top inside the piped swirls. Pipe a small shell border around the bottom edge if desired.
- Store the cake in an airtight container in the refrigerator. Best enjoyed within 3 to 4 days.


