
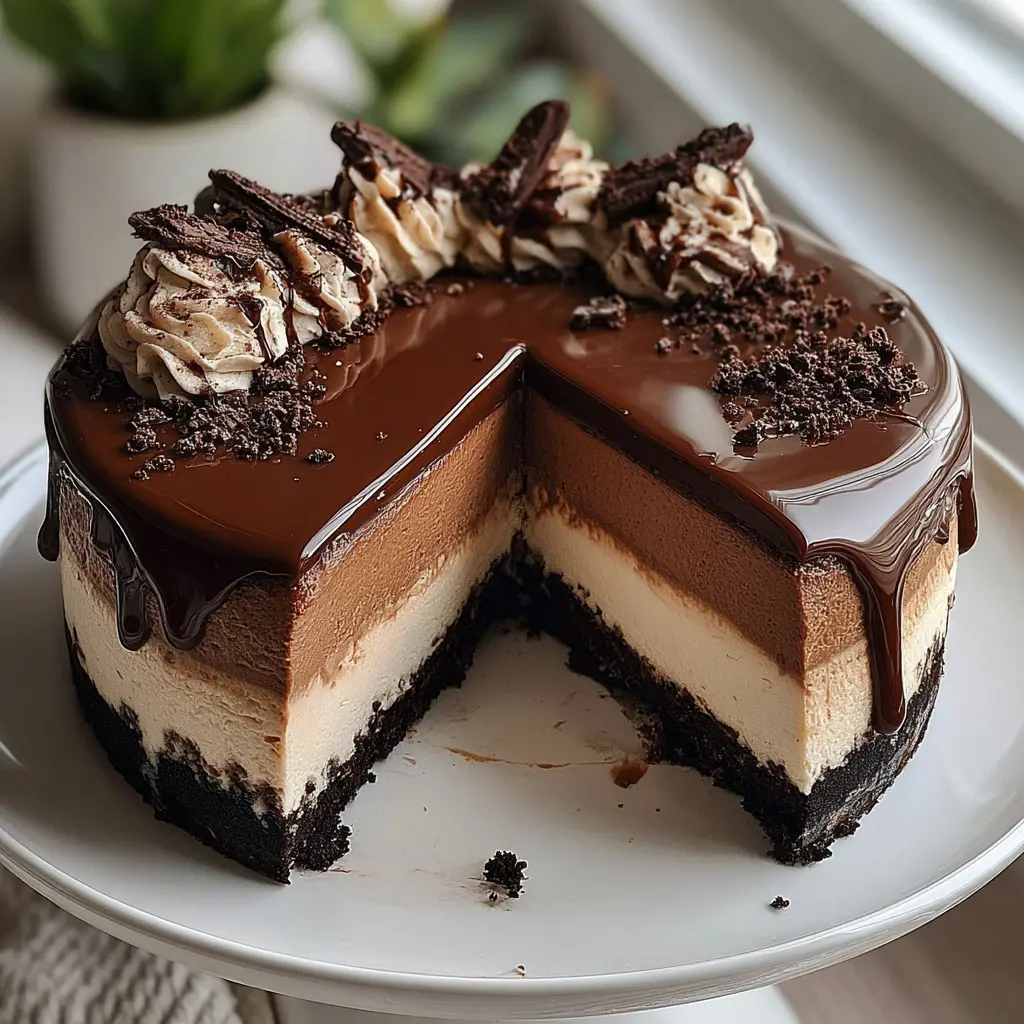

Chocolate Coffee Cheesecake Cake with Espresso Ganache
Ingredients
Method
- Preheat your oven to 325°F. In a medium bowl, combine the crushed chocolate cookies with the melted butter, stirring until the mixture looks like damp sand.
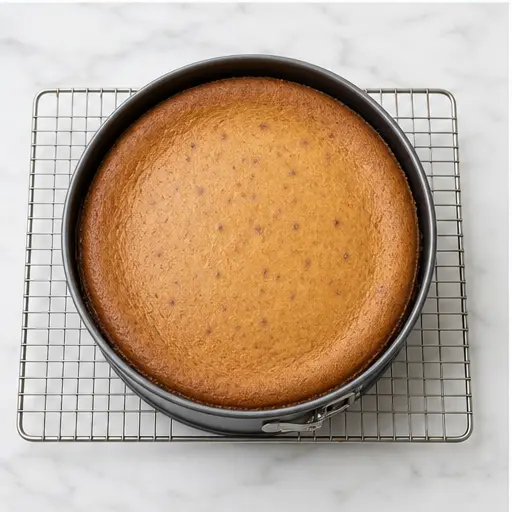
- Press the mixture firmly into the bottom of a 9-inch springform pan, forming an even layer. Bake for 10 minutes, then remove and let cool completely.
- In a large mixing bowl, beat the softened cream cheese and sugar together until smooth and creamy, about 2 minutes.
- Add the eggs one at a time, mixing on low speed just until combined after each addition. Do not overmix.
- Mix in the vanilla extract, sour cream, cooled espresso, and flour until just incorporated.
- Gently fold in the semi-sweet chocolate chips or chopped chocolate with a spatula.
- Pour the filling over the cooled crust and spread it evenly.
- Bake for about 60 minutes, until the edges are set and the center still jiggles slightly when shaken.
- Turn off the oven, crack the door open, and let the cheesecake cool inside for 1 hour. Then transfer to a wire rack to cool completely.
- In a small saucepan, heat the heavy cream over medium heat until it just begins to simmer. Remove from heat.
- Add the semi-sweet chocolate and let sit for 1 minute, then stir until smooth. Stir in the cooled espresso.
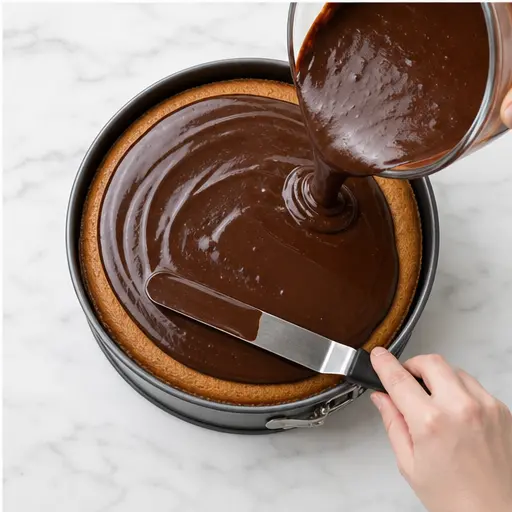
- Pour the ganache over the cooled cheesecake, spreading it evenly to the edges. Refrigerate for at least 4 hours, ideally overnight, to let the flavors meld.
- Run a warm knife under hot water, dry it, then slice the cheesecake for clean cuts. Serve chilled.
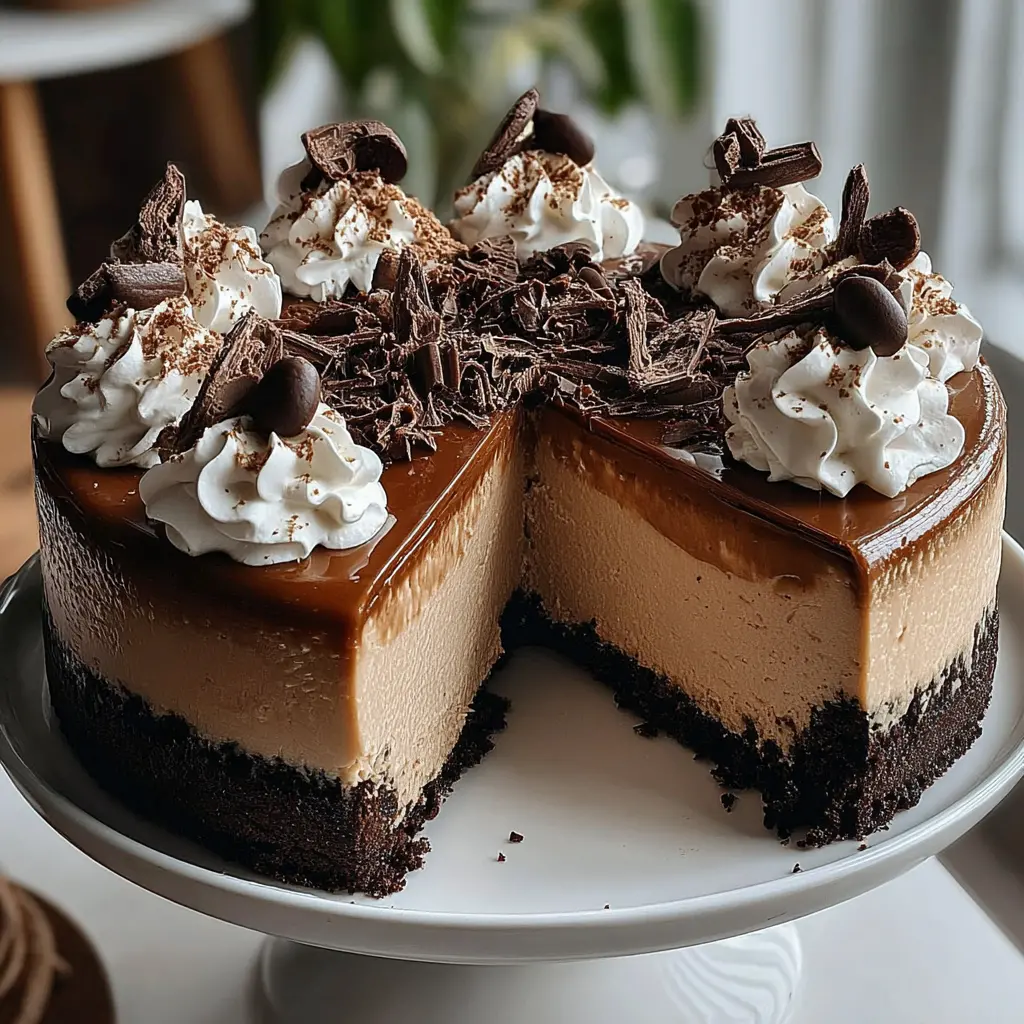
- Garnish each slice with a dollop of whipped cream, chocolate shavings, and a few coffee beans if desired.
Nutrition
Notes
Tried this recipe?
Let us know how it was!What Is Chocolate Coffee Cheesecake Cake?
Let me tell you about the dessert that’s been taking over my kitchen lately. It’s a Chocolate Coffee Cheesecake Cake, and honestly, it’s a bit of a project. But the good kind of project. The kind where you get to combine three of my absolute favorite things into one showstopper: a rich, moist chocolate cake, a creamy coffee-kissed cheesecake layer, and a silky espresso ganache on top. I first made this for a friend’s birthday, and let me tell you, the silence at the table after that first bite was the loudest compliment I’ve ever gotten.
This isn’t just any layered cake. It’s a chocolate coffee cheesecake cake that brings together the best of both worlds. The bottom is a crunchy chocolate cookie crust that gives way to a velvety, coffee-infused cheesecake filling. And the whole thing is topped with a glossy ganache that just screams decadence. If you’re a coffee lover, this is your dream dessert. Trust me on this.
I’ve learned a few things the hard way over the years. Like how a cheesecake can crack if you look at it wrong. Or how a cake layer can turn out dry if you’re not careful. But I’ve worked through all those problems so you don’t have to. This recipe is the result of many, many test bakes. And I’m sharing every single tip I’ve picked up along the way.
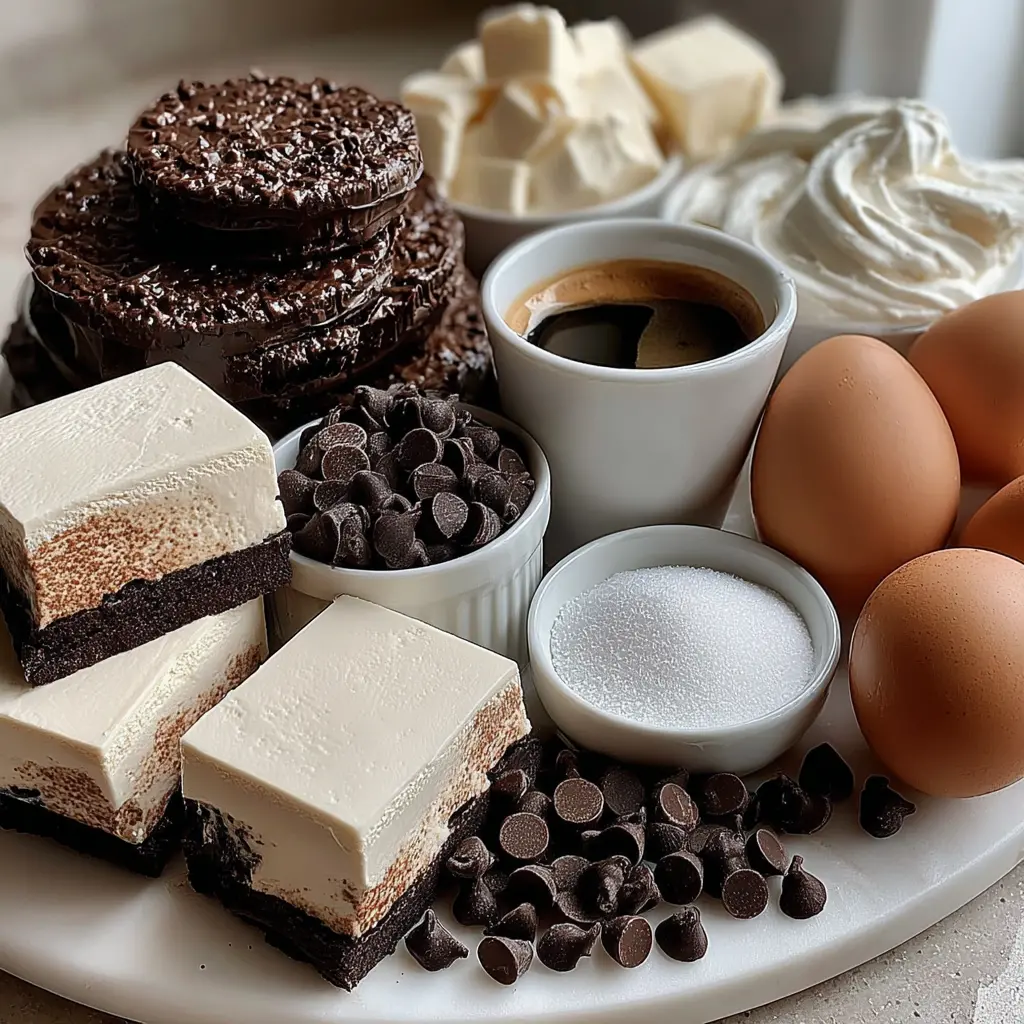
Ingredients You’ll Need
Let’s talk about what goes into this mocha cheesecake dessert. The ingredient list might look long, but most of these are pantry staples. The key is using the right stuff. Here’s what you need and why it matters.
For the Crust:
- Chocolate wafer cookies or chocolate graham crackers – These give that deep, dark chocolate flavor and a sturdy base. You’ll need about 1 1/2 cups crushed, which is roughly 6 ounces.
- Unsalted butter – Just 1/4 cup, melted. It binds the crumbs together into that perfect sandy texture.
For the Cheesecake Filling:
- Cream cheese – Three 8-ounce blocks. And please, use full-fat. Low-fat cream cheese has a higher water content and can make your cheesecake runny. Trust me on this one.
- Granulated sugar – 1 cup. It sweetens the filling and helps with structure.
- Eggs – 3 large, and they absolutely need to be at room temperature. Cold eggs can seize up the batter and leave you with lumps.
- Vanilla extract – 1 teaspoon. Just the good stuff.
- Sour cream – 1/4 cup of full-fat sour cream adds tang and tenderness. Greek yogurt works too.
- Strong brewed espresso – 1/4 cup, cooled. This is where the robust flavor comes from. You can use instant espresso powder dissolved in hot water if that’s what you have.
- All-purpose flour – Just 2 tablespoons. It stabilizes the cheesecake and prevents cracks.
- Semi-sweet chocolate chips or chopped chocolate – 1 cup (about 6 ounces). These melt into the batter for little pockets of chocolate in every bite.
For the Ganache Topping:
- Heavy cream – 1/3 cup. The fat content is crucial for a smooth, glossy ganache.
- Semi-sweet chocolate chips or chopped chocolate – 1/3 cup.
- Brewed espresso – 1 tablespoon, cooled. Just a little kick to reinforce the coffee flavor.
For Garnish (optional, but so worth it): Whipped cream, chocolate shavings, and a few coffee beans for that barista-style finish.
Step-by-Step Instructions
Okay, let’s get into the actual process. I’m going to walk you through the four major stages. Each one is important, so don’t skip ahead.
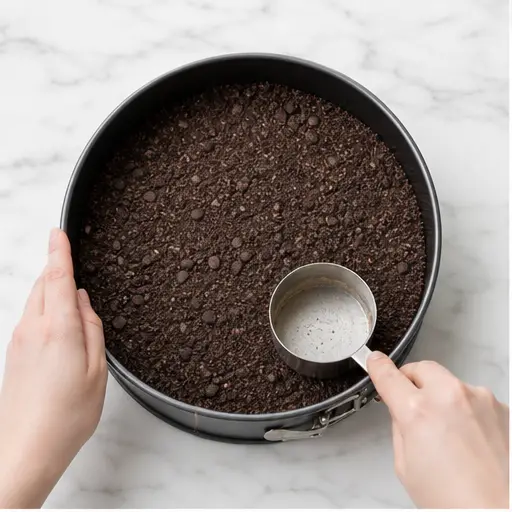
Stage 1: Prepare the Crust
Preheat your oven to 325°F. In a medium bowl, combine the crushed chocolate cookies with the melted butter. Stir it all together until the mixture looks like damp sand. You want every crumb coated. Then press it firmly into the bottom of a 9-inch springform pan. I use the bottom of a measuring cup to really pack it down. Bake for 10 minutes, then remove and let it cool completely. This pre-baking step is crucial – it prevents the crust from getting soggy later.
Stage 2: Make the Cheesecake Filling
In a large mixing bowl, beat the softened cream cheese and sugar together until smooth and creamy. This takes about 2 minutes. Scrape down the bowl and the beater. Then add the eggs one at a time, mixing on low speed just until combined. Do not overmix. Overmixing incorporates too much air, which can cause cracks during baking. After the eggs, mix in the vanilla, sour cream, cooled espresso, and flour. Again, just until incorporated. Finally, gently fold in the chocolate chips with a spatula. The batter should be thick, creamy, and smell absolutely divine.
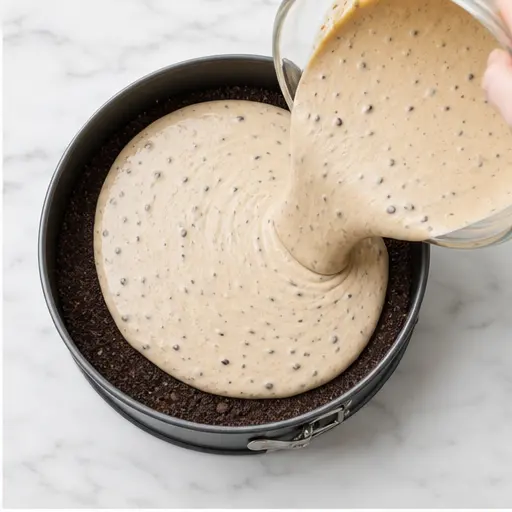
Stage 3: Bake the Cheesecake
Pour the filling over the cooled crust and spread it even. Now, here’s the most important part for a crack-free top: use a water bath. Wrap the bottom of your springform pan in a double layer of heavy-duty aluminum foil. Place it in a larger roasting pan. Pour hot water into the roasting pan until it comes about 1 inch up the sides of the springform. Bake for about 60 minutes. The edges should be set, but the center will still jiggle slightly when you shake the pan. That jiggle is what we’re after. Turn off the oven, crack the door open, and let the cheesecake cool inside for a full hour. Then transfer to a wire rack to cool completely. This gradual cooling is what prevents that dreaded sinking center.
Stage 4: Add the Ganache Topping
Once the cheesecake is completely cool, make the ganache. In a small saucepan, heat the heavy cream over medium heat until it just begins to simmer. You’ll see tiny bubbles around the edge. Remove from heat, add the chocolate, and let it sit for 1 minute. Then stir until smooth. Stir in the tablespoon of cooled espresso. Pour the ganache over the cheesecake and spread it evenly to the edges. Refrigerate for at least 4 hours, but overnight is really best. The flavors need time to meld and the texture needs to set up properly.
Tips for a Crack-Free Cheesecake
I’ve had my fair share of cracked cheesecakes. It’s frustrating, especially when you’re making something this special. But I’ve learned a few tricks that make all the difference. Here are the most important ones for your rich chocolate espresso cake.
Success Tips
Room temperature ingredients: This is non-negotiable. Cold cream cheese and eggs will leave you with a lumpy batter. Set them out 1-2 hours before you start.
Don’t overmix: After adding the sour cream, espresso, and vanilla, stick to the ‘low’ setting on your mixer. Overmixing introduces air that expands and then collapses, causing cracks.
Use a water bath: At the very minimum, place a large roasting pan with hot water on the rack below your cheesecake. The steam creates a humid environment that prevents the top from drying out.
Don’t open the oven door: Use your oven light to see how it’s progressing. Opening the door lets in cold air and can cause the cheesecake to fall.
Cool gradually: Let the cheesecake cool in the oven with the door cracked for an hour. Then cool on the counter. Then refrigerate. Never go straight from the oven to the fridge.
Here are the common mistakes I see, and how to fix them:
- ❌ Overmixing the batter → ✅ Mix on low speed and stop as soon as ingredients are combined.
- ❌ Using cold ingredients → ✅ Let cream cheese and eggs sit at room temperature for at least 1 hour.
- ❌ Opening the oven door during baking → ✅ Use the oven light to check doneness.
- ❌ Skipping the water bath → ✅ Even a pan of water on the rack below helps.
- ❌ Not cooling gradually → ✅ Follow the oven-off, door-cracked, then counter method.
- ❌ Not chilling long enough → ✅ Refrigerate for at least 4 hours, ideally overnight.
Variations to Try
Once you’ve mastered the base recipe, feel free to experiment. Here are some ideas that I’ve tried and loved.
- Different crusts: Use regular graham crackers, cinnamon graham crackers, or even crushed vanilla wafers instead of chocolate ones.
- Dark chocolate filling: Swap the semi-sweet chocolate chips for dark chocolate (60-70% cocoa) for a more intense flavor.
- No coffee version: Omit the espresso from the filling and ganache for a plain chocolate cheesecake. It’s still amazing.
- Raspberry topping: Top the finished cake with fresh raspberries for a bright, tart contrast to the rich chocolate and coffee.
- Salted caramel drizzle: Instead of the ganache, top with a salted caramel sauce. The sweet-salty combo is incredible.
These variations are all optional, but they’re a great way to make this layered coffee cake your own.
How to Store and Freeze
This cake is perfect for making ahead. In fact, I recommend it. The flavors get even better after a day in the fridge.
Refrigerating: Store leftovers tightly covered in the refrigerator for up to 5 days. I use an airtight cake carrier or wrap the springform pan tightly in plastic wrap. The ganache will stay glossy and the cheesecake will remain creamy.
Freezing: You can freeze the cheesecake (without garnishes) for up to 2-3 months. Wrap it tightly in a double layer of plastic wrap, then a layer of aluminum foil. Thaw overnight in the refrigerator before serving. The texture will be just as good as fresh.
Serving: For clean slices, run a long, sharp knife under hot water, dry it, then slice. Wipe the knife clean between cuts. This gives you those beautiful, professional-looking pieces.
Frequently Asked Questions
I hope you love this Chocolate Coffee Cheesecake Cake as much as I do. It’s a labor of love, but every bite is worth it. If you make it, tag me in your photos! I’d love to see your creations. And for more inspiration, check out my Pinterest board for all things chocolate and coffee.
Source: Health & Nutrition Research


3 Responses
I made this for a dinner party last weekend and it was a huge hit! The espresso flavor is perfectly balanced—not too overpowering but definitely present. I did have a small crack on the cheesecake layer, but the ganache covered it beautifully. Will definitely make again!
This looks incredible, but I’m wondering if I could substitute the sour cream with Greek yogurt? I have some on hand and don’t want to buy a whole tub of sour cream just for a quarter cup. Also, any tips for making the crust extra crunchy?
Great questions, James! Yes, full-fat Greek yogurt works perfectly as a substitute for sour cream—just make sure it’s at room temperature. For a crunchier crust, I recommend pre-baking it for 8 minutes at 350°F before adding the filling, and letting it cool completely. That extra step makes a big difference!