

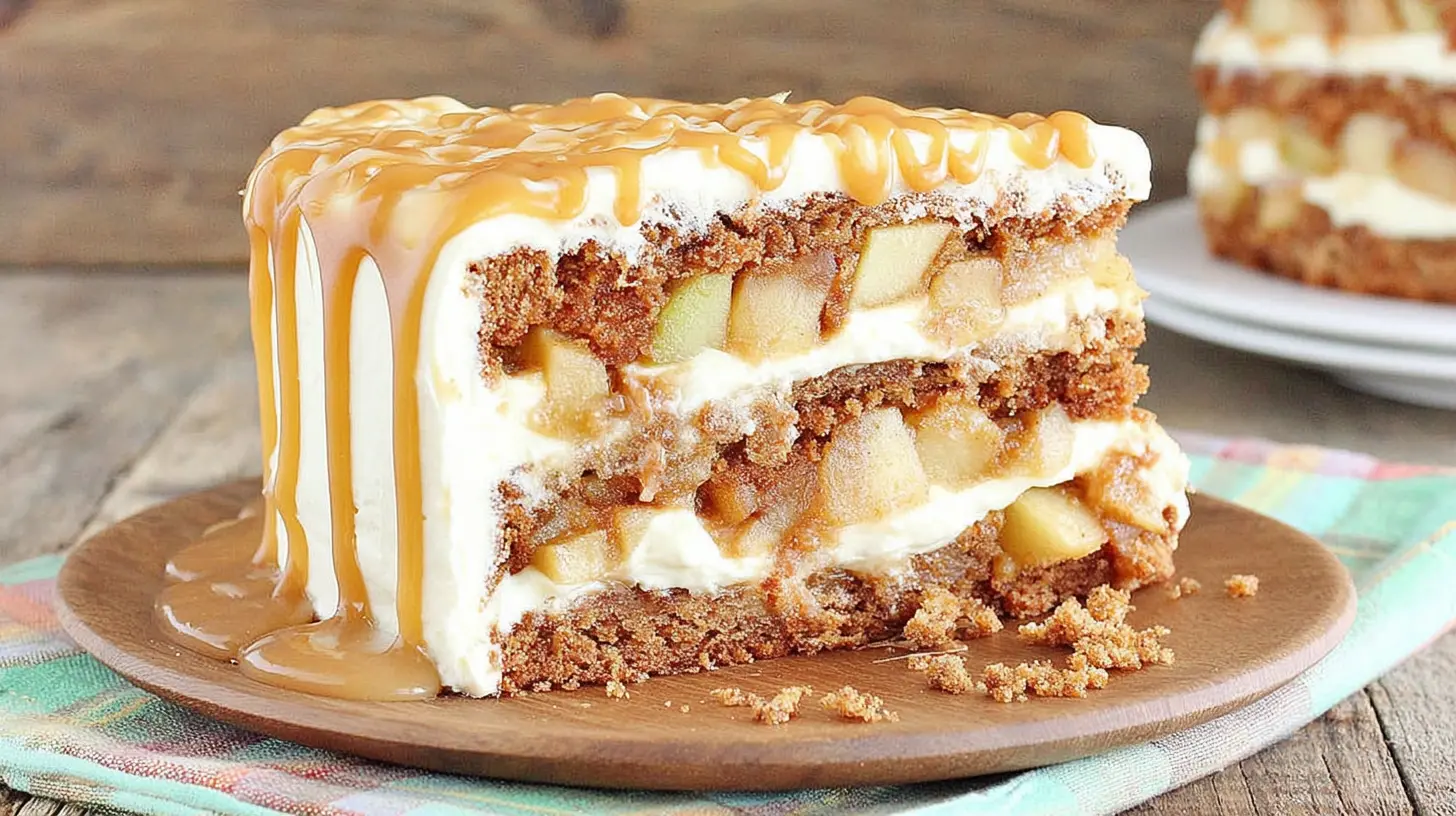
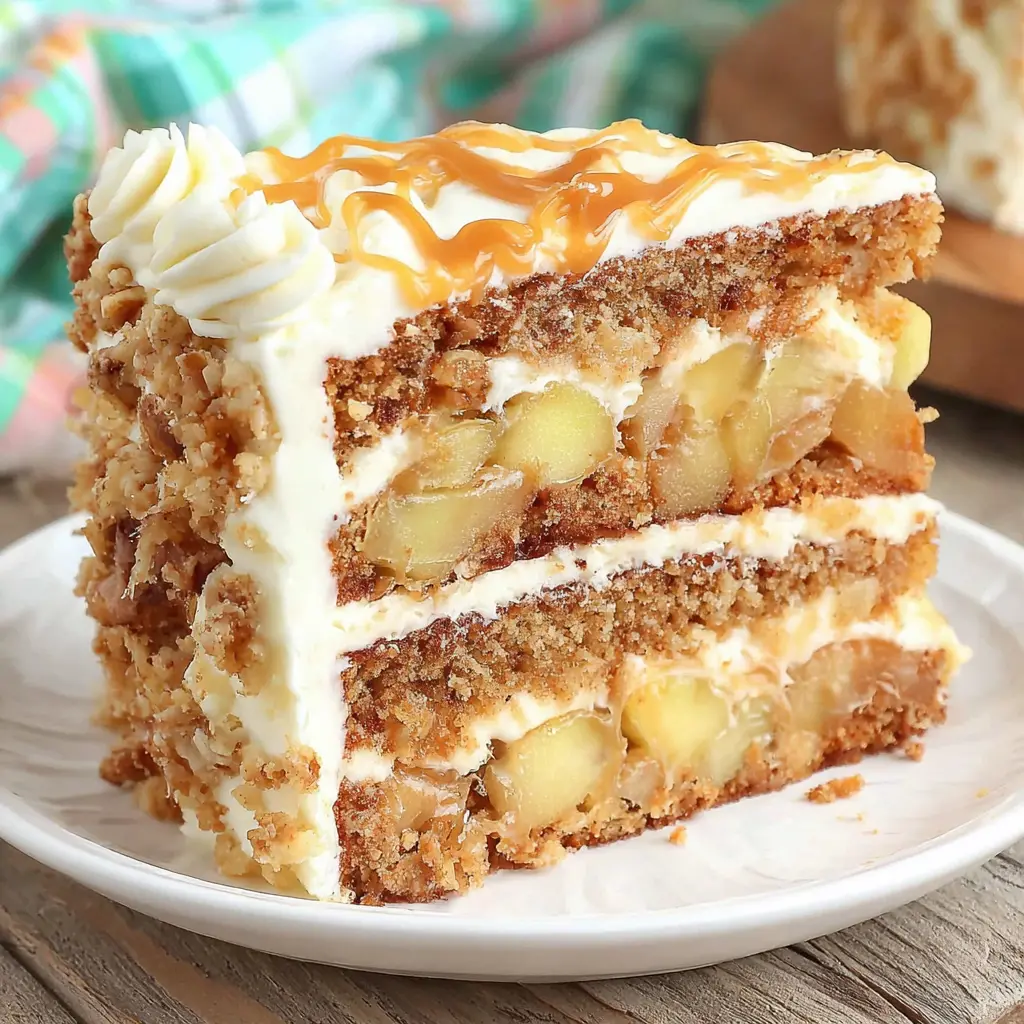
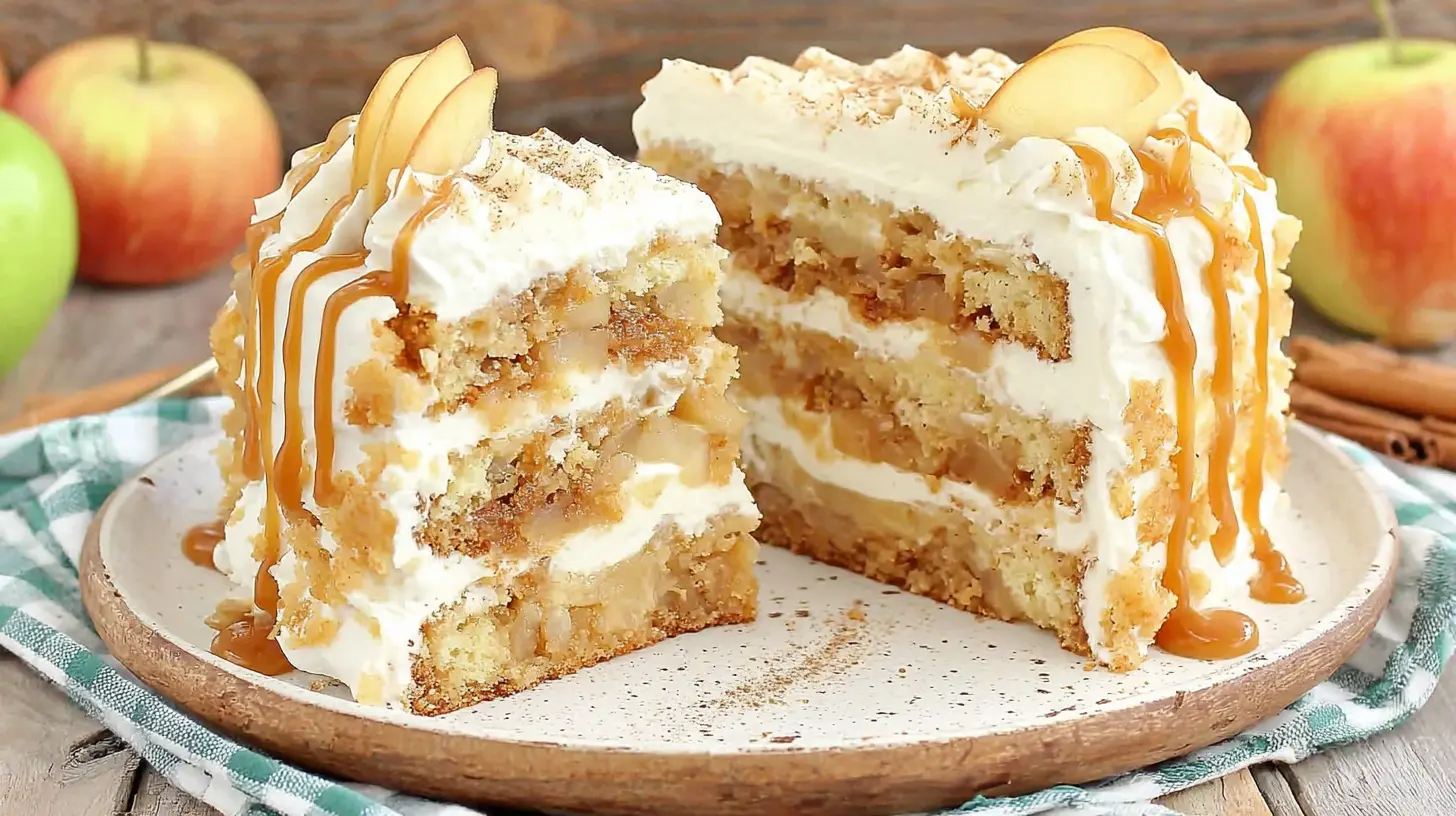
Moist Spiced Caramel Apple Layer Cake
Ingredients
Method
- Warm heavy cream in a microwave-safe bowl, then set aside.
- Add sugar, corn syrup, and water to a large saucepan. Gently stir to incorporate ingredients.
- Cook over medium to medium-high heat, stirring gently, until sugar dissolves and the mixture bubbles.
- Stop stirring and boil the mixture undisturbed until it darkens to a light-medium honey color. Watch closely and remove the pan from heat immediately once this color is achieved, as it darkens quickly.
- Once removed from heat, carefully and slowly pour in the warm heavy cream (expect hissing and bubbling). Stir to fully incorporate the cream.
- Add butter and salt, then stir to combine. Add vanilla.
- Allow the sauce to cool slightly, then pour into a jar. Continue cooling until ready to use.
- Peel and dice apples into small pieces (about 1/2-inch cubes).
- Add apples, brown sugar, butter, cinnamon, and salt to a skillet. Cook over medium-high heat.
- Cook for 3-5 minutes, or until apples soften slightly but retain some texture. Remove from heat and set aside.
- Preheat oven to 350°F.
- Prepare three 8-inch cake pans by lightly greasing the sides, dusting with flour, and lining the bottoms with parchment paper.
- Combine flour, baking powder, salt, and spices in a medium bowl. Whisk, then set aside.
- In an electric mixer bowl, beat butter until smooth. Slowly add sugar while mixing, and continue beating until the butter and sugar are well combined, light, and fluffy. Ensure thorough mixing.
- While mixing, add eggs one at a time, blending for at least 10-20 seconds after each addition to incorporate air.
- Add vanilla and oil, then blend well to combine.
- Add sour cream and blend.
- Reduce mixer speed to low. Pour in half of the milk, then half of the flour mixture. Repeat with the remaining milk and flour. Blend just until all ingredients are well combined. Stop the mixer, scrape down the bowl sides, and stir a couple times by hand to ensure thorough blending.
- Add 1 1/2 cups of the cooked spiced apples to the bowl. Use a large spatula to fold the apples into the batter until just evenly combined. Reserve remaining spiced apples for cake assembly.
- Divide batter evenly into the prepared pans.
- Bake in the preheated 350°F oven for 22-28 minutes, or until the cake has a slight dome and a toothpick inserted into the center comes out clean or with a few moist crumbs.
- Cool cakes in pans for 5-10 minutes, then carefully remove and continue cooling on a wire rack (leave parchment on bottoms). Once mostly cool, wrap cakes well in plastic wrap and place in the freezer to maintain moisture and ease handling for assembly.
- Cut cold butter into a few large pieces. In an electric mixer bowl, beat butter until smooth.
- Add cream cheese and blend until fully combined and smooth.
- Add about half of the powdered sugar. While the mixer runs, pour in room temperature caramel sauce. Stop the mixer and scrape down the bowl sides as needed. Continue blending, then add the remaining powdered sugar, vanilla, and salt.
- Ensure the frosting is thick, creamy, and fluffy. If the kitchen is warm or the caramel sauce was too warm, chill the frosting in the fridge to firm up, then beat again before use.
- Level and split cake layers as desired.
- For easy assembly, optionally add the frosting to a large piping bag fitted with a large round tip.
- Begin with a cake layer on your chosen plate or stand. Pipe a large spiral of frosting, then spread with an offset spatula. Alternatively, scoop a large dollop of frosting onto the cake layer and spread with an offset spatula.
- Add some spiced apples, pressing them slightly into the frosting with a spatula.
- Drizzle caramel sauce on top of the frosting.
- Repeat layers of cake, frosting, apples, and caramel drizzle.
- Top the cake with a generous layer of apples.
- Enjoy!
Nutrition
Notes
Tried this recipe?
Let us know how it was!Why This Caramel Apple Layer Cake Will Be Your New Favorite
Honestly, when I first thought about making a caramel apple layer cake, I figured it’d be one of those super complicated, all-day baking projects. You know, the kind you see on fancy cooking shows where everything is just perfect and you’re convinced you could never, ever pull it off. But here’s the thing: I learned that with a few smart moves, this caramel apple layer cake is totally achievable. And it’s so good, it’s worth every single moment.
It’s a truly rich dessert, a perfect blend of sweet caramel and spiced apples, all nestled in wonderfully moist cake layers. It’s the kind of showstopper you bring to a potluck or a holiday gathering, especially when those cooler Los Angeles spring evenings roll around and you actually want to turn on your oven. Everyone will be asking for the recipe, trust me. And you’ll have this incredible sense of pride, I mean, you made this amazing caramel apple layer cake!
Diving into Delicious Layers: What You’ll Need
Before we even start dreaming of that first bite, let’s get our ingredients in order. I always say, a well-stocked pantry is half the battle, right? For this sweet caramel apple cake, we’re talking about standard baking staples, plus a few stars that really make it shine.
You’ll want to grab some heavy cream, sugar, and corn syrup for that homemade caramel. And for the cake itself, we’re using all-purpose flour, baking powder, salt, cinnamon, allspice, and freshly grated nutmeg. Oh, and don’t forget unsalted butter, eggs, vanilla extract, oil, sour cream, and whole milk for those perfectly tender, moist cake layers. For the spiced apple filling, we’ll need large apples, brown sugar, unsalted butter, cinnamon, and a pinch of salt. And for the dreamy cream cheese frosting, we’ll combine unsalted butter, cream cheese, powdered sugar, some of our salted caramel sauce, vanilla, and a little salt.
Make sure all your cold ingredients, like butter, eggs, sour cream, and cream cheese, are at room temperature. Honestly, it makes such a difference in how smoothly everything mixes together. It’s not being fussy, it’s the difference between a smooth, emulsified batter and, well, something less than perfect.
Crafting That Caramel Sauce
Making homemade caramel might sound a little intimidating, but it’s easier than you think. And it’s so much better than anything store-bought, you know? This sweet caramel sauce is going to be the backbone of our caramel apple layer cake. We’re going for that golden brown, perfectly tender consistency.
Here’s what I wish someone had told me early on: use a candy thermometer. Seriously, it takes all the guesswork out of it. You want that caramel to be thick enough to hold its own between cake layers, but still pourable. The corn syrup helps prevent crystallization, which is a common pain point for new caramel makers. Just watch it carefully, and don’t stir once the sugar starts to dissolve. Let it do its thing, simmering gently until it hits the right temperature. The smell, oh, it’s just amazing when it’s bubbling away on the stove!
Once it’s done, let it cool a bit before using. If it thickens up too much, a quick 5-10 second microwave burst usually gets it back to the right consistency. You can make this caramel a week or even a month ahead of time and store it in the fridge. That’s a huge win for meal prep Sundays, I mean, who wants to do everything on cake day?
Baking Up Those Apple Cake Layers
Now, onto the star of the show: the rich apple sponge layers. This is where we get those moist cake layers everyone raves about. First things first, measure your flour correctly. This isn’t just a suggestion, it’s a game-changer. I highly recommend using a kitchen scale for accuracy, but if you don’t have one, spoon and level method is your best friend. Too much flour means a dry cake, and we definitely don’t want that for our caramel apple layer cake.
Creaming the butter, oil, brown sugar, and vanilla extract is another critical step. Don’t skimp on this! You want that mixture to be light in color and fluffy, which usually takes about 2-3 minutes. This incorporates air, giving your cake a lovely, fluffy cake texture. Then, gently fold in your dry ingredients. The thing is, overmixing the batter after you add the flour develops the glutens too much, leading to a tough, dense cake. We’re aiming for tender crumb perfection here.
For the spiced apple filling, I find a mix of tart and sweet-tart apples, like Granny Smith and Pink Lady, works just right. They balance the sweetness of the caramel beautifully. Cook them until they’re perfectly tender, but still hold their shape. And honestly, for a 9×13 inch sheet cake pan, you’d probably just increase the baking time. For three 8-inch pans, I’d 1.5x the recipe. Or, if you want cupcakes, just reduce the baking time, checking around 15 minutes.
Whipping Up the Caramel Buttercream
Every impressive layer cake needs an equally impressive frosting, and this cream cheese frosting with our homemade caramel? It’s just right. It’s got that tangy cream cheese flavor that cuts through the sweetness, and the sweet caramel sauce woven right in. It truly complements the rich apple sponge layers.
Make sure your butter and cream cheese are at room temperature for the best, smoothest result. It helps prevent lumps, you know? Start by beating them together until they’re light and fluffy. Then, gradually add the powdered sugar, a little at a time, until it’s fully incorporated. Finally, stream in some of that amazing salted caramel sauce and a splash of vanilla. Beat it until it’s light and airy, but still firm enough to hold its shape.
If your frosting seems a bit too thick, a tablespoon of whole milk can thin it out. If it’s too thin, maybe incorporate another half cup of powdered sugar to thicken it. This buttercream frosting is pretty forgiving, honestly. I’ve had to adjust it many times!
Assembling Your Layer Cake Masterpiece
Okay, this is where the magic happens and your caramel apple layer cake really starts to take shape! First, and this is crucial, make sure your apple cake recipe layers are completely cooled. I mean, completely. If they’re even a little warm, your beautiful cream cheese frosting will melt right off, and that’s just a sad sight, honestly.
To help ensure your cake layers bake up nice and flat, you can check out some of my other posts for tips. But even if they dome a little, don’t worry. You can level them once they’re cool. When you’re ready to stack, here’s a pro tip: pipe a ring of buttercream around the edge of each cake layer before adding your spiced apple filling and a drizzle of sweet caramel sauce. This acts like a little dam, keeping all that deliciousness from oozing out the sides. Trust me, I learned this the hard way!
Chill your cake layers a bit before stacking, too. It gives them better structure and makes them easier to handle, especially if you’re using a cake lifter to move those delicate layers. Once all your layers are stacked and filled, give the whole cake a crumb coat of frosting. This traps any loose crumbs. Then, chill it again before applying your final layer of frosting. This step, you know, makes all the difference for a smooth, professional-looking finish. Finally, drizzle with more caramel and maybe some fresh apple slices for garnish. It’s so good!
My Top Tips for Caramel Apple Success
Baking a beautiful caramel apple layer cake can seem like a lot, but I’ve picked up a few baking tips over the years that really help. These aren’t just generic pieces of advice; these are things that genuinely make the process smoother and the outcome more delicious.
First off, flour measurement. I mean it, a kitchen scale is your best friend here. Adding the wrong amount of flour can seriously affect the cake’s texture, making it dry or dense. If you don’t have a scale, use the spoon and level method, please! Don’t just scoop it straight from the bag.
Next, don’t overmix your batter. Once you add the flour, stir until it’s just combined. Overmixing develops gluten, which makes for a tough, chewy cake. We want that moist cake layers, remember?
For the caramel, a candy thermometer is a must. It needs to be thick enough to stay put but soft enough to drizzle. This is key for a well-structured layered dessert. Also, your cake layers absolutely must cool completely before frosting. If they’re warm, that gorgeous cream cheese frosting will just melt right off. I think you’ll find a cake lifter really helpful for moving those delicate layers around during cake assembly, it prevents cracks.
And here’s a secret: you can make things ahead! The caramel will keep for a good month in the fridge. The cooled cake layers can be double-wrapped in plastic wrap and frozen for up to 3 months; just take them out 2-3 hours before assembly. Same for the frosting: it keeps for a week in the fridge or 3 months frozen. Just bring it to room temp and rewhip before using. This makes holiday baking so much less stressful, honestly.
When Things Go Sideways: Troubleshooting Common Issues
Look, baking doesn’t always go perfectly, and that’s okay! Even seasoned bakers have those moments where things just don’t go as planned. It’s part of the baking journey, you know? For this sweet caramel apple cake, there are a few common hiccups, but I’ve got solutions for you.
Common Mistakes & Fixes for Your Caramel Apple Layer Cake
Mistake: Your cake layers are dry or tough.
Solution: This usually comes down to overmixing the batter after adding flour, or incorrect flour measurement. Use a kitchen scale for flour, and stir until just combined. Also, make sure your butter and sour cream were at room temperature. Sour cream is amazing for moist cake layers!
Mistake: The caramel sauce seized or turned grainy.
Solution: This happens if sugar crystals form. Don’t stir the sugar syrup once it starts boiling, and make sure your pot is really clean. The corn syrup helps, but sometimes it just needs a little extra care. If it seizes, you can try adding a tablespoon of hot water and whisking vigorously off the heat, but sometimes you just have to start over. It’s frustrating, I know.
Mistake: The apples sank to the bottom of the cake.
Solution: This often happens if the apples are too wet or too heavy. Make sure your spiced apples are drained well, and try tossing them with a tablespoon of flour before folding them into the batter. This helps them suspend evenly in the batter.
Mistake: Frosting is melting off the cake.
Solution: Your cake layers weren’t completely cool! Or your kitchen is too warm (and let’s be real, LA kitchens can get warm!). Pop the frosted cake into the fridge for 15-20 minutes to firm up the buttercream frosting.
Mistake: Uneven cake layers or a domed top.
Solution: This can be due to an oven that’s not heating evenly or batter not spread level. Use an oven thermometer to check your oven’s accuracy. You can also use cake strips around your pans to encourage even baking. If they still dome, it’s okay, just level them with a serrated knife once completely cool. I mean, nobody’s perfect!
Mix It Up! Variations & Substitutions
I love a recipe that gives you options, you know? This caramel apple layer cake is super versatile, and you can totally adapt it to your preferences or what you have on hand. It’s all about making it work for you!
For the apples, while I love Granny Smith and Pink Lady for their tart-sweet balance, honestly, any firm apple like Honeycrisp will work perfectly tender. You can also use unsweetened applesauce to prevent the cake from becoming overly sweet, if you like. If you’re feeling adventurous, you could even add a handful of chopped walnuts or pecans to the cake batter for some extra crunch and texture. Just be mindful of nut allergies, of course.
If you’re looking for different pan sizes, this apple cake recipe works beautifully in two 8-inch pans. For a bigger crowd, you could make a 9×13-inch sheet cake; just be prepared for a longer bake time, probably around 40-50 minutes. Or, if you prefer smaller treats, it makes about 36 regular-sized cupcakes; start checking for doneness around 18-21 minutes. You can also make four 6-inch layers, baking them for 32-35 minutes.
For dietary adaptations, you’ve got choices too. For a gluten-free caramel apple layer cake, swap the all-purpose flour for a good quality gluten-free flour blend. If you’re going dairy-free or vegan, you can use vegan butter, a vegan egg replacer, and alternative milks (like almond, soy, or oat milk) for the sour cream and heavy cream. It’s amazing how many great alternatives are out there now, especially at places like Whole Foods Market or Trader Joe’s.
Keep It Fresh: Storage & Make-Ahead Guide
Successfully baking a caramel apple layer cake is one thing, but knowing how to store it so it stays amazing? That’s a whole other level of baking tips. I mean, you put all that effort in, you want it to last, right?
For short-term storage, your finished caramel apple layer cake will stay fresh under a cake dome at room temperature for up to 2 days. If you’ve got leftovers, especially once it’s cut, I always recommend covering the cut section with a bit of extra frosting to prevent it from drying out, then refrigerating it in an airtight container for up to 4 days. That cream cheese frosting really needs to be refrigerated.
For longer storage, this cake freezes beautifully. You can freeze unfrosted cake layers individually wrapped in plastic wrap and then aluminum foil for up to 3 months. Just thaw them at room temperature for 2-3 hours before you’re ready to frost. If you’ve got a whole frosted cake you want to freeze, pop it into the freezer until the frosting is firm, then wrap it tightly in plastic wrap and foil. It’ll keep for up to 3 months. To thaw, just let it sit in the fridge overnight. When you’re ready to serve, let it come to room temperature for about 30 minutes to an hour for the best texture and flavor. It’s so good!
Frequently Asked Questions
Serving Your Stunning Caramel Apple Cake
Once your beautiful caramel apple layer cake is assembled and perhaps has had a little chill time, it’s ready to shine! I think it’s best enjoyed cool, but not straight-from-the-fridge cold, you know? Let it sit at room temperature for about 30 minutes to an hour before serving. This allows the cake layers to soften just a bit and the cream cheese frosting to become perfectly tender and creamy.
When you slice into it, you’ll hear that little whisper of the knife through the moist cake layers, see those golden apples and the smooth caramel peeking out. It’s truly a rich dessert. Garnish each slice with a fresh apple sliver or a sprinkle of cinnamon spice, maybe even a tiny swirl of extra salted caramel sauce if you’re feeling fancy. It’s perfect for a special occasion cake, or just a really amazing treat for a weekend brunch with friends. Honestly, it’s so good, everyone will love it!
Final Bite: Your Caramel Apple Layer Cake Awaits!
And there you have it, your guide to creating an absolutely amazing caramel apple layer cake. I know it might seem like a project, but honestly, once you break it down, it’s totally manageable. You’ll be so proud when you present this beautiful, golden apple cake slice, all rich with sweet caramel and perfectly tender apples.
This fall style cake dessert is going to earn you all the compliments, trust me. It’s a reliable recipe you can return to again and again. So, what are you waiting for? Grab those apples on your next Ralphs or Trader Joe’s run, and let’s get baking! You’ll be amazed at how easy it was, and how incredibly delicious. I love this recipe, and I think you will too. Don’t forget to share your creations in the comments below, I’d love to see them! For more dessert ideas and baking inspiration, check out my Pinterest boards.
Source: Nutritional Information


