
Strawberry Coconut Layer Cake with Cream Cheese Frosting
Ingredients
Method
- Preparation: Preheat your oven to 350 degrees F. Prep your cake pans. This is a 3 layer cake - so you'll need 3 - 9" cake pans. You can grease and flour your pans, or you can use a non-stick spray specifically for baking.
- Prepare the strawberry mixture by combining buttermilk, fresh strawberries, and freeze-dried strawberries in a blender.
- Blend until smooth. Set aside.
- For this recipe you need egg whites. So separate your eggs and discard the yolks. Allow the whites to sit at room temp for about 30 minutes. Set aside.
- In a medium sized bowl - combine flour, baking powder, baking soda and salt. Stir to combine. Adding salt when baking activates the baking soda. So don't skip the salt! Set aside.
- Whip butter using the paddle attachment of your stand mixer for 30 seconds.
- Add sugar and beat until combined.
- Stir in vanilla.
- Add room temperature egg whites. Beat for 3 minutes. You'll have a pale, light batter.
- Add ⅓ of the blended strawberry mixture. Add ⅓ of the flour mixture. Beat just until combined. Repeat until you have used the remaining flour and strawberry mixture.
- Divide the batter between your 3 prepared cake pans. Give them a little shake to even the batter. Bake at 350 for 30 minutes, or until a toothpick comes out clean.
- Let cakes cool in pans for 10 minutes, and then turn over onto a cooling rack and let cook completely.
- Whip butter and cream cheese together using your paddle attachment of your stand mixer.
- Add powdered sugar, vanilla, and coconut extract.
- Beat until smooth.
- Add about a tablespoon of frosting to your cake plate. This will function as glue and keep the cake from slipping around on the plate.
- Add one cake round. Smooth a thick layer of frosting on top. Add your second cake and add frosting. Repeat with the 3rd layer.
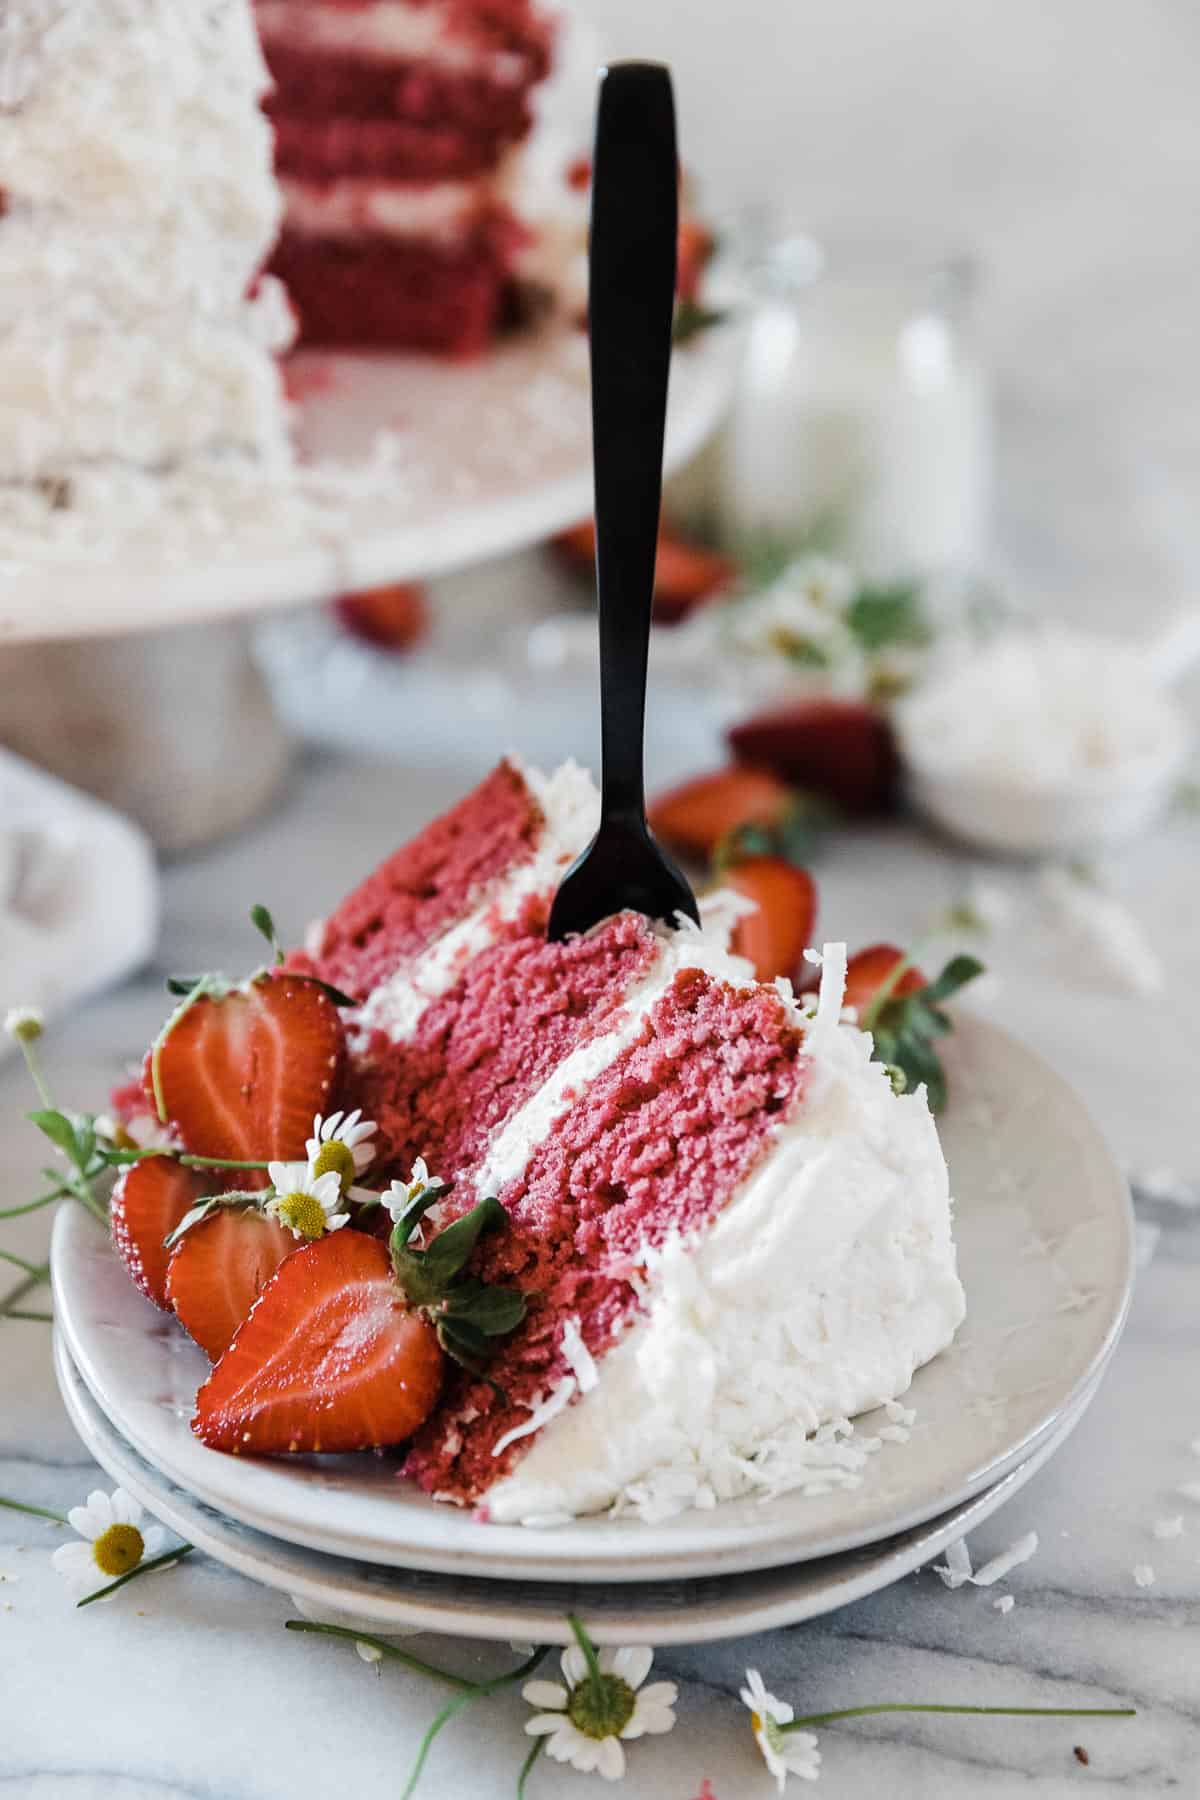
- Smooth frosting over the top and sides of the cake. Sprinkle the top with shredded coconut and press coconut into the sides of the cake. Top with fresh strawberries. Perfection.
Nutrition
Notes
Tried this recipe?
Let us know how it was!Why You’ll Love This Strawberry Coconut Layer Cake
I used to think layer cakes were only for professionals. Honestly, I remember my first attempt at a layered cake. Let’s just say it was more of a leaning tower of Pisa situation. The layers slid, the frosting was a mess, and I think I cried a little. But then I cracked the code. And this Strawberry Coconut Layer Cake? It’s the cake that made me feel like a real baker.
Imagine a cake that tastes like a tropical vacation and looks like it belongs in a bakery window. That’s what we’re making here. The crumb is soft and tender, with a whisper of coconut from both the milk and the toasted flakes. Then you’ve got these pockets of bright, fresh strawberry in the filling. It’s not heavy. It’s not cloyingly sweet. It’s just… perfect.
And here’s the thing. You don’t need to be a pastry chef to pull this off. I’ve broken down every step so that you feel confident, not overwhelmed. Whether you’re making this for Mother’s Day brunch, a spring birthday, or just because you want something beautiful, this cake delivers. Trust me on this.
Ingredients for Strawberry Coconut Cake
Let’s talk about what goes into this cake. The ingredient list might look long, but I promise it’s all stuff you can find at your local Ralphs or Trader Joe’s. The trick is knowing why each one matters.
The Strawberry Cake
The base of this Strawberry Coconut Layer Cake starts with all-purpose flour, baking powder, and a little baking soda. I use buttermilk here because it makes the cake incredibly moist and tender. It also helps balance the sweetness. You’ll need fresh strawberries for the filling and freeze-dried strawberries for the frosting. That freeze-dried powder is a game changer. It gives you that intense strawberry flavor without adding extra liquid.
You’ll also need egg whites at room temperature. I know, I know, separating eggs is annoying. But it’s worth it. Room temperature egg whites whip up better and give the cake a lighter texture. And don’t forget the vanilla and a tiny drop of pink food coloring. Just enough to make it look pretty.
The Creamy Coconut Frosting
For the frosting, we’re using cream cheese and butter. I prefer salted butter here because it cuts through the sweetness and enhances the coconut flavor. You’ll also need powdered sugar, vanilla, and coconut extract. But here’s my rule: don’t go overboard with the coconut extract. That synthetic taste can ruin everything. Stick with a good quality extract and let the toasted coconut flakes do the heavy lifting.
Speaking of coconut, you’ll want unsweetened coconut flakes for toasting. They add that amazing crunch and nutty flavor. I mean, the smell alone will make you want to eat them straight off the baking sheet.
How To Make Strawberry Coconut Layer Cake
Okay, let’s get into the process. I’ll walk you through it step by step. And I’ll explain the why behind each step, because that’s what makes you a better baker.
First, toast your coconut. Spread the flakes on a baking sheet and pop them in a 350°F oven for about 3 to 5 minutes. Watch them closely. They go from golden brown to burnt in seconds. You want them light gold and smelling amazing.
For the cake, start by creaming your butter and sugar until it’s light and fluffy. This takes about 3 to 4 minutes. Then add your egg whites one at a time. Scrape the bowl well. In a separate bowl, whisk your dry ingredients together. Then alternate adding the dry ingredients and the buttermilk to the butter mixture. Start and end with the dry ingredients. And here’s the big tip: don’t overmix. Once the flour is incorporated, stop. Overmixing develops gluten and makes the cake tough.
Now for the strawberries. You’ll macerate them with a little sugar. This draws out the excess moisture. Then you drain them. This is crucial. If you skip this step, your cake layers will get soggy. Trust me, I learned this the hard way.
Pour the batter into prepared 9-inch pans. Bang the pans on the counter a few times to pop any air bubbles. Bake at 350°F for about 25 to 30 minutes. You’ll know they’re done when a toothpick comes out clean or the cake springs back when you touch it.
Let the layers cool completely. I mean completely. If you try to frost them while they’re warm, the frosting will slide right off. I usually let them cool on a wire rack for about an hour, then wrap them in plastic wrap and pop them in the fridge for another 30 minutes. Cold cakes are much easier to work with.
For the frosting, beat the cream cheese and butter together until smooth. Then add the powdered sugar, vanilla, and coconut extract. Beat for about 4 to 5 minutes until it’s light and fluffy. Then fold in the crushed freeze-dried strawberry powder.
To assemble, place one cake layer on your stand. Add a layer of frosting, then some of the macerated strawberries. Repeat with the next layer. Then do a crumb coat. This is a thin layer of frosting that traps all the crumbs. Pop it in the fridge for 15 minutes. Then do the final coat. Press the toasted coconut onto the sides before the frosting crusts over.
Expert Tips for the Best Strawberry Coconut Layer Cake
I’ve made this cake more times than I can count. And I’ve made every mistake in the book. So here are my best tips to make sure your Strawberry Coconut Layer Cake turns out perfect.
Use room temperature ingredients. This is non-negotiable. Room temperature egg whites and butter emulsify better, giving you a smoother batter and a more tender crumb.
Don’t overmix. I said it before, but it’s worth repeating. Mix just until the flour disappears. A few lumps are fine.
Prep your pans properly. Grease them well and dust with flour. Or use baking spray with flour. Nothing is worse than a cake layer that won’t come out of the pan.
Level your cakes. If your layers have domed tops, use a serrated knife to level them. A flat layer stacks much better and looks more professional.
Chill your layers. Cold cake layers are easier to handle and less likely to crumble. I always chill mine for at least 30 minutes before frosting.
Don’t skimp on the crumb coat. This thin layer of frosting traps the crumbs so your final coat is clean and smooth. It takes an extra 15 minutes but it’s so worth it.
Press the coconut on gently. Fill your hand with toasted coconut and pat it against the sides of the cake. It sticks to the frosting easily, so you don’t need to press hard.
Common Mistakes & Fixes
Mistake: The cake layers are domed or uneven.
Solution: This usually happens if the oven is too hot or you overmixed the batter. Use an oven thermometer to check your temperature. And remember, don’t overmix. If they still dome, just level them with a serrated knife.
Mistake: The frosting is sliding off the cake.
Solution: Your cake layers weren’t cool enough. Always let them cool completely before frosting. A crumb coat helps too. And if the frosting is too soft, pop the cake in the fridge for 15 minutes between coats.
Mistake: The strawberries made the cake soggy.
Solution: You didn’t macerate and drain them properly. The sugar draws out the moisture, and you need to drain that liquid. Don’t skip this step. It makes all the difference.
Mistake: The cake is dry.
Solution: You might have overbaked it. Check for doneness a few minutes early. Also, make sure you’re using buttermilk. It adds moisture and tenderness. If your cake is still dry, you can brush the layers with a simple syrup before frosting.
Recipe Variations
One of the things I love about this Strawberry Coconut Layer Cake is how versatile it is. You can change it up based on what you have or what you’re in the mood for.
Different berries. If strawberries aren’t in season, try raspberries or blueberries. The process is the same. Macerate them, drain them, and use them in the filling.
Different frosting. If cream cheese frosting isn’t your thing, try a Swiss meringue buttercream. It’s lighter and less sweet. Or go with a coconut whipped cream frosting for an even lighter, dairy-free option.
Gluten-free version. You can substitute the all-purpose flour with a good gluten-free flour blend. Look for one that measures cup for cup. The texture might be slightly different, but it’ll still be delicious.
Dairy-free version. Use a dairy-free butter substitute and a dairy-free cream cheese. For the buttermilk, add a tablespoon of lemon juice to a cup of dairy-free milk. Let it sit for 5 minutes before using.
Cupcakes. This batter makes amazing strawberry coconut cupcakes. Just fill your cupcake liners about two-thirds full and bake for 18 to 20 minutes. Frost them the same way and top with a little toasted coconut.
Storage & Leftovers
If you have any leftovers, which is rare in my house, here’s how to store them. You can keep the cake covered at room temperature for 2 to 3 days. But if it’s warm in your kitchen, I’d recommend the fridge. It’ll last 3 to 5 days in the fridge. Just let it come to room temperature for about 30 minutes before serving. The texture is much better that way.
You can also freeze the cake layers. Bake them, let them cool completely, then wrap each layer tightly in plastic wrap and then foil. They’ll keep in the freezer for up to a month. When you’re ready to use them, thaw them in the fridge overnight. Then frost as usual.
For leftover slices, wrap them individually in plastic wrap and put them in a freezer bag. They’ll keep for up to 4 months. Just thaw a slice whenever you need a little sweetness.
Frequently Asked Questions
When you bring this Strawberry Coconut Layer Cake to your next gathering, everyone will ask for the recipe. And honestly, you’ll be proud to share it. This is the cake that proves you can make something beautiful without losing your mind. You’ve got this. And your cake will be the star of the table. Go ahead, preheat that oven. Your masterpiece awaits.
For more inspiration, check out my Pinterest boards for other tropical dessert ideas.
Source: Nutritional Information


